Modding MvsL is significantly more difficult than modding Singleplayer levels. If you're just getting started with modding the game, you might want to start [here](https://bookstack.nsmbcentral.net/books/new-super-mario-bros-ds/page/modding-101-creating-a-bare-bones-level)
## FaQ > ##### *How do I play Mario vs Luigi hacks?* - The easiest way to play an MvsL hack on real hardware is by using “Multi-cart” - This requires that you own **two** flashcards (such as an R4 Card). - To set this method up, simply put **the same ROM** on both flashcards. Then, in the game, choose the option to “Compete with another New Super Mario Bros. Owner” and play MvsL as you normally would. - If you do not have access to two flashcards, then you have two, more difficult, options remaining - Your first option is to try and use a hacked NDS firmware that bypasses Download Play's signature check 1. Download firmware.nds and put it on your flashcard. 2. Open this ROM on the DS you will launch Download Play from. 3. Now, eject the flashcard from the DS you just ran the ROM on. (This will not cause your DS to freeze) 4. Finally, put the flashcard back in the other DS. 5. Once you have done this, you can run the ROM of the MvsL hack and select “Play with someone who doesn't own New Super Mario Bros” - If the firmware ROM does not work on your flashcard, try this one instead. - Your final option is to use normal DS Download Play with “DLP Mode” in NSMBe 5 1. Open a **clean (unedited) ROM** 2. Open it in NSMBe 3. After you open the ROM, go to Tools and check “Enable DLP-friendly mode” 4. Now, you can make whatever changes you want to the ROM 5. When you're done, you can play with another DS through DS Download Play like you normally would using the “Play with someone who doesn't own New Super Mario Bros” option - If the game hangs at the Nintendo logo, you might have missed a step. Double check you did everything and try again with another **clean** ROM - If the DS freezes with a black screen after you select a level it can mean one of two things: - Your flashcard is not compatible with this method - There's something wrong with the level that is making the game freeze > ##### *My level crashes, what do I do now?* - If you are not using any Code Hacks, then here are some things to consider 1. Have you changed any object banks? This causes MvsL to crash so you need to change the object banks back to whatever the level had originally. 2. Double-check that you are not using an object that has been confirmed to crash MvsL. There is a table later on this page that shows what objects are compatible with MvsL. 3. Have you changed the number of Battle Stars that are in the level? Changing the number of Battle Stars in a level can cause MvsL to crash, and you will need to restore the original amount of Battle Stars the level had. > ##### *My level crashes, but I'm using Code Hacks!* - Even with Code Hacks, not all objects work in MvsL. Take a look at the table at the end of the page to see if all of the objects you're using are compatible with MvsL. > ##### *My level makes us de-sync, what's going on?* - Because of the nature of how multiplayer works in this game, the Random Number Generator seed is only synchronized once when the connection is established. Only inputs are sent from one console to another, so the code must account for both player actors. If code does not account for each player, the games will become de-synced. For example, if an enemy was coded to imply get the values of a player on the local console, it will read different data on each console. This causes the enemy to act differently on each DS, thus causing a de-sync. Implementation example: ```c++ // Enemy reads only the position of its own console player playerPositionX = Game::getPlayer(Game::localPlayerID)->position.x; // Now the position that was read is different between both consoles // for this enemy and he will behave differently for each console! // This is very bad! // A solution would be to get the position of the closest player playerPositionX = enemy->getClosestPlayer(nullptr, nullptr)->position.x; // This way, it gets the closest player instead of its console player ``` ## Object Compatibility (Vanilla) - These objects will work in MvsL regardless of if you are using code hacks - Most of the objects in this list are objects that are already used in MvsL| Object ID | Actor Name |
|---|---|
| 23 | Pipe Piranha Plant (Facing up) |
| 24 | Pipe Piranha Plant (Facing down) |
| 25 | Pipe Piranha Plant (Facing right) |
| 26 | Pipe Piranha Plant (Facing left) |
| 27 | Bill Blaster (Bullet Bill launcher) |
| 28 | Bob-omb |
| 71 | Stonewall moving up & down |
| 72 | Stonewall moving left & right |
| 95 | Spin Block |
| 148 | Goomba |
| 149 | Koopa Troopa |
| 210 | MvsL Big Star |
| Object ID | Object Name | Compatibility | Notes |
| 0 | Crash Object (Player Actor) | Crash | Needs the clone code hack |
| 1 | Crash Object (Player Actor) | Crash | Needs the clone code hack |
| 2 | Crash Object (Player Actor) | Crash | Needs the clone code hack |
| 3 | Crash Object (Player Actor) | Crash | Needs the clone code hack |
| 4 | Crash Object (Player Actor) | Crash | Needs the clone code hack |
| 5 | Crash Object (Player Actor) | Crash | Needs the clone code hack |
| 6 | Crash Object (Player Actor) | Crash | Needs the clone code hack |
| 7 | Crash Object (Player Actor) | Crash | Needs the clone code hack |
| 8 | Crash Object (Player Actor) | Crash | Needs the clone code hack |
| 9 | Crash Object (Player Actor) | Crash | Needs the clone code hack |
| 10 | Nothing | N/A | Technically works due to it being nothing |
| 11 | Nothing | N/A | Technically works due to it being nothing |
| 12 | Nothing | N/A | Technically works due to it being nothing |
| 13 | Nothing | N/A | Technically works due to it being nothing |
| 14 | Nothing | N/A | Technically works due to it being nothing |
| 15 | Nothing | N/A | Technically works due to it being nothing |
| 16 | Nothing | N/A | Technically works due to it being nothing |
| 17 | Nothing | N/A | Technically works due to it being nothing |
| 18 | Nothing | N/A | Technically works due to it being nothing |
| 19 | Nothing | N/A | Technically works due to it being nothing |
| 20 | Defunct Actor 22 | N/A | If using the Actor Spawner code hack it works |
| 21 | Mega Goomba | Works | If using Boss Particle code hack |
| 22 | Hammer Brother from map | N/A | MvsL is missing a world map so... |
| 23 | Pipe Piranha Plant (facing up) | Works | |
| 24 | Pipe Piranha Plant (facing down) | Works | |
| 25 | Pipe Piranha Plant (facing right) | Works | |
| 26 | Pipe Piranha Plant (facing left) | Works | |
| 27 | Bill Blaster (Bullet Bill launcher) | Works | |
| 28 | Bob-omb | Works | |
| 29 | Princess Peach | Works | |
| 30 | Monty Tank | Works | If using Boss Particle code hack |
| 31 | Cheep Cheep | Works | |
| 32 | Goal Pole's Flag | Works | |
| 33 | Trampoline (portable springboard) | Crash | |
| 34 | Red Ring | Crash | |
| 35 | Final Bowser Controller | Crash | |
| 36 | Thwomp | Works | |
| 37 | Spiny | Works | |
| 38 | Boo | Works | |
| 39 | Castle boss controller | Partial | Some of the options crash the game, you can use a switch instead. |
| 40 | Lakitu (unused object) | Works | |
| 41 | Bowser bridge switch | Works | Loads, but graphics are not loaded correctly |
| 42 | Chain Chomp/Log | Works | |
| 43 | Chain Chomp (unused object) | Works | |
| 44 | Fire Snake (unused Actor 46) | Works | |
| 45 | Respawnable Hidden Block | Works | |
| 46 | Event controller - activates Spiked Ball when touched by Snake Block | Works | |
| 47 | Lakithunder | Works | |
| 48 | Aquatic bubble current (up) | Works | |
| 49 | Aquatic bubble current (down) | Works | |
| 50 | Aquatic bubble current (right) | Works | |
| 51 | Aquatic bubble current (left) | Works | |
| 52 | Buzzy Beetle | Works | |
| 53 | Dry Bones | Works | |
| 54 | Lava Bubble (Podoboo) | Works | |
| 55 | Bullet Bill Spawner | Works | |
| 56 | Fire Bar | Works | |
| 57 | Coin | Works | |
| 58 | Bowser | Works | |
| 59 | Hammer Brother | Works | |
| 60 | Nothing | N/A | Technically works due to it being nothing |
| 61 | Nothing | N/A | Technically works due to it being nothing |
| 62 | Big Bowser (unused object) | Works | |
| 63 | Dry Bowser | Works | |
| 64 | Whomp | Works | |
| 65 | Cheepskipper | Works | |
| 66 | P Switch | Works | Graphics are not loaded correctly |
| 67 | Sushi (shark) | Works | |
| 68 | Lift moving up and down | Works | |
| 69 | Lift moving left and right | Works | |
| 70 | Rotating log lift (unused actor) | Works | |
| 71 | Stonewall moving up and down | Works | |
| 72 | Stonewall moving left and right | Works | |
| 73 | Wobbly metal lift | Works | |
| 74 | Wobble Rock | Works | |
| 75 | Seesaw lift | Works | |
| 76 | Scale lift | Works | |
| 77 | Flimsy Lift (falls once touched) | Works | |
| 78 | Lift moving one way once stood on | Works | |
| 79 | Three-platform rickshaw lift (rotates in place by self) | Works | |
| 80 | Lift spawner | Works | |
| 81 | Nothing | N/A | Technically works due to it being nothing |
| 82 | Rotating rectangle lift | Works | |
| 83 | Self-activating block | Works | |
| 84 | Zoom | Works | |
| 85 | Flip fence (duplicate object) | Works | |
| 86 | Rotating triangle lift | Works | |
| 87 | Nothing | N/A | Technically works due to it being nothing |
| 88 | Brick Block containing P Switch | Works | P-Switch graphics are not loaded correctly |
| 89 | Snailicorn | Works | |
| 90 | Wiggler | Works | |
| 91 | Track-controlled lift | Works | |
| 92 | Unagi (eel) | Works | |
| 93 | Arrow signboard | Works | |
| 94 | Swooper | Works | |
| 95 | Spin Block | Works | |
| 96 | Seaweed | Works | |
| 97 | Nothing | N/A | Technically works due to it being nothing |
| 98 | Camera vertical scrolling | N/A | |
| 99 | Four-platform rickshaw lift | Works | |
| 100 | Vertical camera offset (unused actor) | N/A | |
| 101 | Event controller - view enter | Works | |
| 102 | Spiked Ball | Works | |
| 103 | Dorrie | Works | |
| 104 | Tweester (Tornado) | Works | |
| 105 | Whirlpool | Works | |
| 106 | Red Coin | Crashes | |
| 107 | ? Switch | Works | Graphics are not loaded correctly |
| 108 | ! Switch | Works | Graphics are not loaded correctly |
| 109 | Amp | Works | |
| 110 | Brick Block containing !-Switch | Works | !-Switch graphics are not loaded correctly |
| 111 | Floating log | Works | |
| 112 | Nothing | N/A | Technically works due to it being nothing |
| 113 | Cheep Chomp | Works | |
| 114 | Burner (Small) | Works | |
| 115 | Large Spiked Ball | Works | |
| 116 | Skeeter (Water Bug) | Works | Causes a desync however |
| 117 | Map Flying ? Block | N/A | |
| 118 | Burner | Works | |
| 119 | Swinging lift (pendulum-like) | Works | |
| 120 | Grounded Piranha Plant | Works | |
| 121 | Nothing | N/A | Technically works due to it being nothing |
| 122 | Big Grounded Piranha Plant | Works | |
| 123 | Grounded Fire Piranha Plant | Works | |
| 124 | Large grounded Fire Piranha Plant | Works | |
| 125 | Defunct Actor 229 | N/A | |
| 126 | Drawbridge lift | Works | |
| 127 | Big four-platform rickshaw lift | Works | |
| 128 | Warp Cannon | Works | |
| 129 | Boss Key Location | Works | |
| 130 | Jumping Cheep Cheep | Works | |
| 131 | Checkpoint - vertical | Works | Does the animation but doesn't set anything |
| 132 | Checkpoint | Works | Does the animation but doesn't set anything |
| 133 | Nothing | N/A | Technically works due to it being nothing |
| 134 | Nothing | N/A | Technically works due to it being nothing |
| 135 | Nothing | N/A | Technically works due to it being nothing |
| 136 | Pokey | Works | |
| 137 | Nothing | N/A | Technically works due to it being nothing |
| 138 | Nothing | N/A | Technically works due to it being nothing |
| 139 | Nothing | N/A | Technically works due to it being nothing |
| 140 | Boss Key | Works | |
| 141 | Swelling ground | Works | |
| 142 | Tightrope | Works | |
| 143 | Spiked ? Block (unused actor 251) | Crashes | |
| 144 | Spiked ? Block | Crashes | |
| 145 | Spiked ? Block (unused actor 253) | Crashes | |
| 146 | Ground-pound panel | Works | |
| 147 | Bump from below platform | Works | |
| 148 | Goomba | Works | |
| 149 | Koopa Troopa | Works | |
| 150 | Koopa Paratroopa | Works | |
| 151 | Nothing | N/A | Technically works due to it being nothing |
| 152 | Event trigger block | Crash | |
| 153 | Nothing | N/A | Technically works due to it being nothing |
| 154 | Nothing | N/A | Technically works due to it being nothing |
| 155 | Special exit controller (warp entrance) | Crash | Sometimes just corrupts graphics and does nothing |
| 156 | Nothing | N/A | Technically works due to it being nothing |
| 157 | Fire Brother | Partial | Causes a desync |
| 158 | Boomerang Brother | Partial | Causes a desync |
| 159 | Nothing | N/A | Technically works due to it being nothing |
| 160 | Nothing | N/A | Technically works due to it being nothing |
| 161 | Nothing | N/A | Technically works due to it being nothing |
| 162 | Mushroom Platform lift | Works | |
| 163 | Nothing | N/A | Technically works due to it being nothing |
| 164 | Event controller - "AND" | Works | |
| 165 | Event controller - "OR" (If X OR Y, do Z) | Works | |
| 166 | Event controller - "RANDOM" | Works | |
| 167 | Event controller - chainer (If X, do Y) | Works | |
| 168 | Event controller - "IF" (uses zones) | Works | |
| 169 | Spin Block (unused Actor 255) | N/A | Doesn't spawn |
| 170 | Nothing | N/A | Technically works due to it being nothing |
| 171 | Spin Block (unused Actor 256) | N/A | Doesn't Spawn |
| 172 | Nothing | N/A | Technically works due to it being nothing |
| 173 | Swinging/able rope | Works | |
| 174 | Mushroom Platform lift | Works | |
| 175 | Bouncy bricks (Unused) | Works | |
| 176 | Nothing | N/A | Technically works due to it being nothing |
| 177 | Nothing | N/A | Technically works due to it being nothing |
| 178 | Nothing | N/A | Technically works due to it being nothing |
| 179 | Nothing | N/A | Technically works due to it being nothing |
| 180 | Climbing Koopa | Works | |
| 181 | Nothing | N/A | Technically works due to it being nothing |
| 182 | Nothing | N/A | Technically works due to it being nothing |
| 183 | Lakitu spawner | Works | |
| 184 | Nothing | N/A | Technically works due to it being nothing |
| 185 | Cheep Cheep random spawner | Works | |
| 186 | Paragoomba | Works | |
| 187 | Balance lift | Works | |
| 188 | Nothing | N/A | Technically works due to it being nothing |
| 189 | Pipe Cannon | Works | Desynchronizes the game |
| 190 | Nothing | N/A | Technically works due to it being nothing |
| 191 | Hanging Bouncing ? Block | Works | |
| 192 | Coin Spawner (unused actor) | Crash | |
| 193 | Big Dry Bones | Works | |
| 194 | Big Thwomp | Works | |
| 195 | 0 Stick to bottom length activator left | Works | |
| 196 | 0 Stick to bottom length activator right | Works | |
| 197 | Tile Creator/Destroyer (Tile God) | Crash | |
| 198 | In air vertical scroll stop left | N/A | |
| 199 | In air vertical scroll stop right | N/A | |
| 200 | Nothing | N/A | Technically works due to it being nothing |
| 201 | Nothing | N/A | Technically works due to it being nothing |
| 202 | Nothing | N/A | Technically works due to it being nothing |
| 203 | Unused Purple Mushroom Platform Lift | Works | |
| 204 | Fire Snake | Works | |
| 205 | Flame Chomp Spawner | Works | |
| 206 | Ghost house goo | Works | |
| 207 | Big Cheep Cheep | Works | |
| 208 | Nothing | N/A | Technically works due to it being nothing |
| 209 | Sledge Brother | Works | Causes a desync however |
| 210 | MvsL Battle Star | Works | Who would've thought |
| 211 | Blooper | Works | |
| 212 | Blooper Nanny (unused actor 144) | Works | |
| 213 | Blooper Nanny that w/ Baby Bloopers | Works | |
| 214 | Nothing | N/A | Technically works due to it being nothing |
| 215 | Nothing | N/A | Technically works due to it being nothing |
| 216 | Nothing | N/A | Technically works due to it being nothing |
| 217 | Nothing | N/A | Technically works due to it being nothing |
| 218 | Auto-scrolling controller | Works | If the players spawn in the same position after respawning it stops working |
| 219 | Spike Top | Works | |
| 220 | Bowser Jr. | Works | |
| 221 | Nothing | N/A | Technically works due to it being nothing |
| 222 | Mini Goomba | Works | |
| 223 | Flip fence | Works | |
| 224 | Big flip fence | Works | |
| 225 | Nothing | N/A | Technically works due to it being nothing |
| 226 | Scuttlebug | N/A | |
| 227 | Moneybag | Works | |
| 228 | Roulette Block | Crash | |
| 229 | Petey Piranha | Works | |
| 230 | Nothing | N/A | Technically works due to it being nothing |
| 231 | Water | Works | |
| 232 | Hanging ? Block | Works | |
| 233 | Swinging/able pole | Works | |
| 234 | Lava | Partial | Causes a desync, line the top with lava tiles |
| 235 | Star Coin | Crash | |
| 236 | Rotating square lift | Works | |
| 237 | Broozer | Works | |
| 238 | Purple Mushroom Platform lift | Works | |
| 239 | Yellow/Orange Mushroom Platform | Works | |
| 240 | Nothing | N/A | Technically works due to it being nothing |
| 241 | Bill Blaster Turret | Works | |
| 242 | Blue Mushroom Platform | Works | |
| 243 | Roof Spiny | Works | |
| 244 | Bouncy Mushroom Platform | Works | |
| 245 | Corked Pipe + foot pump | Crashes | |
| 246 | Floating barrel | Works | |
| 247 | Sushi spawner (shark spawner) | Works | |
| 248 | Balloon Boo | Works | |
| 249 | Track-controlled wall-jump lift | Works | |
| 250 | Crowber | Works | |
| 251 | Big Unagi | Crash | |
| 252 | Banzai Bill Blaster | Works | |
| 253 | Nothing | N/A | Technically works due to it being nothing |
| 254 | Kab-omb | Works | |
| 255 | Jungle FG Effect (Unused Actor) | Works | |
| 256 | Rotating carry-through-wall turntable-like lift | Works | |
| 257 | Coin trail Cheep Cheep | Works | |
| 258 | Spike Bass (unused object) | Works | |
| 259 | Poisoned Water | Partial | Causes desync |
| 260 | Fast Spike Pillar - Down | Works | |
| 261 | Fast Spike Pillar - Up | Works | |
| 262 | Fast Spike Pillar - Left | Works | |
| 263 | Fast Spike Pillar - Right | Works | |
| 264 | Mega Ground Pound's sky drops + | Crash | |
| 265 | Phantom Hand (Pointing hand) | Works | |
| 266 | Invisible Lava Bubble (unused actor) | Works | |
| 267 | Nothing | N/A | Technically works due to it being nothing |
| 268 | Underwater bounce bubble | Works | |
| 269 | Giant Wiggler | Works | |
| 270 | Smashed pipe object | Works | |
| 271 | Crowber spawner | Works | |
| 272 | Snowy branch | Works | |
| 273 | Snow Spike | Works | |
| 274 | Sinking-snow pile | Works | |
| 275 | Blockhopper | Partial | Desyncs |
| 276 | Scroll and Mario stop sideways | Works | |
| 277 | Arrow sign | Works | |
| 278 | Groundpound-able ghost house goo | Works | |
| 279 | Flipper (one-way gate) | Works | |
| 280 | Horizontal camera offset | N/A | Not sure how this object works |
| 281 | Squiggler | Works | |
| 282 | Swinging/able vine | Works | |
| 283 | Spike Bass spawner | Works | |
| 284 | Splunkin (pumpkin) | Works | |
| 285 | Scuttlebug spawner | N/A | |
| 286 | Event controller - multi-chainer | Works | |
| 287 | Enemy-in-Pipe Generator | Works | |
| 288 | Nothing | N/A | Technically works due to it being nothing |
| 289 | Platform Block (expandable block) | Works | Doesn't respawn if it turns into bricks and you collect a battle star. |
| 290 | Flying ? Block | Crash | Black screen |
| 291 | Brick Block containing ? Switch | Works | ? Switch graphics are not loaded correctly |
| 292 | Event Activated Door | Works | |
| 293 | Touching ground vertical scroll stop left | Works | |
| 294 | Touching ground vertical scroll stop right | Works | |
| 295 | Mummipokey | Works | Use a P-Switch |
| 296 | Lift moving left and right | Works | |
| 297 | Stonewall moving left and right | Works | |
| 298 | Stonewall moving u, d, l, r | Works | |
| 299 | Snake Block | Works | |
| 300 | Haunted lift | Works | |
| 301 | Toadsworth | Works | Only freezes Mario for a few seconds, and Luigi can roam freely. Background chooser will break because of BMG differences. |
| 302 | Toad House block | Doesn't work | Garble graphics. |
| 303 | Ball 'n' Chain | Works | |
| 304 | Spike Pillar - down | Works | |
| 305 | Final Castle Create Loop | N/A | I have no idea how this works. |
| 306 | Final Castle Wrong Path | N/A | I have no idea how this works. |
| 307 | Spike Pillar - up | Works | |
| 308 | Spike Pillar - left | Works | |
| 309 | Spike Pillar - right | Works | |
| 310 | Fog FG effect | Partial | Graphics are not loaded correctly |
| 311 | Snow FG effect 1 | Works | |
| 312 | Rise or lower while/once on Mushroom Platform lift - mechanical | Works | |
| 313 | Snow FG effect 2 | Works | |
| 314 | Snow FG effect 3 | Works | |
| 315 | Cloud FG effect | Partial | Graphics are not loaded correctly |
| 316 | Water FG effect 1 | Works | |
| 317 | Water FG effect 2 | Works | |
| 318 | Fire FG effect 1 | Works | |
| 319 | Fire FG effect 2 | Works | |
| 320 | Fire FG effect 3 | Works | |
| 321 | Light FG Effect 1 | N/A | |
| 322 | Light FG Effect 2 | Works | |
| 323 | Squishy cloud platform | Works | Both players can interact with it at the same time |
| 324 | Grassland Clouds FG effect | Partial | Graphics are not loaded correctly |
| 325 | Small Grassland Clouds FG effect | Partial | Graphics are not loaded correctly |
In this tutorial, you'll learn how to:
- Install the necessary tools to start modding - Open your ROM in the editor - Open a level from your ROM - Create a bare-bones level to build from #### Section 1: Getting Ready To edit the game, you'll need a copy of your New Super Mario Bros. DS ROM and the New Super Mario Bros. Editor (NSMBe).We are not allowed to give a download to the ROM. If you have a 3DS, [here is a guide](https://3ds.hacks.guide/dumping-titles-and-game-cartridges.html) that lets you dump your game cartridge ROM using a modded 3DS.
For the best compatibility for more complex tasks, you will need a US region ROM.
Head over to [GitHub](https://github.com/MammaMiaTeam/NSMB-Editor/releases) to download the latest version of NSMBe from the Mamamia Team. When you click the link, you will be taken to a page that looks like this: [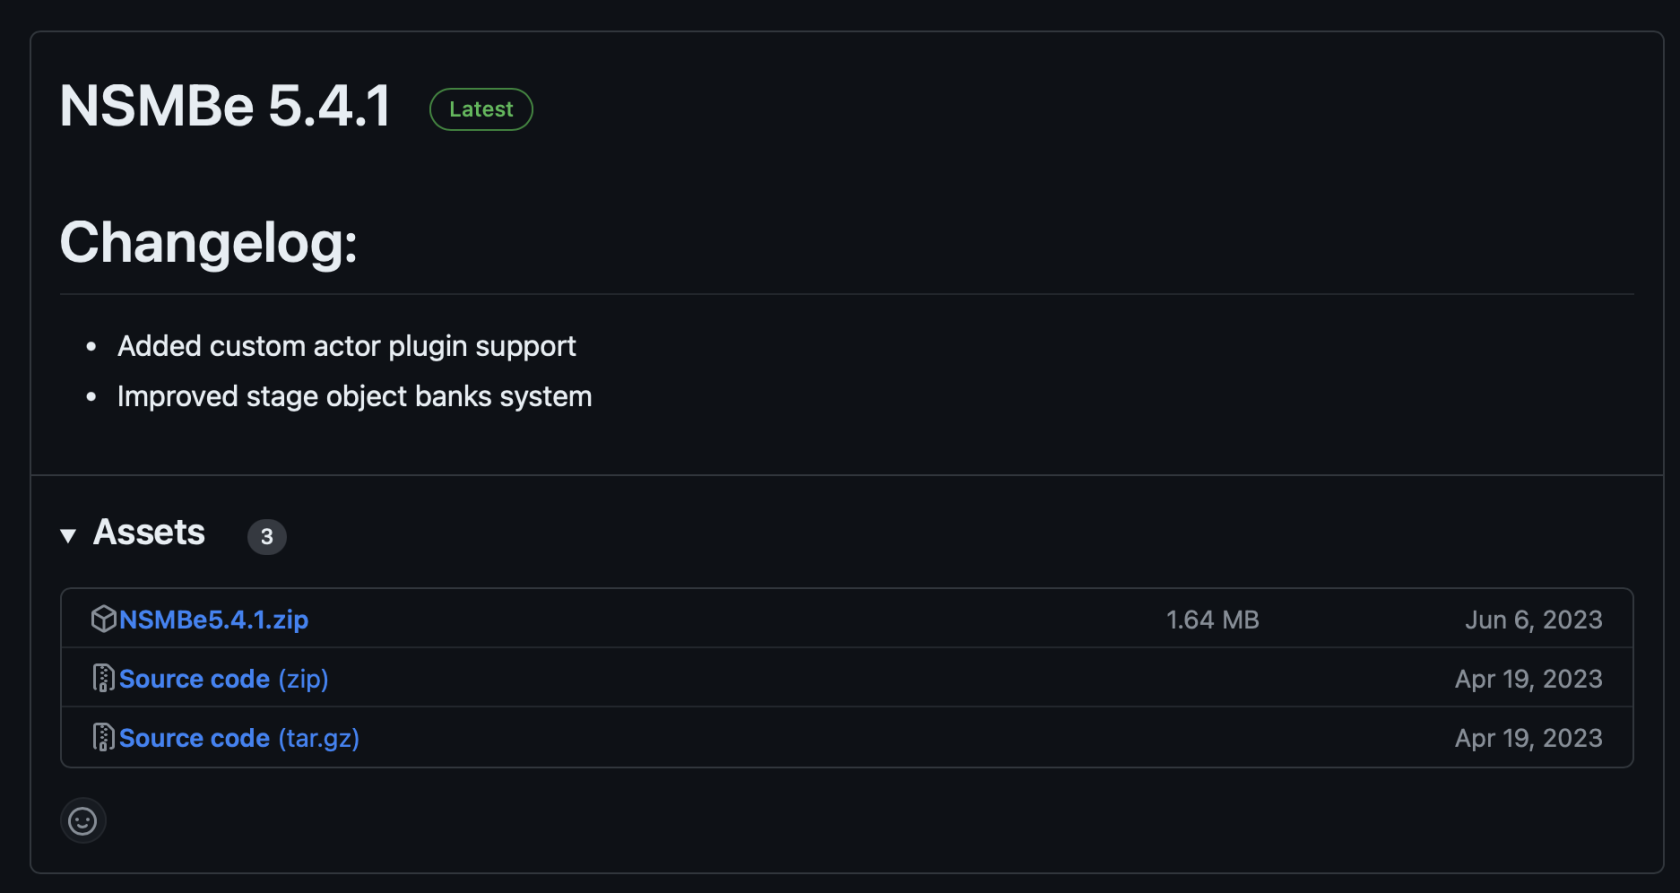](https://bookstack.nsmbcentral.net/uploads/images/gallery/2024-02/image.png) Just click on **NSMBeX.X.X.zip** to download the editor. (The X's will match with whatever version the editor is on. As of writing this version is 5.4.1, as seen in the screenshot) Now, in your downloads folder, you need to extract the zip file. On Windows, this is done by right-clicking the **.zip** and clicking **Extract All...** Just click extract on the window that appears. You should now have a folder in your Downloads folder named **NSMBeX.X.X**. The final folder will look something like this: [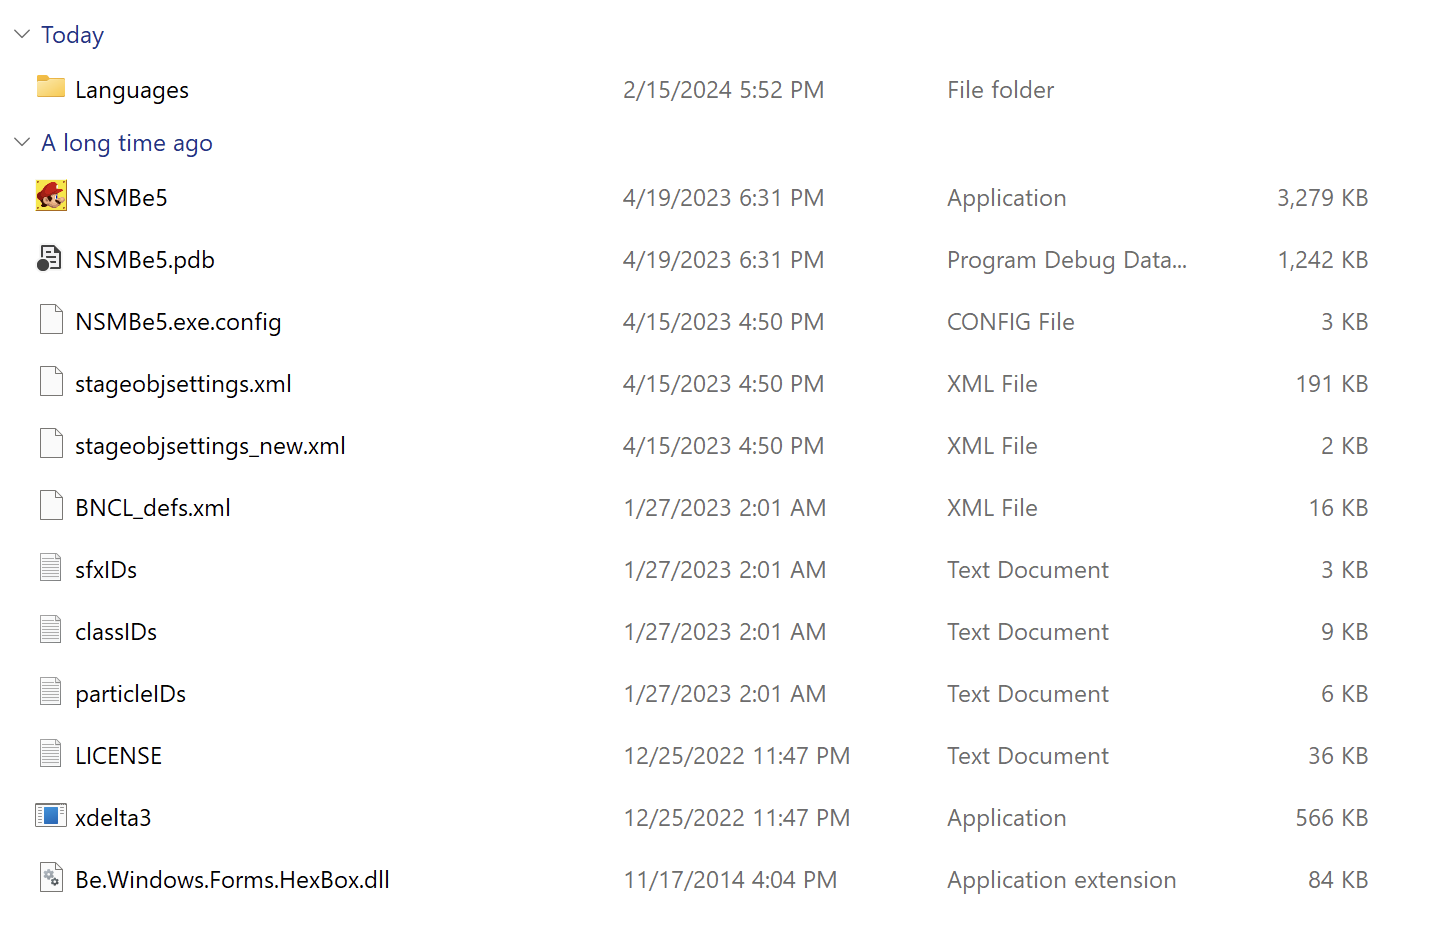](https://bookstack.nsmbcentral.net/uploads/images/gallery/2024-02/MqDimage.png)You have now installed the necessary tools to begin modding
#### Section 2: Opening Your ROM Now that you have the editor extracted, let's open up your ROM! Inside of the **NSMBeX.X.X** folder, open the app named **NSMBe5.exe**. You should see a window that looks something like this: [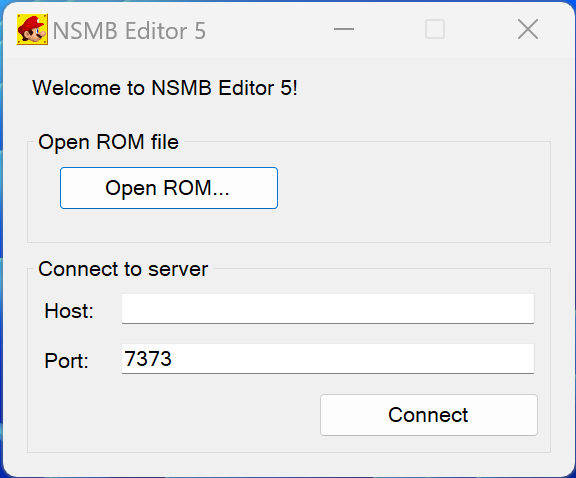](https://bookstack.nsmbcentral.net/uploads/images/gallery/2024-02/RBmimage.png) Now, click on **Open ROM...** and open your dumped ROM of New Super Mario Bros. DSThe ROM will have an extension of **.nds**
You should now see this: [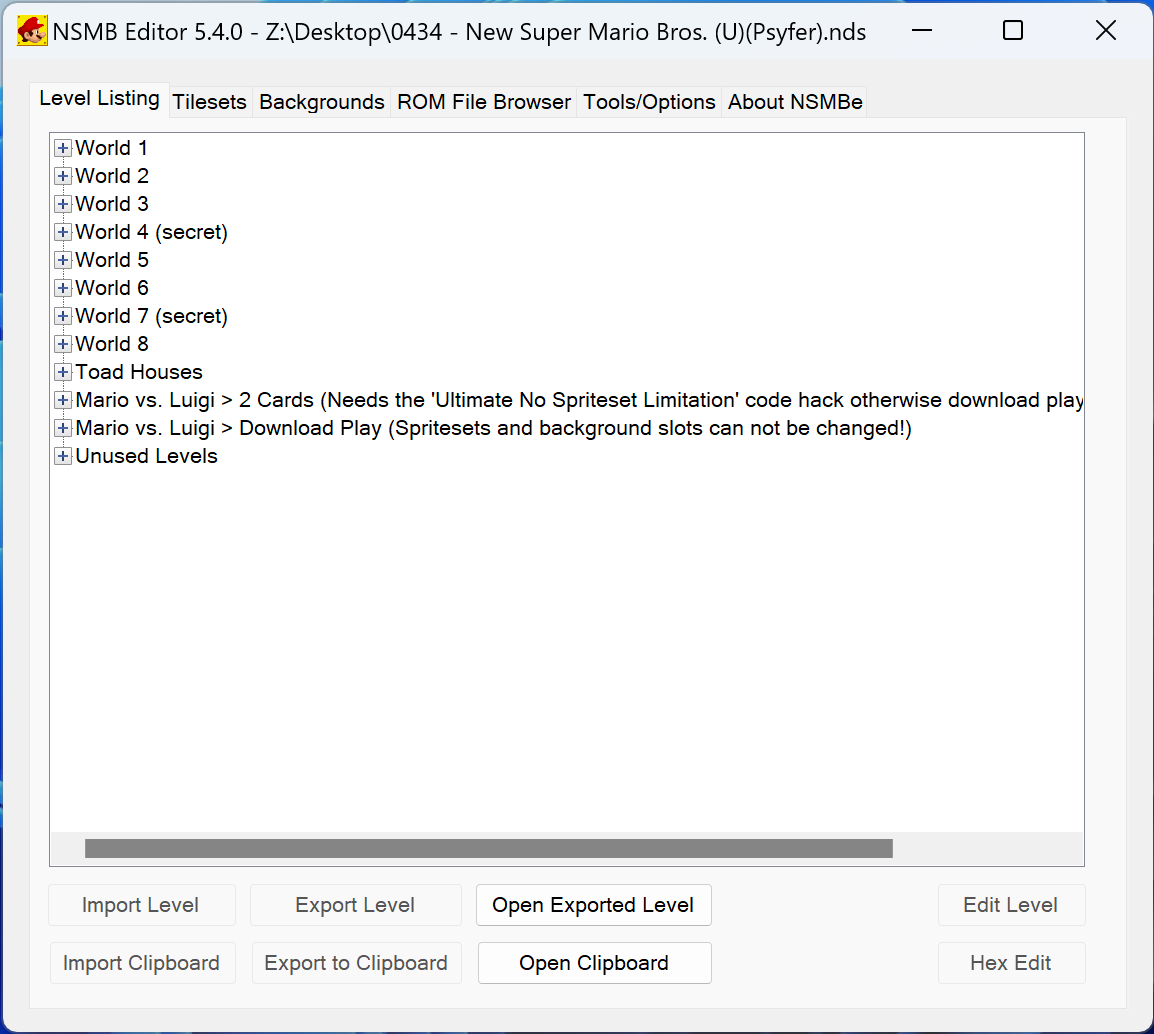](https://bookstack.nsmbcentral.net/uploads/images/gallery/2024-02/lrUimage.png)You have now opened your ROM in the editor
#### Section 3: Opening a Level Now for the fun part, editing a level! To start, we will open 1-1, Area 1. To do this, open the **World 1** drop down, open the **1-1** dropdown, and finally double click on **Area 1**.Each level in the game has a various number of **Areas**. Nintendo used these as a way to keep each sub-area separated. For example, **Area 1** of 1-1 is where you start the level, and **Area 2** is the bonus room found in **Area 1**.
[](https://bookstack.nsmbcentral.net/uploads/images/gallery/2024-02/YpKimage.png) You will now be presented with the level view: [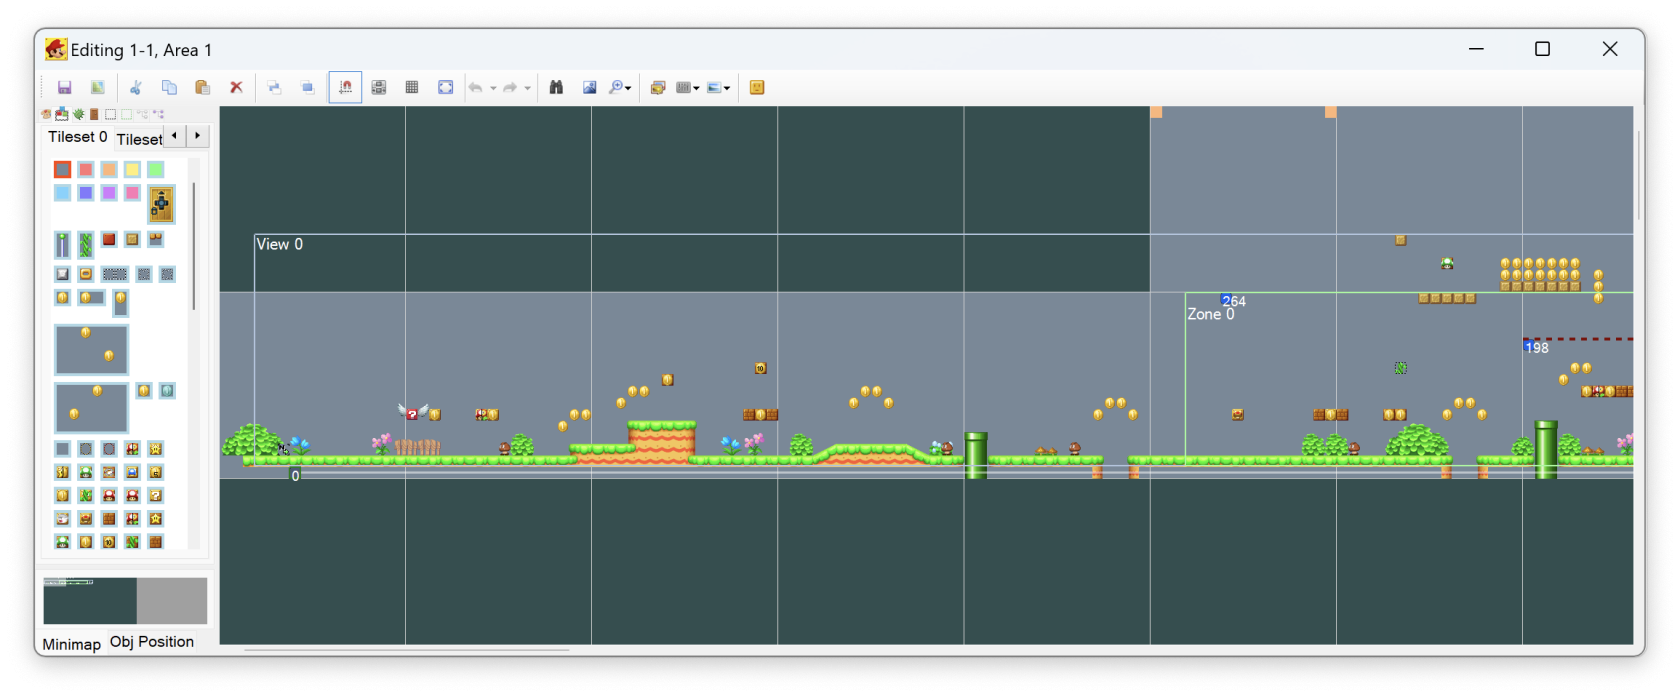](https://bookstack.nsmbcentral.net/uploads/images/gallery/2024-02/Vlbimage.png)If the level view appears too small, you may need to modify the config file. To do this: open the file named "NSMBe5.exe.config" using Notepad, delete the lines: **<System.Windows.Forms.ApplicationConfigurationSection> <add key="DpiAwareness" value="PerMonitorV2"/></System.Windows.Forms.ApplicationConfigurationSection>** After deleting the lines, save the file, restart the editor, and open **Area 1** again.
You have now opened a level from your ROM
#### Section 4: Creating a Bare-Bones Level It is best practice to start from a blank level, so let's clear out the existing level by pressing **Ctrl+A** to select everything in the level, followed by clicking the [](https://bookstack.nsmbcentral.net/uploads/images/gallery/2024-02/dktimage.png)at the top of the editor window. Your blank level will look like this: [](https://bookstack.nsmbcentral.net/uploads/images/gallery/2024-02/mVEimage.png) > ##### Now that we have a blank level, what do we need to add back? All levels in NSMB DS must at *minimum* have a **Start Entrance** and at least one main **View**. With that being said, let's add them back! To begin, we will add the main view. To do this, click on [](https://bookstack.nsmbcentral.net/uploads/images/gallery/2024-02/9sYimage.png) in the sub-menu bar. This will show a list of all the views in the level (or it would if we didn't just delete everything in the level). To create a view, all we need to do is click on **Add**. Your level will now have a transparent box: [](https://bookstack.nsmbcentral.net/uploads/images/gallery/2024-02/YQiimage.png) You'll notice a bunch of settings here. For now, the only thing you need to worry about is checking **Scroll vertically**. This allows the in-game camera to follow Mario up and down inside of your level.The **View** defines the bounds of your level. The camera is not allowed to go outside of the current view. Mario can go above the view, however the camera will not follow him. The sides of a view will stop Mario. Mario will die if he falls below the bottom of the view.
Click and drag the small box that says **View 0** and move the **View** to the top left of the level. While we're moving the view, go ahead and grab the bottom right box and extend the view to be one square big. You're level should look like this now: [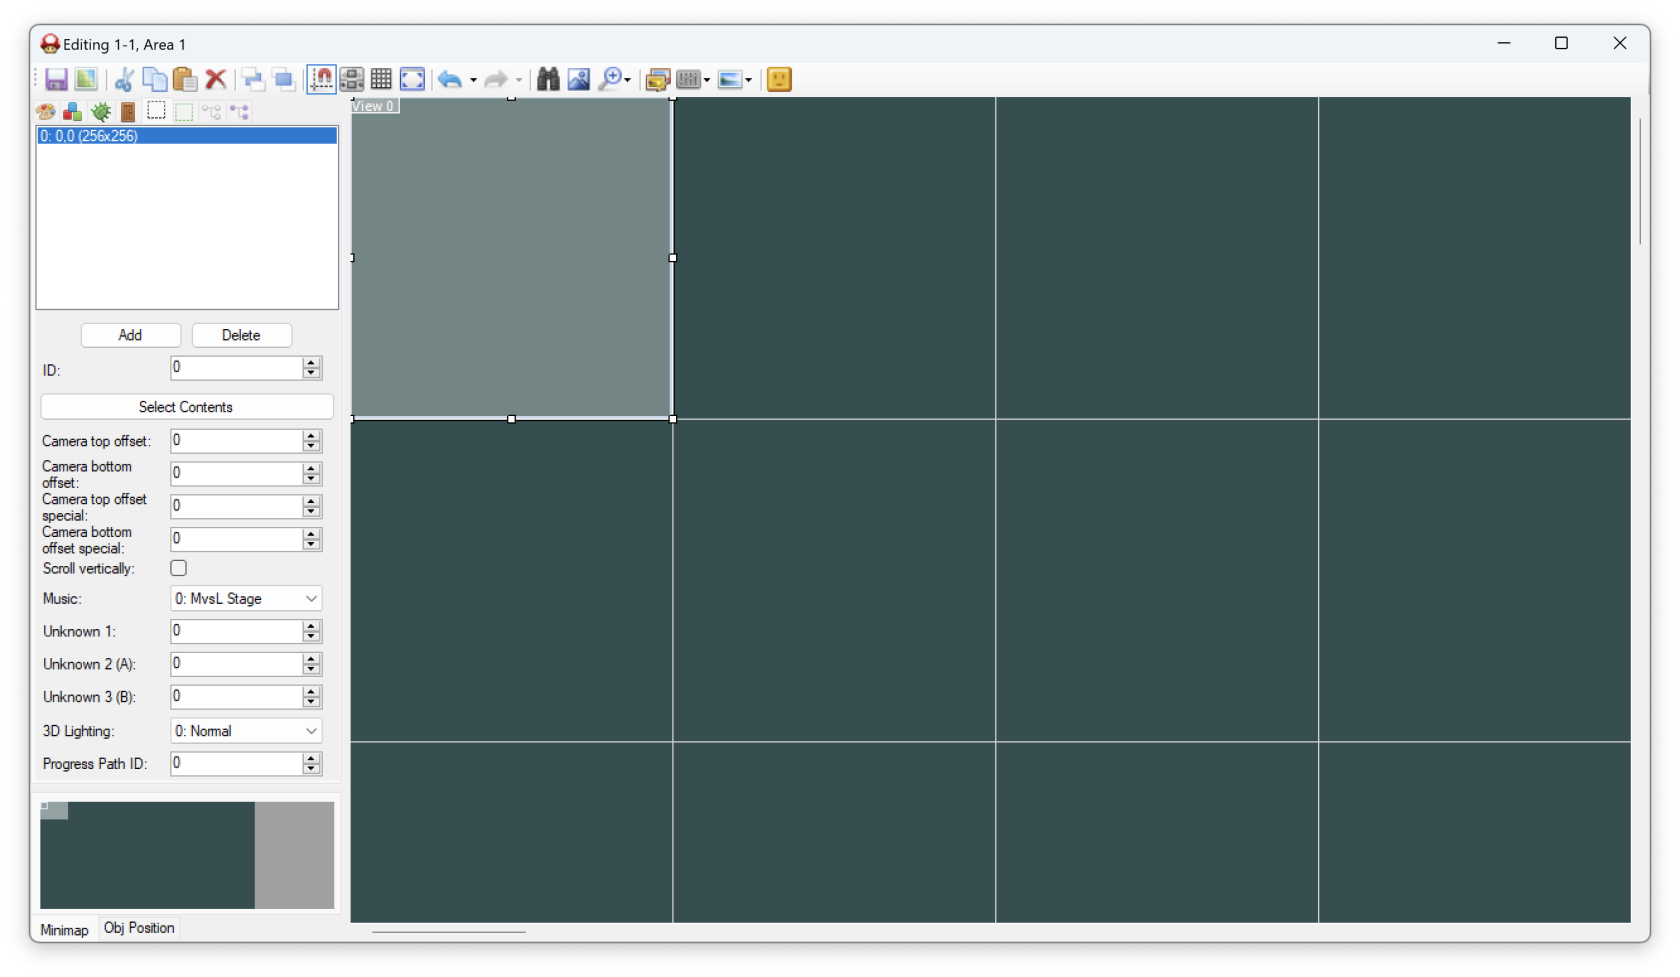](https://bookstack.nsmbcentral.net/uploads/images/gallery/2024-02/IG1image.png) Now, let's create the **Start Entrance**. Click on the [](https://bookstack.nsmbcentral.net/uploads/images/gallery/2024-02/Mehimage.png) button in the sub-menu. Similarly to the views button, this will give a list of every **Entrance** that is in this level. Go ahead and click on **Add** to create a new **Entrance**. [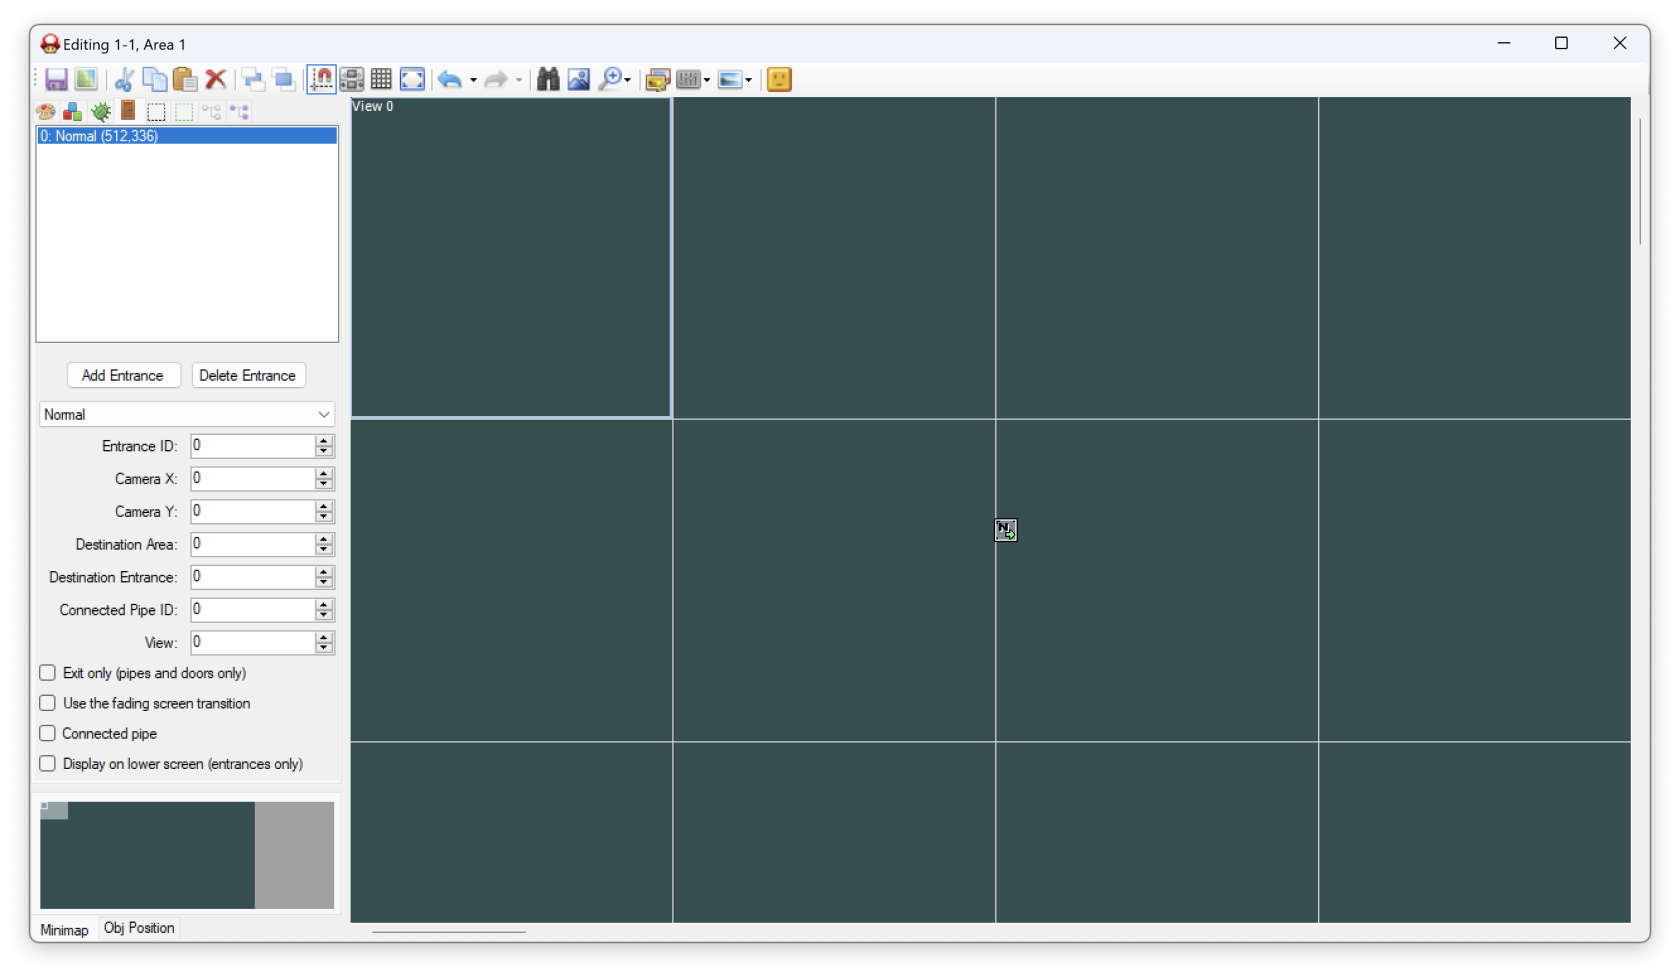](https://bookstack.nsmbcentral.net/uploads/images/gallery/2024-02/TZeimage.png) Once again, there are a few settings on the entrance that you can play with but for now let's just move the entrance inside of our **View**. [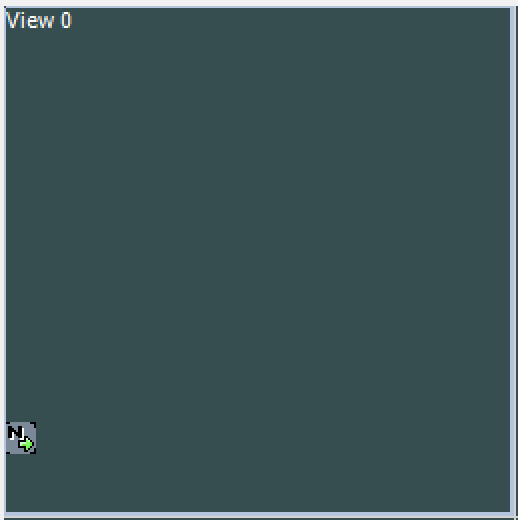](https://bookstack.nsmbcentral.net/uploads/images/gallery/2024-02/TU5image.png) There we go! We have what's at *minimum* required. However...if we were to play this level now, Mario would just fall down and die. Let's add a floor and the **Goal Pole's Flag** to this level! To get to the **Tile** picker, click on the [](https://bookstack.nsmbcentral.net/uploads/images/gallery/2024-02/Q9wimage.png) button (and also click on **Tileset 1** if it is not already selected). Your side bar should now be filled with **Tiles**! [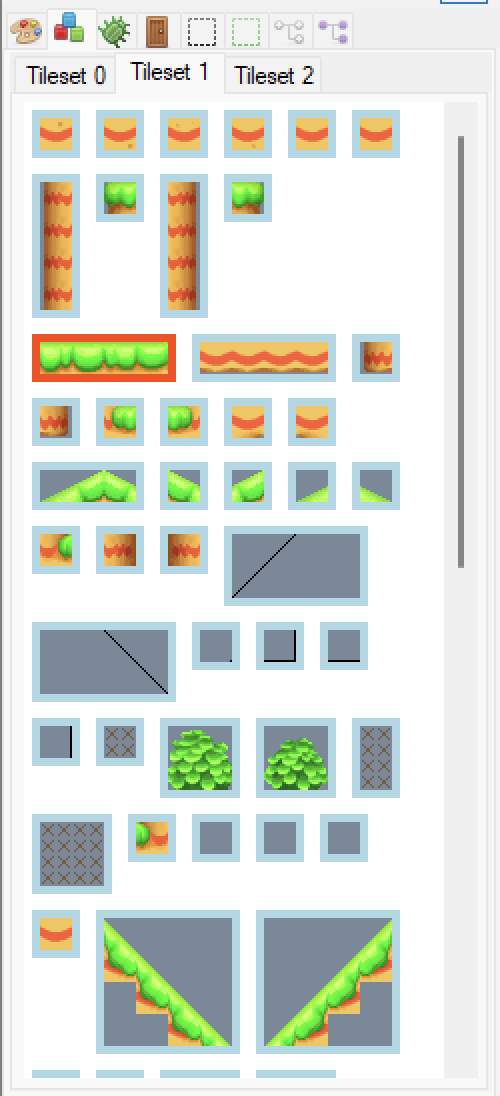](https://bookstack.nsmbcentral.net/uploads/images/gallery/2024-02/pxeimage.png) Go ahead and pick the tile I have selected (highlighted in red in the screenshot), then right-click to place the tile in our view. After this, you can grab the corner of the tile and stretch it out across the view. [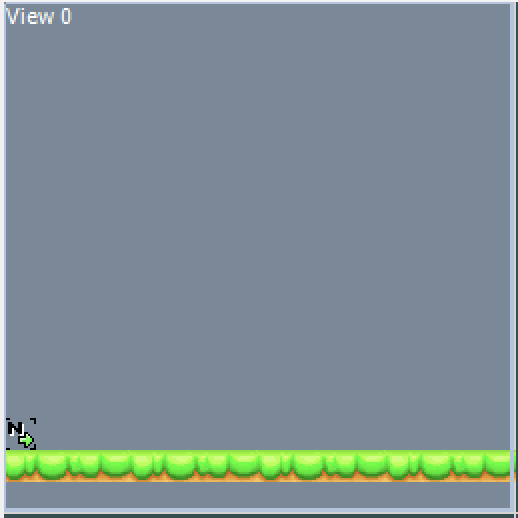](https://bookstack.nsmbcentral.net/uploads/images/gallery/2024-02/ceoimage.png) Not bad! Now, let's make a **Goal Pole** for Mario to clear the level with. First off, click on the [](https://bookstack.nsmbcentral.net/uploads/images/gallery/2024-02/Ob6image.png) button in the sub menu to bring up the **Actor List**. [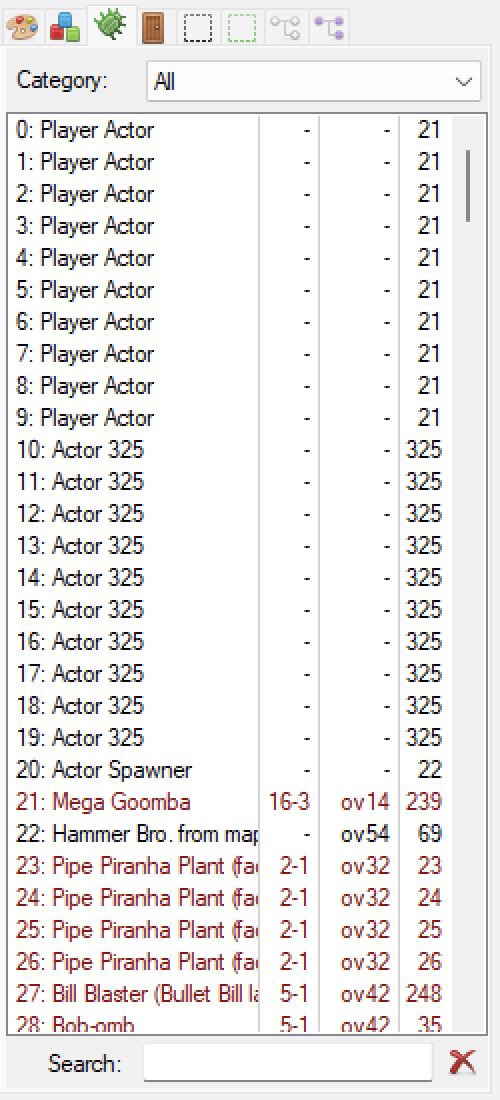](https://bookstack.nsmbcentral.net/uploads/images/gallery/2024-02/O9rimage.png) This is every **Actor** in the game. You'll become familiar with more **Actors** as you begin making levels. For now, enter "Goal Pole's Flag" into the search box. This will now filter out all other **Actors**. [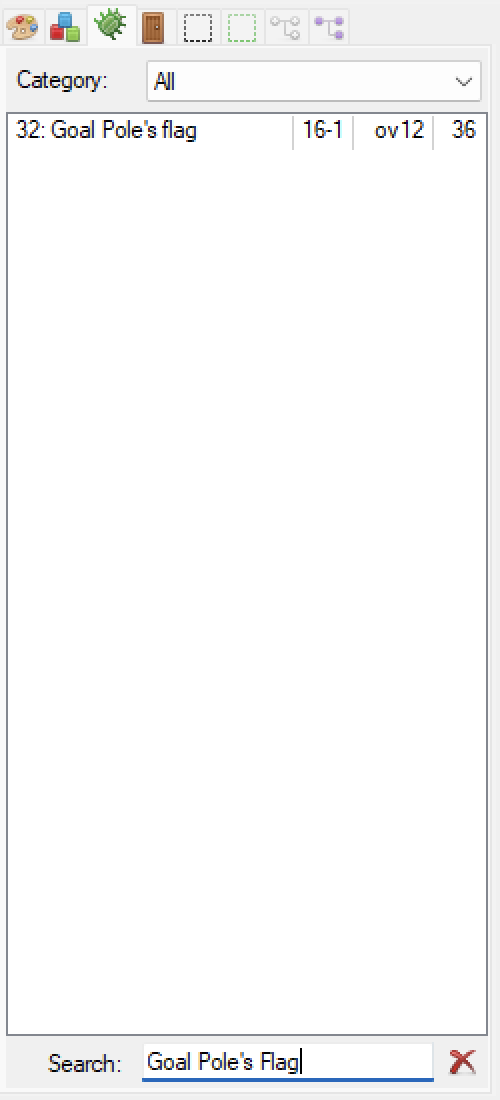](https://bookstack.nsmbcentral.net/uploads/images/gallery/2024-02/6Ubimage.png) Click on the **Actor** in the list, then right click in the level like you did for the tile. This will add the **Goal Pole's Flag** into the level. [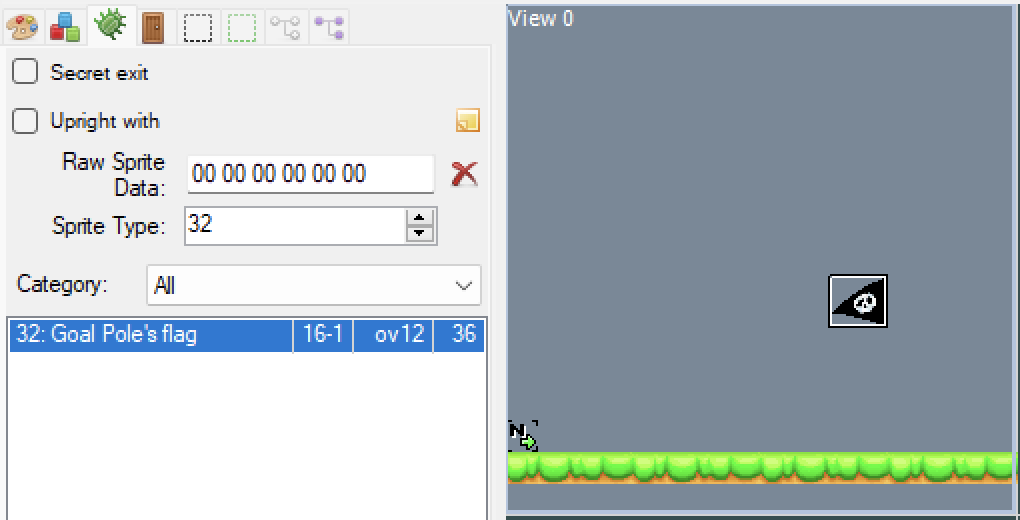](https://bookstack.nsmbcentral.net/uploads/images/gallery/2024-02/hnXimage.png) On the left, you'll notice that some options for the **Goal Pole's Flag** has appeared. All **Actors** will have an options menu appear for them when they are highlighted in the level. All that's left to do now is finish tiling the **Goal Pole**.Test your knowledge! The **Goal Pole** tiles are located in **Tileset 0**, try and build the flag like the next screenshot! Here's a tip, the **Goal Pole** is 9 tiles high and two tiles wide.
[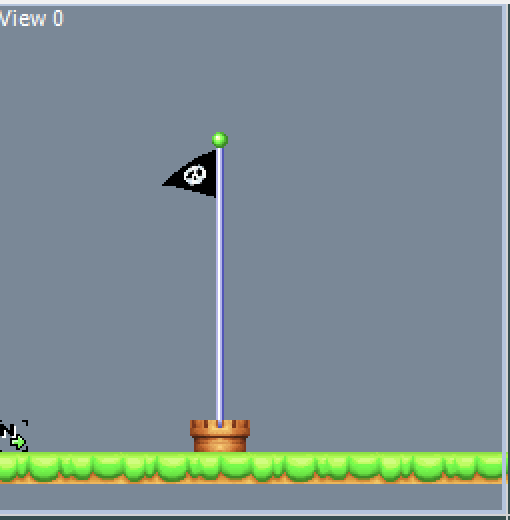](https://bookstack.nsmbcentral.net/uploads/images/gallery/2024-02/K3Oimage.png)With the flag created, we now need to build the castle. To begin, head over to **Tileset 2** and click on the castle. Now, right click to place the castle and drag it to create the castle. Your level will look like this now: [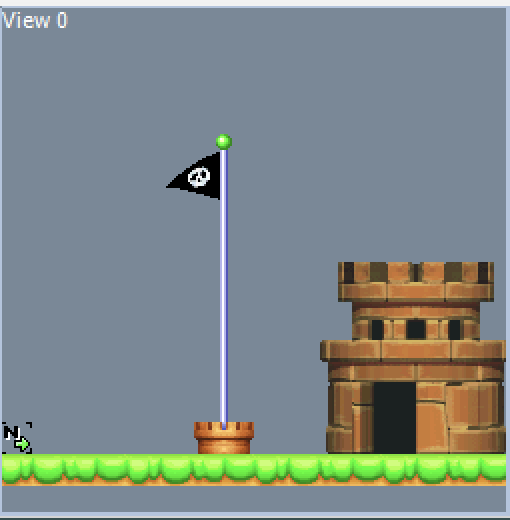](https://bookstack.nsmbcentral.net/uploads/images/gallery/2024-02/mciimage.png) We're almost done. The castle in this game is composed of three tiles: the castle we just created, the wall that will stop Mario, and the roof that allows the small flag to show up after you cleared the level. Select the wall from the tile picker: [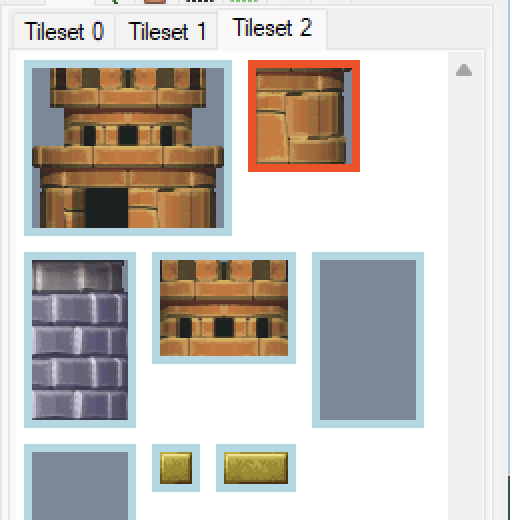](https://bookstack.nsmbcentral.net/uploads/images/gallery/2024-02/CPPimage.png)Drag this wall over the castle you created. [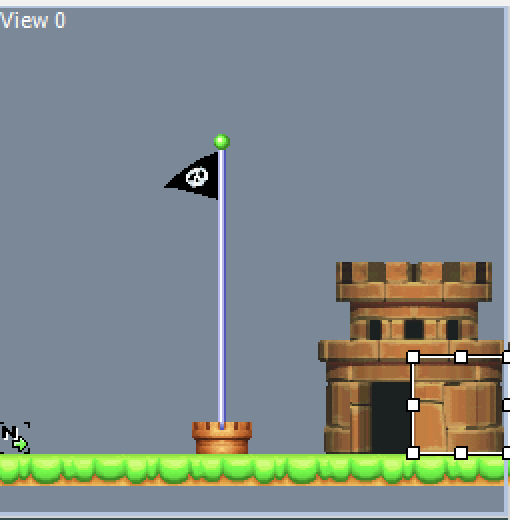](https://bookstack.nsmbcentral.net/uploads/images/gallery/2024-02/vSgimage.png)Lastly, drag the roof tile over the castle like you just did for the wall [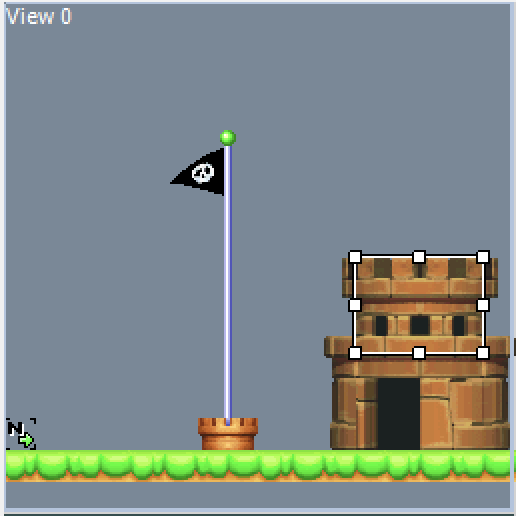](https://bookstack.nsmbcentral.net/uploads/images/gallery/2024-02/1fWimage.png)You have now created a bare-bones level
You can now save your level using the save icon or by pressing **Ctrl+S**.