| **Number for level header (Hex)** | **Number in NSMBe/Nitro Studio (Decimal)** | **Name in** | **Name in SDAT file** |
| 00 | MvsL Stage 2 (sometimes nothing plays) | BGM\_VS\_CHIJOU | |
| 01 | Tower | BGM\_TRIDE.sseq | |
| 02 | Starman | BGM\_MUTEKI.sseq | |
| 03 | Mega Mario | BGM\_HUGE.sseq | |
| 04 | End of Level (+ MvsL course win) | BGM\_COURSE\_CLEAR.sseq | |
| 05 | Death | BGM\_DOWN.sseq | |
| 06 | Desert | BGM\_SABAKU.sseq | |
| 07 | Boss | BGM\_BOSS.sseq | |
| 08 | VS Lose | BGM\_VS\_LOSE\_FANFARE | |
| 09 | Underground | BGM\_CHIKA.sseq | |
| 0A | Bonus room | BGM\_MAME.sseq | |
| 0B | Underwater | BGM\_WATER3.sseq | |
| 0C | Lava | BGM\_KAZAN\_SOTO.sseq | |
| 0D | End Credits (Early, unused) | BGM\_SAMPLE | |
| 0E | Beach | BGM\_SANBASHI.sseq | |
| 0F | Bowser Jr. Battle | BGM\_KUPPAJR | |
| 10 | Ghost House | BGM\_OBAKE.sseq | |
| 11 | Castle | BGM\_SHIRO.sseq | |
| 12 | Switch timer | BGM\_SWITCH.sseq | |
| 13 | End of Game Fanfare | BGM\_FINAL\_CLEAR | |
| 14 | Game Over | BGM\_GAMEOVER.sseq | |
| 15 | Final Boss | BGM\_FINAL\_KUPPA.sseq | |
| 16 | Boss Beaten | BGM\_BOSS\_CLEAR.sseq | |
| 17 | \[Nothing\] | \[Nothing\] | |
| 18 | Athletic | BGM\_ATHLETIC.sseq | |
| 19 | Toad House | BGM\_MINIGAME.sseq | |
| 1A | Grassland | BGM\_CHIJOU\_CONT.sseq | |
| 1B | Title Screen | BGM\_SELECT.sseq | |
| 1C | SMB End of Level | BGM\_GOAL\_FANFARE2.sseq | |
| 1D | Toad House Fanfare | BGM\_FANFARE\_KINO.sseq | |
| 1E | MvsL Stage 2 | BGM\_VS\_STAGE.sseq | |
| 1F | MvsL start screen (is this the exact same audio data as the title screen?) | BGM\_VS\_SELECT.sseq | |
| 20 | MvsL Loop | BGM\_VS\_FAN\_LOOP.sseq | |
| 21 | MvsL Win | BGM\_VS\_WIN.sseq | |
| 22 | MvsL Lose | BGM\_VS\_LOSE | |
| 50 | Lava ambient | BGM\_AMB\_YOUGAN | |
| 51 | Desert wind ambient | BGM\_AMB\_SABAKU | |
| 52 | Water ambient | BGM\_AMB\_WATER | |
| 53 | Cave Water Ambient | BGM\_AMB\_CHIKA | |
| 56 | Sky Wind Ambient | BGM\_AMB\_SKY | |
| 63 | Early MvsL Stage (Early grassland, unused) | BGM\_CHIJO | |
| 64 | World 1 | BGM\_WORLD1 | |
| 65 | World 2 | BGM\_WORLD2 | |
| 66 | World 3 | BGM\_WORLD3 | |
| 67 | World 4 | BGM\_WORLD4 | |
| 68 | World 5 | BGM\_WORLD5 | |
| 69 | World 6 | BGM\_WORLD6 | |
| 6A | World 7 | BGM\_WORLD7 | |
| 6B | World 8 | BGM\_WORLD8 | |
| 6C | End Credits | BGM\_ENDING | |
| 6D | Intro 1 | BGM\_OPENING\_DEMO1 | |
| 6E | Intro 2 | BGM\_OPENING\_DEMO2 | |
| 6F | Peach Fanfare | BGM\_KUPPACLEAR\_DEMO |
TODO: - Verify info for BG start position nybble — 0x2 and 0x3 in particular. - How specifically do "Disable vertical scrolling" and "Automatic horizontal scrolling" work? What all do bytes 13 and 16 do? - Might be nice to list which BG speeds and such are all used.
Foregrounds and backgrounds scroll differently in many levels — sometimes they have a fast speed ratio and sometimes they can be completely static. This can be adjusted by hex editing your level. - **Bottom background** --> Change block 3. - **Top background** --> Change block 5. [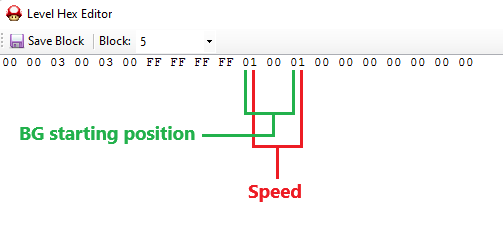](https://bookstack.nsmbcentral.net/uploads/images/gallery/2024-10/bg-hexadecimal-example.png) - Byte 11: Control BG horizontal scrolling. - Byte 13: Control BG vertical scrolling. And for each byte: - First Nybble: Controls where the background starts relative to the view and how it loops. This seemingly does nothing for horizontal looping or start position. - Second Nybble: Controls scroll speed relative to stage foreground speed. (*Image source: [MarioSunshine](https://nsmbhd.net/post/33882/ ""Background Scrolling Data List" thread on NSMBHD")*) ##### **Start position and loop data** - 0x0: Starts from bottom of view offset by 32px; loops entire background. - 0x1: Starts from top of view offset by 32px; loops entire background. - 0x2: Duplicate of 0x0? - 0x3: Duplicate of 0x1? - 0x4: Starts from bottom of view offset by 32px; loops top half of background. - 0x5: Starts from top of view offset by 32px; loops bottom half of background. Any value higher than 0x5 freezes the game. ##### **Scroll speed data** Table address in overlay 0: `0x0002F468` Table address in memory: `0x020C7B48` - 0x0: Same as FG speed. Used in w2-3 (sewer level) for example. - 0x1: 50% FG speed. - 0x2: 25% FG speed. Common for top backgrounds. - 0x3: 12.5% FG speed. Common for bottom backgrounds. - 0x4: 120% FG speed. Unused. - 0x5: 75% FG speed. - 0x6: 6.25% FG speed. - 0x7: 9.375% FG speed. - 0x8: 20.3125% FG speed. - 0x9: Same as FG speed. - 0xA: Same as FG speed. - 0xB: Same as FG speed. - 0xC: Same as FG speed. - 0xD: 200% FG speed. Unused. - 0xE: 400% FG speed. Unused. - 0xF: 800% FG speed. Unused. (*Source: [RoadrunnerWMC](https://github.com/RoadrunnerWMC/nsmbpy/blob/master/nsmbpy/level.py "nsmbpy GitHub")*) #### **Disabling vertical scrolling** - **Bottom background** --> Change both bytes 13 and 16 of block 3. - **Top background** --> Change both bytes 13 and 16 of block 5. - Byte 13: set to 0x40. - Byte 16: set to 0x10. (*Source: [MeroMero](https://nsmbhd.net/post/33169/ ""Background scrolling" thread on NSMBHD")*) #### **Automatic horizontal scrolling**TODO: Expand this table to contain all files, splitting the table if needed
| Filepath | Description |
|---|---|
| **fnt.bin** | *File Name Table* It contains filenames, folders and folders names. |
| **fat.bin** | *File Allocation Table* It contains every file's address in the rom and its size. |
| **header.bin** | [Header](https://problemkaputt.de/gbatek-ds-cartridge-header.htm "Page detailing NDS ROM header info") |
| **arm9ovt.bin** | It lists every arm9 overlay, its location in the rom and where it should be loaded in the ram. |
| **arm7ovt.bin** | It should list every arm7 overlay, its location in the rom and where it should be loaded in the ram. |
| **arm9.bin** | The code for the main processor. |
| **arm7.bin** | *The code for the coprocessor.* |
| **banner.bin** | Contains the game banner text and icon shown in the system bios |
| **rsasig.bin** | *Some signature* |
| / | Root folder |
| /**00DUMMY** | *Empty, NSMBe uses it to store tileset, their objects' descriptions, backgrounds and music names after renaming them* |
| /**BUILDTIME** | *Last game build time* |
| /**mgvs\_sound\_data.sdat** | *Minigames music* |
| /**sound\_data.sdat** | *Main game music* |
| /ARCHIVE/ | Contains archives for minigames and download play |
| /BG\_chk/ | Contains tile behaviour files for tilesets |
| /BG\_ncg/ | Contains bitmaps for tilesets, backgrounds, and tile animations |
| /BG\_ncl/ | Contains palettes and palette animations for tilesets and backgrounds, as well as jyotyu palette |
| /BG\_nsc/ | Contains tilemaps for backgrounds |
| /BG\_pnl/ | Contains tilemaps for tilesets |
| /BG\_unt/ | *Objects info for tilesets* |
| /course/ | *It contains all the levels .bin files* |
| /demo/ | *It contains some cutscene stuffs* |
| /ending/ | *It contains other ending stuffs (like the tower BG)* |
| /enemy/ | *It contains the enemies' models and animations* |
| /ipl/ | Contains bitmap and palette for DS Download Play banner icon |
| /map/ | *It contains all the Worldmap files* |
| /obj/ | Contains bitmaps and palettes of in-course sprites |
| /particle/ | Contains particle archives |
| /player/ | *It contains player's models and animations* |
| /polygon\_unit/ | *It contains some levels effects, the quicksand files, the pipe graphics, and the End-of-level graphics* |
| /script/ | *It contains BMG files (used for In-Level pause scripts, Worldmap's pause scripts, and for the Titlescreen's File Select scripts)* |
| /uiStudio/ | Contains files related to game UI |
| overlay7/ | *It should contain the overlays for the arm7 processor* |
| overlay9/ | *It contains the overlays for the arm9 processor* |
TODO:
- File IDs of files in archives.
- More files?
- Maybe the makeshift file tree could be replaced with something else.
TODO: Currently sorted alphabetically — would something else work better? Things that probably also should be here: - Area - View - Zone - Chunk - Entrance
This page briefly defines some of the jargon you may encounter while modding New Super Mario Bros.; this will generally not cover more broadly-used terms such as tilemap, palette, archive, and so forth. **Code patch**: A piece of code which is compiled then inserted into the game. Also referred to as a **code hack**, **code mod**, or **ASM hack** (though the latter is considered a misnomer and usage of it is proscribed — it is listed here only for posterity). **Control byte**: A byte that controls how a map16 tile tiles in a tile object. **Map16**: The tilemap for tilesets. **Map16 tile**: A 16x16 tile composed of four 8x8 tiles. These can have tile behaviors set for them and are used in tile objects. May also be simply referred to as a tile. **Object**: Can refer to both an actor that may exist in a stage (e.g., a bullet bill) or a tile object. The former is more common and may be also referred to as an **actor**. **Object bank**: A set of objects that are set to load and can thusly be used in an area. Also referred to as a **sprite set** (proscribed). **Object ID**: The ID of an object. Distinct from stage object ID. Also refered to as **class ID** (proscribed). **Object settings**: A data field containing information about an object's settings and events it's connected to. Also referred to as a **sprite data** (proscribed). **Randomization**: The property of a tileset to effectively randomly shuffle a certain set of map16 tiles in game to add visual variety. **Slope control tile**: A tile with a control byte of 80 or over used to control how map16 tiles tile in a tile object. Mainly used in tile objects for slopes. **Stage object**: An object that can be placed in a stage (e.g., a goomba). Also refered to as a **stage actor** or **sprite** (the latter being proscribed). Also may be truncated to object or sprite colliqually. **Stage object ID**: The ID of an object that can be placed in a stage. Also refered to as **stage actor ID** or **sprite ID** (the latter being proscribed). **Tile behavior**: How a map16 tile is meant to behave in a level when the player interacts with it. Also referred to as **tile type**. **Tile object**: A unit of map16 tiles that can be placed in a level and are set to tile in a specific fashion. NSMBe refers to these simply as **object**s. **3D** **tile**: A map16 tile which draws a texture instead of (or, in special cases, over) the 8x8 tiles present on the map16. # Level List Every level in the game accompanied by its file name and how many areas it has. | Filename | Level Name | Area Count | |----------|--------------------------|------------| | A01 | World 1-1 | 3 Areas | | A02 | World 1-2 | 3 Areas | | A03 | World 1-3 | 1 Area | | A04 | World 1-4 | 3 Areas | | A05 | World 1-5 | 2 Areas | | A06 | World 1-A | 2 Areas | | A07 | W1 Tower | 3 Areas | | A08 | W1 Castle | 3 Areas | | A09 | Cannon (W1 to W5) | 1 Area | | B01 | World 2-1 | 3 Areas | | B02 | World 2-2 | 2 Areas | | B03 | World 2-3 | 2 Areas | | B04 | World 2-4 | 2 Areas | | B05 | World 2-5 | 2 Areas | | B06 | World 2-6 | 2 Areas | | B07 | World 2-A | 3 Areas | | B08 | W2 Tower | 3 Areas | | B09 | W2 Castle | 3 Areas | | B10 | Cannon (W2 to W5) | 1 Area | | C01 | World 3-1 | 2 Areas | | C02 | World 3-2 | 2 Areas | | C03 | World 3-3 | 3 Areas | | C04 | World 3-A | 3 Areas | | C05 | World 3-B | 2 Areas | | C06 | World 3-C | 2 Areas | | C07 | W3 Ghost House | 3 Areas | | C08 | W3 Tower | 2 Areas | | C09 | W3 Castle | 2 Areas | | C10 | Cannon (W3 to W6) | 1 Area | | D01 | World 4-1 | 1 Area | | D02 | World 4-2 | 2 Areas | | D03 | World 4-3 | 2 Areas | | D04 | World 4-4 | 2 Areas | | D05 | World 4-5 | 3 Areas | | D06 | World 4-6 | 2 Areas | | D07 | World 4-A | 2 Areas | | D08 | W4 Ghost House | 3 Areas | | D09 | W4 Tower | 2 Areas | | D10 | W4 Castle | 2 Areas | | D11 | Cannon (W4 to W7) | 1 Area | | E01 | World 5-1 | 1 Area | | E02 | World 5-2 | 2 Areas | | E03 | World 5-3 | 2 Areas | | E04 | World 5-4 | 1 Area | | E05 | World 5-A | 2 Areas | | E06 | World 5-B | 1 Area | | E07 | World 5-C | 2 Areas | | E08 | W5 Ghost House | 3 Areas | | E09 | W5 Tower | 2 Areas | | E10 | W5 Castle | 2 Areas | | E11 | Cannon (W5 to W8) | 1 Area | | F01 | World 6-1 | 2 Areas | | F02 | World 6-2 | 2 Areas | | F03 | World 6-3 | 2 Areas | | F04 | World 6-4 | 1 Area | | F05 | World 6-5 | 2 Areas | | F06 | World 6-6 | 3 Areas | | F07 | World 6-A | 2 Areas | | F08 | World 6-B | 1 Area | | F09 | W6 Tower 1 | 2 Areas | | F10 | W6 Tower 2 | 2 Areas | | F11 | W6 Castle | 2 Areas | | F12 | Unused Cannon (W6 to W8) | 1 Area | | G01 | World 7-1 | 1 Area | | G02 | World 7-2 | 2 Areas | | G03 | World 7-3 | 2 Areas | | G04 | World 7-4 | 1 Area | | G05 | World 7-5 | 3 Areas | | G06 | World 7-6 | 3 Areas | | G07 | World 7-7 | 1 Area | | G08 | World 7-A | 2 Areas | | G09 | W7 Ghost House | 3 Areas | | G10 | W7 Tower | 2 Areas | | G11 | W7 Castle | 2 Areas | | H01 | World 8-1 | 2 Areas | | H02 | World 8-2 | 3 Areas | | H03 | World 8-3 | 2 Areas | | H04 | World 8-4 | 2 Areas | | H05 | World 8-5 | 2 Areas | | H06 | World 8-6 | 2 Areas | | H07 | World 8-7 | 1 Area | | H08 | World 8-8 | 2 Areas | | H09 | W8 Tower 1 | 2 Areas | | H10 | W8 Tower 2 | 2 Areas | | H11 | W8 Castle | 2 Areas | | H12 | W8 Final Castle | 3 Areas | | I01 | 1-Up Bonus Game | 1 Area | | I02 | Item Bonus Game | 1 Area | | I03 | Mega Mushroom Bonus Game | 1 Area | | I04 | Bottom Screen Background Chooser | 1 Area | | J01 | MvsL - SMB 1-1 | 1 Area | | J02 | MvsL - Underground | 1 Area | | J03 | MvsL - Ice World | 1 Area | | J04 | MvsL - Pipe World | 1 Area | | J05 | MvsL - Castle | 1 Area | | J06 | Unused Level 1 | 1 Area | | J07 | Unused Level 2 | 1 Area | | J08 | Unused Level 3 | 1 Area | | J09 | Unused Level 4 | 1 Area | | J10 | Unused Level 5 | 1 Area | # List of Activator Actors #### **1. General Event Controllers** - \[Class=020\] \[Object=101\] Event Controller - \[Class=087\] \[Object=155\] Special exit controller (warp entrance) - \[Class=137\] \[Object=164\] Event Controller AND - \[Class=138\] \[Object=165\] Event Controller OR - \[Class=139\] \[Object=166\] Event Controller Random - \[Class=140\] \[Object=167\] Event Controller Buffer - \[Class=141\] \[Object=168\] Event Controller Zone - \[Class=142\] \[Object=286\] Event Controller Sequencer - \[Class=255\] \[Object=169\] Spin Block (unused Actor 255) #### **2. Switches and Other Event Controllers** - \[Class=067\] \[Object=235\] Star Coin - \[Class=086\] \[Object=152\] Event trigger block - \[Class=151\] \[Object=034\] Red Coin Ring - \[Class=242\] \[Object=107\] ? Switch - \[Class=243\] \[Object=291\] Brick Block containing ? Switch - \[Class=244\] \[Object=066\] P Switch - \[Class=245\] \[Object=088\] Brick Block containing P Switch - \[Class=246\] \[Object=108\] ! Switch - \[Class=247\] \[Object=110\] Brick Block containing ! Switch (unused actor) - \[Class=265\] \[Object=041\] Bowser bridge switch (skull switch) #### **3. Triggerable Actors** - \[Class=067\] \[Object=235\] Star Coin - \[Class=079\] \[Object=103\] Dorrie - \[Class=080\] \[Object=106\] Red Coin - \[Class=092\] \[Object=192\] Coin Spawner (unused actor) - \[Class=161\] \[Object=068\] Lift moving up and down - \[Class=162\] \[Object=069\] Lift moving left and right - \[Class=174\] \[Object=078\] Lift moving one way once stood on - \[Class=183\] \[Object=099\] Four platform rickshaw lift - \[Class=206\] \[Object=197\] Tile Creator/Destroyer (Tile God) - \[Class=242\] \[Object=107\] ? Switch - \[Class=243\] \[Object=291\] Brick Block containing ? Switch - \[Class=244\] \[Object=066\] P Switch - \[Class=245\] \[Object=088\] Brick Block containing P Switch - \[Class=246\] \[Object=108\] ! Switch - \[Class=247\] \[Object=110\] Brick Block containing ! Switch (unused actor) - \[Class=263\] \[Object=292\] Event Activated Door - \[Class=265\] \[Object=041\] Bowser bridge switch (skull switch) - \[Class=276\] \[Object=218\] Auto-scrolling controller - \[Class=278\] \[Object=231\] Water - \[Class=279\] \[Object=234\] Lava - \[Class=281\] \[Object=259\] Poisoned Water # List of player animations| **Name** | **Value** | **anmFile** | **anmName** |
| Idle | 0x00 | plmario | wait |
| WalkSlow | 0x01 | plmario | walk |
| Walk | 0x02 | plmario | run |
| Dash | 0x03 | pl | b\_dash |
| DashFast | 0x04 | pl | b\_dash2 |
| Jump | 0x05 | pl | jump |
| JumpFall | 0x06 | pl | jump2 |
| JumpLand | 0x07 | pl | jumped |
| TripleJump\_unused | 0x08 | pl | 2jump1 |
| TripleJumpFall | 0x09 | pl | 2jump2 |
| TripleJumpLand | 0x0A | pl | 2jumped; also used as DoubleJumpLand |
| TripleJump | 0x0B | pl | roll\_jump |
| Skid | 0x0C | pl | turn |
| SkidTurn | 0x0D | pl | trned |
| GroundPoundRoll | 0x0E | pl | hipsr |
| GroundPoundFall | 0x0F | pl | hipat |
| GroundPoundLand | 0x10 | pl | hiped |
| Crouched | 0x11 | pl | stoop |
| ThrowFireball | 0x12 | pl | fire\_at |
| SlipBumpFall | 0x13 | pl | sdown |
| Sliding | 0x14 | plnovs | slip |
| StandUp | 0x15 | pl | sliped |
| SlipFall | 0x16 | plnovs | slipla |
| DiveLand | 0x17 | plnovs | sldctslpbk |
| DiveSlide | 0x18 | plnovs | lost |
| DiveStandUp | 0x19 | plnovs | roll (static) |
| RollPose | 0x1A | pl | roll (loop) |
| Roll | 0x1B | pl | carry\_start |
| CarryStart | 0x1C | pl | carry\_wait |
| CarryIdle | 0x1D | pl | carry\_walk |
| CarryWalk | 0x1E | pl | carry\_throw |
| CarryThrow | 0x1F | pl | scale\_up |
| MegaGrow | 0x20 | pl | wimp |
| Walljump | 0x21 | pl | wsld |
| WallSlide | 0x22 | pl | swim\_in; possibly unused |
| SwimStart | 0x23 | plnovs | swim\_wait |
| SwimIdle | 0x24 | plnovs | paddle\_1 |
| SwimIdle1 | 0x25 | plnovs | swim |
| Swim\_legs | 0x26 | plnovs | paddle\_2 |
| SwimPaddle2 | 0x27 | plnovs | paddle\_end |
| SwimPaddleEnd | 0x28 | plnovs | tree\_start |
| PoleGrab | 0x29 | plnovs | tree\_wait |
| PoleIdle | 0x2A | plnovs | tree\_wait |
| PoleClimb | 0x2B | plnovs | tree\_climb |
| PoleSlide | 0x2C | plnovs | tree\_pose |
| PushedFall | 0x2D | pl | shfdn |
| Push | 0x2E | pl | push |
| SpinJump | 0x2F | pl | spin\_jump |
| SpinJumpLand | 0x30 | pl | spin\_jump\_end |
| CeilingRopeGrab | 0x31 | plnovs | monkey\_start |
| CeilingRopeRightHandGrab | 0x32 | plnovs | monkey\_wait\_r |
| CeilingRopeLeftHandGrab | 0x33 | plnovs | monkey\_wait\_l |
| CeilingRopeRightHandMove | 0x34 | plnovs | monkey\_r\_to\_l |
| CeilingRopeLeftHandMove | 0x35 | plnovs | monkey\_l\_to\_r |
| LavaDamageJump | 0x36 | plnovs | firejmp |
| CrouchStart | 0x37 | pl | squat\_start |
| SwimCarry | 0x38 | plnovs | swim\_carry |
| SwimPaddleCarry | 0x39 | plnovs | paddle\_carry |
| SwimThrow | 0x3A | plnovs | swim\_throw |
| BumpedNormal | 0x3B | pl | sfbdn |
| BumpedHard | 0x3C | pl | sffdn |
| CannonShoot | 0x3D | pl | shoot |
| Shocked | 0x3E | plnovs | e\_shock |
| ShockedFall | 0x3F | plnovs | e\_down: unused |
| TightropeWalk | 0x40 | plnovs | rope\_walk |
| MegaWalk | 0x41 | pl2 | big\_walk |
| MegaJump | 0x42 | pl2 | big\_jump\_st |
| MegaJumpLand | 0x43 | pl2 | big\_jump\_ed |
| MegaGroundPoundRoll | 0x44 | pl2 | big\_hip\_st |
| MegaGroundPoundFall | 0x45 | pl2 | big\_hip\_at |
| MegaGroundPoundLand | 0x46 | pl2 | big\_hip\_ed |
| LedgeStand | 0x47 | plnovs | wall\_wait |
| LedgeStandMoveLeft | 0x48 | plnovs | wall\_walk\_l |
| LedgeStandMoveRight | 0x49 | plnovs | wall\_walk\_r |
| LedgeStandClimbDown | 0x4A | plnovs | hang\_start |
| LedgeGrabClimbUp | 0x4B | plnovs | hang\_up |
| LedgeGrabIdle | 0x4C | plnovs | hang\_wait |
| LedgeGrabMoveLeft | 0x4D | plnovs | hang\_walk\_l |
| LedgeGrabMoveRight | 0x4E | plnovs | hang\_walk\_r |
| VineRopeIdle | 0x4F | plnovs | rope\_swing |
| SpinDrill | 0x50 | pl2 | spin\_jump2 |
| JumpCombo2 | 0x51 | pl2 | jump\_b |
| JumpCombo3 | 0x52 | pl2 | jump\_c |
| JumpCombo4\_kick | 0x53 | pl2 | jump\_d |
| LongJump | 0x54 | pl2 | jump\_b\_1 |
| LongJumpFall | 0x55 | pl2 | jump\_b\_2 |
| DoubleJump | 0x56 | pl2 | 2jmp\_c\_1 |
| DoubleJumpFall | 0x57 | pl2 | 2jmp\_c\_2 |
| BackflipJump | 0x58 | pl2 | 2jmp\_d\_1; possibly unused |
| BackflipJumpFall | 0x59 | pl2 | 2jmp\_d\_2 |
| UnknownStarJump | 0x5A | pl2 | 2jmp\_e\_1 |
| UnknownStarJumpFall | 0x5B | pl2 | 2jmp\_e\_2 |
| JumpCombo5\_twirl | 0x5C | pl2 | jump\_e |
| PipeEntrance | 0x5D | pl2 | low\_walk |
| DeadFall | 0x5E | pl2 | dead |
| DeadPose | 0x5F | pl2 | dead\_pose |
| GoalJump | 0x60 | plnovs | goal\_jump |
| GoalCap | 0x61 | plnovs | goal\_puton\_cap |
| DoorWalk | 0x62 | pl2 | door\_walk |
| BattleGoalJump | 0x63 | plnovs | bt\_goal\_jmp |
| BattleGoalOut | 0x64 | plnovs | bt\_goal\_out |
| MegaJumpFall | 0x65 | pl2 | big\_jmp\_2 |
| TightropeIdle | 0x66 | plnovs | rope\_wait |
| TightropeJumpLand | 0x67 | plnovs | rope\_jump\_ed |
| MiniWalk | 0x68 | pl2 | zero\_g\_walk |
| MiniJump | 0x69 | pl2 | zero\_g\_jump |
| MiniJumpFall | 0x6A | pl2 | zero\_g\_jump2 |
| MiniJumpLand | 0x6B | pl2 | zero\_g\_jump\_ed |
| UnusedSpinJumpOff | 0x6C | pl2 | spin\_jump\_off; possibly unused |
| UnusedSpinJump | 0x6D | pl2 | spin\_jump\_st |
| Shell | 0x6E | pl2 | shell\_in |
| StarRoll | 0x6F | pl2 | star\_roll |
| FenceMoveVertical | 0x70 | plnovs | net\_walk1 |
| FenceIdle | 0x71 | plnovs | net\_wait |
| UnusedDamageFall | 0x72 | plnovs | e\_damage1 |
| UnusedDamageLand | 0x73 | plnovs | e\_damage2 |
| FenceSlam | 0x74 | plnovs | net\_attack |
| FenceMoveHorizontal | 0x75 | plnovs | net\_walk2 |
| LedgeJump | 0x76 | plnovs | w\_jump1 |
| LedgeJumpFall | 0x77 | plnovs | w\_jump2 |
| LedgeJumpLand | 0x78 | plnovs | w\_jump\_ed |
| LedgeGrab | 0x79 | plnovs | jump\_hang |
| SwimWalk | 0x7A | plnovs | swim\_walk |
| SwimStanding | 0x7B | plnovs | swim\_standing |
| Buried | 0x7C | plnovs | buried |
| BuriedStandUp | 0x7D | plnovs | buried\_ed |
| BuriedFall | 0x7E | plnovs | buried\_st |
| BuriedDamage | 0x7F | plnovs | buried\_damage |
| MegaSitCrouch | 0x80 | pl2 | big\_hip\_squat |
| WaterDeadFall | 0x81 | plnovs | swim\_dead |
| TightropeUnbalanced | 0x82 | plnovs | rope\_wait2 |
| MegaIdle | 0x83 | pl2 | big\_wait |
| BossCallPeach | 0x84 | plnovs | find |
| BossStarePeach | 0x85 | plnovs | find\_loop |
| BossReactPeach | 0x86 | plnovs | find\_surprise |
| BossWin | 0x87 | plnovs | boss\_key\_get |
| MegaWin | 0x88 | plnovs | big\_goal |
| FinalBossEnd | 0x89 | plnovs | m\_kiss |
| FinalBossPeach | 0x8A | plnovs | m\_fall\_wait |
| FinalBossCap | 0x8B | plnovs | m\_escort |
| FinalBossKiss | 0x8C | plnovs | m\_shy |
| GoalJumpLand | 0x8D | plnovs | goal\_jump\_ed |
| BossIdle | 0x8E | plnovs | bt\_wait |
| BossStartled | 0x8F | plnovs | bt\_surprise |
| BeanStalkMove | 0x90 | plnovs | pea\_plant |
| BeanStalkGrab | 0x91 | plnovs | pea\_plant\_st |
| BeanStalkIdle | 0x92 | plnovs | pea\_plant\_wait |
| BowserJrWin | 0x93 | plnovs | jr\_clear |
| Particle Id | In-Game Effect | Notes |
| 0 | toadsworth creates toad house block(s) – part 2 red toad house disappears – part 3 | |
| 1 | ||
| 2 | ||
| 3 | something in the intro | |
| 4 | ||
| 5 | whomp destroyed – part 1 | |
| 6 | whomp destroyed – part 2 | |
| 7 | whomp destroyed – part 3 | |
| 8 | ||
| 9 | whomp slams ground – part 1 | |
| A | whomp slams ground – part 2 | |
| B | whomp slams ground – part 3 | |
| C | ||
| D | mario jumps/lands on world map | also used for flying ? blocks, hammer bros and bowser jr on the world map? |
| E | mario goes into castle on world map | |
| F | ||
| 10 | ||
| 11 | something todo with end-of-boss cutscene or world map? | |
| 12 | ||
| 13 | bob-omb explodes - part 1 | sometimes spawned (off-screen?) on world map |
| 14 | bob-omb explodes - part 2 | sometimes spawned (off-screen?) on world map |
| 15 | bob-omb explodes - part 3 | |
| 16 | bob-omb explodes - part 4 | |
| 17 | bob-omb explodes - part 5 | |
| 18 | bob-omb explodes - part 6 | |
| 19 | bob-omb explodes - part 7 | |
| 1A | ||
| 1B | red toad house disappears – part 1 | |
| 1C | red toad house disappears – part 2 thwomp hits ground – part 1 | |
| 1D | thwomp hits ground – part 2 | |
| 1E | big thwomp hits ground – part 1 | |
| 1F | big thwomp hits ground – part 2 | |
| 20 | big thwomp hits ground – part 3 | |
| 21 | get mega mushroom – part 1 | |
| 22 | get mega mushroom – part 2 | |
| 23 | get mega mushroom – part 3 | |
| 24 | get mega mushroom – part 4 | |
| 25 | get mega mushroom – part 5 | |
| 26 | get mega mushroom – part 6 | |
| 27 | get mega mushroom – part 7 | |
| 28 | get mega mushroom – part 8 | |
| 29 | get mega mushroom – part 9 | |
| 2A | get mega mushroom – part 10 | |
| 2B | get mega mushroom – part 11 | |
| 2C | get mega mushroom – part 12 | |
| 2D | ||
| 2E | ||
| 2F | ||
| 30 | ||
| 31 | ||
| 32 | ||
| 33 | ||
| 34 | ||
| 35 | ||
| 36 | ||
| 37 | ||
| 38 | ||
| 39 | mega mario walks right – alternating with 3A | |
| 3A | mega mario walks right – alternating with 39 | |
| 3B | ||
| 3C | mega mario walks left – alternating with 3D | |
| 3D | mega mario walks left – alternating with 3C / goal fireworks related? – part 6 | |
| 3E | goal fireworks related? – part 7 | |
| 3F | goal fireworks related? – part 8 | |
| 40 | goal fireworks related? – part 9 | |
| 41 | goal fireworks related? – part 10 | |
| 42 | ||
| 43 | ||
| 44 | ||
| 45 | ||
| 46 | ||
| 47 | goal fireworks related? – part 1 | |
| 48 | goal fireworks related? – part 2 | |
| 49 | goal fireworks related? – part 3 | |
| 4A | goal fireworks related? – part 4 | |
| 4B | goal fireworks related? – part 5 | |
| 4C | splunkin stomped on for the second time – part 1 | |
| 4D | splunkin stomped on for the second time – part 2 | |
| 4E | splunkin stomped on for the second time – part 3 | |
| 4F | splunkin stomped on for the first time – part 1 | |
| 50 | splunkin stomped on for the first time – part 2 | |
| 51 | bowser jr lands after being defeated | |
| 52 | ||
| 53 | ||
| 54 | ||
| 55 | ||
| 56 | ||
| 57 | ||
| 58 | ||
| 59 | ||
| 5A | ||
| 5B | ||
| 5C | ||
| 5D | ||
| 5E | ||
| 5F | ||
| 60 | ||
| 61 | ||
| 62 | ||
| 63 | ||
| 64 | ||
| 65 | ||
| 66 | ||
| 67 | ||
| 68 | ||
| 69 | ||
| 6A | ||
| 6B | ||
| 6C | ||
| 6D | ||
| 6E | ||
| 6F | ||
| 70 | ||
| 71 | ||
| 72 | ||
| 73 | jump onto cliff ledge from normal ground | |
| 74 | ||
| 75 | ||
| 76 | item/object appears/disappears – part 1 | |
| 77 | item/object appears/disappears – part 2 | |
| 78 | item/object appears/disappears – part 3 | |
| 79 | enemy/mega goomba “popped” – part 1 boss shutter piece spawned/destroyed – part part 1 bowser bridge piece destroyed – part 1 | |
| 7A | enemy/mega goomba “popped” – part 2 boss shutter piece spawned/destroyed – part part 2 bowser bridge piece destroyed – part 2 | |
| 7B | ||
| 7C | ||
| 7D | ||
| 7E | mario “twinkles” in distance after being fired by warp cannon | |
| 7F | ||
| 80 | ||
| 81 | ||
| 82 | ||
| 83 | ||
| 84 | ||
| 85 | ||
| 86 | run into enemy as mega mario | |
| 87 | ||
| 88 | ||
| 89 | ||
| 8A | ||
| 8B | ||
| 8C | ||
| 8D | ||
| 8E | ||
| 8F | ||
| 90 | ||
| 91 | ||
| 92 | ||
| 93 | ||
| 94 | ||
| 95 | blue coin collected | |
| 96 | mario breaks free from under fallen snow – part 1 | |
| 97 | mario breaks free from under fallen snow – part 2 | |
| 98 | ||
| 99 | ||
| 9A | ||
| 9B | ||
| 9C | ||
| 9D | mario stomps on Crowber – part 1 | |
| 9E | mario stomps on Crowber – part 2 | |
| 9F | mario does Drill Stomp straight down | |
| A0 | bowser jr/blockhopper jumps/lands | |
| A1 | object enters/exits lava – part 1 | |
| A2 | object enters/exits lava – part 2 | |
| A3 | object enters/exits poison water – part 1 | |
| A4 | object enters/exits poison water – part 2 | |
| A5 | object enters/exits water – part 1 | |
| A6 | object enters/exits water – part 2 | |
| A7 | ||
| A8 | mario lands on soft cloud platform | |
| A9 | mario lands on quicksand | |
| AA | mario lands on sinking snow – part 1 | |
| AB | mario lands on sinking snow – part 2 | |
| AC | mario fireball hits enemy/wall – part 1 | |
| AD | mario fireball hits enemy/wall – part 2 | |
| AE | stomp on wiggler | |
| AF | ||
| B0 | ||
| B1 | ||
| B2 | kab-omb explodes – part 1 | |
| B3 | kab-omb explodes – part 2 | |
| B4 | kab-omb explodes – part 3 | |
| B5 | ||
| B6 | ground-pound on koopa troopa/buzzy beetle – part 1 | |
| B7 | ground-pound on koopa troopa/buzzy beetle – part 2 | |
| B8 | ground-pound on koopa troopa/buzzy beetle – part 3 | |
| B9 | ground-pound on koopa troopa/buzzy beetle – part 4 | |
| BA | “pop” enemy with ground-pound – part 1 | |
| BB | “pop” enemy with ground-pound – part 2 | |
| BC | “pop” enemy with ground-pound – part 3 | |
| BD | ||
| BE | ||
| BF | ||
| C0 | ||
| C1 | ||
| C2 | ||
| C3 | ||
| C4 | ||
| C5 | ||
| C6 | ||
| C7 | ||
| C8 | ||
| C9 | ||
| CA | mario stomps lakitu | |
| CB | mario lands in lakitu’s cloud | |
| CC | ||
| CD | ||
| CE | ||
| CF | ||
| D0 | bill blaster fires bullet bill – part 1 | but not rotating bill blaster |
| D1 | bill blaster fires bullet bill – part 2 | “ |
| D2 | ground-pound on koopa troopa/buzzy beetle – part 5 | |
| D3 | ground-pound on koopa troopa/buzzy beetle – part 6 | |
| D4 | ||
| D5 | ||
| D6 | ||
| D7 | ||
| D8 | toadsworth creates toad house block(s) – part 1 | |
| D9 | ||
| DA | ||
| DB | skeeter bomb enters water or maybe skeeter spawns bomb – part 3 | |
| DC | skeeter bomb enters water or maybe skeeter spawns bomb – part 4 | |
| DD | ||
| DE | ||
| DF | ||
| E0 | ||
| f8 | Mario ground pound Falling snow hits ground | |
| E2 | Mario lands after triple jump Mario ground pounds on mummipokey | |
| E3 | ||
| E4 | mario goes out of water – part 1 | |
| E5 | mario goes out of water – part 2 | |
| E6 | mario goes out of water – part 3 | |
| E7 | mario exits water – part 1 | |
| E8 | mario exits water – part 2 | |
| E9 | mario exits water – part 3 | |
| EA | get red coin | |
| EB | ||
| EC | ||
| ED | ||
| EE | mario lands on ground in deep water – part 1 | |
| EF | mario lands on ground in deep water – part 2 | |
| F0 | ||
| F1 | ||
| F2 | ||
| F3 | mario flies off Spin Block/out of tornado – part 1 | |
| F4 | mario flies off Spin Block/out of tornado – part 2 | |
| F5 | something todo with spinning/drill stomp – part 1 | |
| F6 | something todo with spinning/drill stomp – part 2 | |
| F7 | something todo with spinning/drill stomp – part 3 | |
| F8 | get star coin – part 1 | |
| F9 | get star coin – part 2 | |
| FA | get star coin – part 3 | |
| FB | ||
| FC | ||
| FD | ?/p/! switch pressed – part 1 | |
| FE | ?/p/! switch pressed (alt – part upside down or underwater only?) – part 1 | |
| FF | ?/p/! switch pressed (alt – part upside down or underwater only?) – part 2 | |
| 100 | ?/p/! switch pressed – part 2 | |
| 101 | ||
| 102 | ||
| 103 | mario does Drill Stomp when small mario | |
| 104 | mario wall jump from right – part 1 | |
| 105 | mario wall jump from right – part 2 | |
| 106 | mario wall jump from right – part 3 | |
| 107 | mario wall jump from left – part 1 | |
| 108 | mario wall jump from left – part 2 | |
| 109 | mario wall jump from left – part 3 | |
| 10A | ||
| 10B | ||
| 10C | mario lands on /starts to hang off of cliff edge | |
| 10D | ||
| 10E | mario goes into water in 1-A start section – part 1 cheepskipper enters/exits water – part 1 | |
| 10F | mario goes into water in 1-A start section – part 2 cheepskipper enters/exits water – part 2 | |
| 110 | mario goes into water in 1-A start section – part 3 spike pillar goes into water – part 1 | |
| 111 | spike pillar goes into water – part 2 | |
| 112 | ||
| 113 | cheepskipper enters/exits water – part 3 | |
| 114 | mario goes into water in 3-Castle boss room – part 1 | |
| 115 | mario goes into water in 3-Castle boss room – part 2 | |
| 116 | mario goes into water in 3-Castle boss room – part 3 | |
| 117 | mario punches fence – part 1 | |
| 118 | mario punches fence – part 2 |
| ID | ID (dec) | Description |
|---|---|---|
| 24-28 | 36-40 | Causes the stage rotation used in 8-Final Castle if byte 4 of block 4 (tileset block) is set to 0xFF. |
| 3E | 62 | Blue coin trail while event is active. |
| 46 | 70 | Causes the unused "faded circle" screen transition to be used when using an entrance or exit. **Unused** |
| F3 | 243 | Partial Starman effects. **Unused?** |
| F4 | 244 | Partial Mega Mushroom effects. **Unused?** |
| EB | 235 | Make inventory contain item with no icon. Crashes when you release the item and it can't be replaced by other items. Maybe defunct unused item? **Unused?** |
| F7 | 247 | Locks camera into bottom left of view. Mario isn't forced to be inside this camera, but he can't interact with actors outside the camera. **Unused?** |
| Closest ASCII Character | Character ID | Character Used? | SFX ID | SFX Name | SFX Usage Outside of Credits |
|---|---|---|---|---|---|
| A | 0x0 | Yes | 0x34 | SE\_EMY\_KPJR\_DAMAGE\_V | Bowser Jr. stomped (voice) |
| B | 0x1 | Yes | 0x35 | SE\_EMY\_KPJR\_CRY\_V | Bowser Jr. defeated |
| C | 0x2 | Yes | 0x39 | SE\_EMY\_KPJR\_GUARD\_ON | Bowser Jr. go into shell |
| D | 0x3 | Yes | 0x6e | SE\_EMY\_KURIBO\_FUMU | Stomp on enemy / Stomp on other player |
| E | 0x4 | Yes | 0x6f | SE\_EMY\_KAME\_FUMU | Stomp on Koopa / Kab-omb / Skeeter (?) |
| F | 0x5 | Yes | 0x70 | SE\_EMY\_KAME\_KERU | Enemy defeated by fireball/Shell mario in shell/Ground-pound/Flagpole / Mega Goomba defeated by Mini Player / Hanging ? Block hit from side / Item destroyed in lava / Block spawned by tile creator sprite |
| G | 0x6 | Yes | 0xf5 | SE\_VOC\_OPDM\_YES | Player reacts to completion of logo |
| H | 0x7 | Yes | 0xfa | SE\_VOC\_OPDM\_AWAWA\_01 | Player reacts to thunder strike |
| I | 0x8 | Yes | 0x128 | SE\_OBJ\_GOAL\_HANABI | Goal firework |
| J | 0x9 | Yes | 0x103 | SE\_AMB\_OPDM\_BABEL | Logo crashes down |
| K | 0xa | Yes | 0x123 | SE\_OBJ\_GET\_DRAGON\_COIN | Get Star Coin |
| L | 0xb | Yes | 0x10b | SE\_VOC\_OPDM\_PEACH\_HELP | |
| M | 0xc | Yes | 0x166 | SE\_PLY\_CHANGE\_NORMAL | Turn back to normal from Mega |
| N | 0xd | Yes | 0x14f | SE\_PLY\_HIP\_ATTACK\_M | Mini ground-pound |
| O | 0xe | Yes | 0x149 | SE\_PLY\_JUMP\_3 | Mini Player jumps |
| P | 0xf | Yes | 0x152 | SE\_PLY\_DOWN | Player loses a life |
| Q | 0x10 | No | 0x153 | SE\_PLY\_SWIM | Player swim |
| R | 0x11 | Yes | 0x168 | SE\_PLY\_THROW\_FIRE | Fire Player/Fire Bros – throw fireball |
| S | 0x12 | Yes | 0x16c | SE\_OBJ\_GET\_COIN | Get coin |
| T | 0x13 | Yes | 0x171 | SE\_OBJ\_DOKAN\_BREAK | Pipe/Bill Blaster smashed from the side as Mega Player |
| U | 0x14 | Yes | 0x172 | SE\_PLY\_JUMPDAI | Jump on trampoline/Pot in final boss intro jumps |
| V | 0x15 | Yes | 0x17b | SE\_SYS\_ONE\_UP | Get 1-up mushroom |
| W | 0x16 | Yes | 0x17c | SE\_SYS\_ONE\_DOWN | Unused |
| X | 0x17 | Yes | 0x1a9 | SE\_OBJ\_TSUBO\_BREAK | Pot in final boss intro shatters |
| Y | 0x18 | Yes | 0x1ab | SE\_VOC\_M\_HOEE | Mario embarrassed after being kissed by peach |
| Z | 0x19 | Yes | 0x1ad | SE\_VOC\_P\_THANK\_YOU | Peach thanks Player after battle |
| a | 0x1a | Yes | 0x34 | SE\_EMY\_KPJR\_DAMAGE\_V | Bowser Jr. stomped (voice) |
| b | 0x1b | Yes | 0x35 | SE\_EMY\_KPJR\_CRY\_V | Bowser Jr. defeated |
| c | 0x1c | Yes | 0x39 | SE\_EMY\_KPJR\_GUARD\_ON | Bowser Jr. go into shell |
| d | 0x1d | Yes | 0x6e | SE\_EMY\_KURIBO\_FUMU | Stomp on enemy / Stomp on other player |
| e | 0x1e | Yes | 0x6f | SE\_EMY\_KAME\_FUMU | Stomp on Koopa / Kab-omb / Skeeter (?) |
| f | 0x1f | Yes | 0x70 | SE\_EMY\_KAME\_KERU | Enemy defeated by fireball/Shell mario in shell/Ground-pound/Flagpole / Mega Goomba defeated by Mini Player / Hanging ? Block hit from side / Item destroyed in lava / Block spawned by tile creator sprite |
| g | 0x20 | Yes | 0xf5 | SE\_VOC\_OPDM\_YES | Player reacts to completion of logo |
| h | 0x21 | Yes | 0xfa | SE\_VOC\_OPDM\_AWAWA\_01 | Player reacts to thunder strike |
| i | 0x22 | Yes | 0x128 | SE\_OBJ\_GOAL\_HANABI | Goal firework |
| j | 0x23 | Yes | 0x103 | SE\_AMB\_OPDM\_BABEL | Logo crashes down |
| k | 0x24 | Yes | 0x123 | SE\_OBJ\_GET\_DRAGON\_COIN | Get Star Coin |
| l | 0x25 | Yes | 0x10b | SE\_VOC\_OPDM\_PEACH\_HELP | |
| m | 0x26 | Yes | 0x166 | SE\_PLY\_CHANGE\_NORMAL | Turn back to normal from Mega |
| n | 0x27 | Yes | 0x14f | SE\_PLY\_HIP\_ATTACK\_M | Mini ground-pound |
| o | 0x28 | Yes | 0x149 | SE\_PLY\_JUMP\_3 | Mini Player jumps |
| p | 0x29 | Yes | 0x152 | SE\_PLY\_DOWN | Player loses a life |
| q | 0x2a | Yes | 0x153 | SE\_PLY\_SWIM | Player swim |
| r | 0x2b | Yes | 0x168 | SE\_PLY\_THROW\_FIRE | Fire Player/Fire Bros – throw fireball |
| s | 0x2c | Yes | 0x16c | SE\_OBJ\_GET\_COIN | Get coin |
| t | 0x2d | Yes | 0x171 | SE\_OBJ\_DOKAN\_BREAK | Pipe/Bill Blaster smashed from the side as Mega Player |
| u | 0x2e | Yes | 0x172 | SE\_PLY\_JUMPDAI | Jump on trampoline/Pot in final boss intro jumps |
| v | 0x2f | Yes | 0x17b | SE\_SYS\_ONE\_UP | Get 1-up mushroom |
| w | 0x30 | Yes | 0x17c | SE\_SYS\_ONE\_DOWN | Unused |
| x | 0x31 | No | 0x1a9 | SE\_OBJ\_TSUBO\_BREAK | Pot in final boss intro shatters |
| y | 0x32 | Yes | 0x1ab | SE\_VOC\_M\_HOEE | Mario embarrassed after being kissed by peach |
| z | 0x33 | Yes | 0x1ad | SE\_VOC\_P\_THANK\_YOU | Peach thanks Player after battle |
| À | 0x34 | No | 0x36 | SE\_EMY\_KPJR\_UH | Bowser Jr. “wakes up” after battle |
| Á | 0x35 | No | 0x37 | SE\_EMY\_KPJR\_LAND | Bowser Jr. land after jump attack |
| Â | 0x36 | No | 0x3b | SE\_EMY\_KPJR\_GUARD\_OFF | Bowser Jr. stop hiding in shell |
| Ä | 0x37 | No | 0x3c | SE\_EMY\_KPJR\_DAMAGE | Bowser Jr. stomped |
| Ç | 0x38 | No | 0x3d | SE\_EMY\_KPJR\_PURUPURU | Bowser Jr. shakes head after waking up after battle |
| È | 0x39 | No | 0x77 | SE\_EMY\_KAME\_HIT\_7 | Defeat 7th and subsequent enemy in a row while sliding |
| É | 0x3a | No | 0xf6 | SE\_VOC\_OPDM\_UN\_01 | Player looks up at logo |
| Ê | 0x3b | No | 0xfc | SE\_VOC\_OPDM\_AWAWA\_02 | |
| Ë | 0x3c | No | 0xff | SE\_VOC\_OPDM\_HOEE | |
| Ì | 0x3d | No | 0x10a | SE\_VOC\_OPDM\_PEACH\_CRY | |
| Í | 0x3e | No | 0x101 | SE\_AMB\_OPDM\_WARBLE | Intro birds |
| Î | 0x3f | No | 0x102 | SE\_AMB\_OPDM\_THUNDER | Thunder strike on castle |
| Ï | 0x40 | No | 0x104 | SE\_EMY\_OPDM\_KPJR\_FOOT | Bowser Jr. sneaks up on peach |
| Ñ | 0x41 | No | 0x109 | SE\_PLY\_OPDM\_MA\_HIT | |
| Ò | 0x42 | No | 0x10d | SE\_OBJ\_OPDM\_NEW\_FALL | |
| Ó | 0x43 | No | 0x10e | SE\_OBJ\_OPDM\_NEW\_SET | |
| Ô | 0x44 | No | 0x10f | SE\_OBJ\_OPDM\_LOGO\_FALL\_L | |
| Ö | 0x45 | No | 0x110 | SE\_OBJ\_OPDM\_LOGO\_FALL\_S | |
| Ù | 0x46 | No | 0x170 | SE\_OBJ\_COIN\_BOUND | Loose coin hit ground |
| Ú | 0x47 | No | 0x174 | SE\_OBJ\_ITEM\_APPEAR | Item out of block |
| Û | 0x48 | No | 0x13a | SE\_SYS\_MID\_POINT | Pass checkpoint |
| Ü | 0x49 | No | 0x13e | SE\_SYS\_HURRY\_UP | |
| ß | 0x4a | No | 0x14d | SE\_PLY\_HIP\_ATTACK | Ground-pound hits ground / Ground-pound hits other player |
| à | 0x4b | No | 0x36 | SE\_EMY\_KPJR\_UH | Bowser Jr. “wakes up” after battle |
| á | 0x4c | No | 0x37 | SE\_EMY\_KPJR\_LAND | Bowser Jr. land after jump attack |
| â | 0x4d | No | 0x3b | SE\_EMY\_KPJR\_GUARD\_OFF | Bowser Jr. stop hiding in shell |
| ä | 0x4e | No | 0x3c | SE\_EMY\_KPJR\_DAMAGE | Bowser Jr. stomped |
| ç | 0x4f | No | 0x3d | SE\_EMY\_KPJR\_PURUPURU | Bowser Jr. shakes head after waking up after battle |
| è | 0x50 | No | 0x77 | SE\_EMY\_KAME\_HIT\_7 | Defeat 7th and subsequent enemy in a row while sliding |
| é | 0x51 | No | 0xf6 | SE\_VOC\_OPDM\_UN\_01 | Player looks up at logo |
| ê | 0x52 | No | 0xfc | SE\_VOC\_OPDM\_AWAWA\_02 | |
| ë | 0x53 | No | 0xff | SE\_VOC\_OPDM\_HOEE | |
| ì | 0x54 | No | 0x10a | SE\_VOC\_OPDM\_PEACH\_CRY | |
| í | 0x55 | No | 0x101 | SE\_AMB\_OPDM\_WARBLE | Intro birds |
| î | 0x56 | No | 0x102 | SE\_AMB\_OPDM\_THUNDER | Thunder strike on castle |
| ï | 0x57 | No | 0x104 | SE\_EMY\_OPDM\_KPJR\_FOOT | Bowser Jr. sneaks up on peach |
| ñ | 0x58 | No | 0x109 | SE\_PLY\_OPDM\_MA\_HIT | |
| ò | 0x59 | No | 0x10d | SE\_OBJ\_OPDM\_NEW\_FALL | |
| ó | 0x5a | No | 0x10e | SE\_OBJ\_OPDM\_NEW\_SET | |
| ô | 0x5b | No | 0x10f | SE\_OBJ\_OPDM\_LOGO\_FALL\_L | |
| ö | 0x5c | No | 0x110 | SE\_OBJ\_OPDM\_LOGO\_FALL\_S | |
| ù | 0x5d | No | 0x170 | SE\_OBJ\_COIN\_BOUND | Loose coin hit ground |
| ú | 0x5e | No | 0x174 | SE\_OBJ\_ITEM\_APPEAR | Item out of block |
| û | 0x5f | No | 0x13a | SE\_SYS\_MID\_POINT | |
| ü | 0x60 | No | 0x13e | SE\_SYS\_HURRY\_UP | |
| . | 0x61 | No | 0x15b | SE\_PLY\_FOOTNOTE\_H | |
| • | 0x62 | No | 0x15e | SE\_PLY\_FOOTNOTE\_H | |
| \_ | 0x63 | No | 0x16a | SE\_PLY\_CHANGE\_SMALL | Enter/exit pipe / Enter warp / lose powerup |
| - | 0x64 | No | 0x163 | SE\_PLY\_CHANGE\_BIG | Get powerup / Collect Starman as Mega Player |
| \[another type of line\] | 0x65 | No | 0x167 | SE\_PLY\_CHANGE\_MAME | Become mini |
| & | 0x66 | Yes | 0x177 | SE\_OBJ\_BLOCK\_BREAK | Player break brick block / boss shutter block spawn/break / block broken by tile destroyer sprite / bridge destroyed in Bowser/Big Bowser boss / peach platform destroyed in final boss / Bob-omb destroy block / Big Unagi destroy block / Mummipokey sand ball break |
| ' | 0x67 | Yes | 0x178 | SE\_PLY\_STAR\_ATTACK | Mega Player touch enemy/Big Player touch Mini Goomba / Big Unagi destroy block / Broozer destroy block |
TODO: - Use these to improve/correct the documentation here and/or in NSMBe's object xml - Add more setups
Zone ID 0 should be interchangeable with any other ID, but this needs to be tested.| **Object Settings** | **Trigger Requirements** |
| [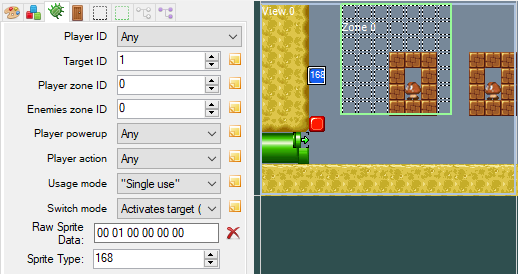](https://bookstack.nsmbcentral.net/uploads/images/gallery/2025-05/mmwimage.png) Player zone ID: 0 Enemies zone ID: 0 | The event will only trigger when the player enters zone 0 after all enemies in said zone are destroyed. |
| [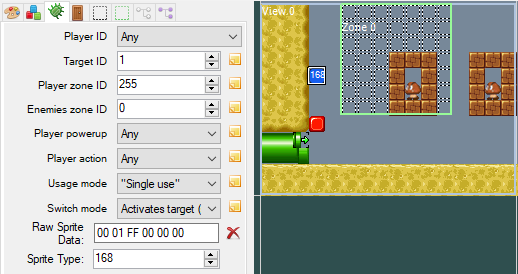](https://bookstack.nsmbcentral.net/uploads/images/gallery/2025-05/EZBimage.png) Player zone ID: 255 Enemies zone ID: 0 | The event will trigger when all enemies in zone 0 are destroyed. |
| [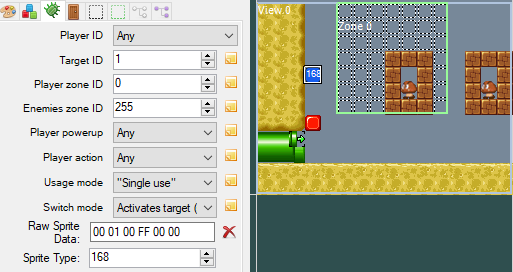](https://bookstack.nsmbcentral.net/uploads/images/gallery/2025-05/l8Mimage.png) Player zone ID: 0 Enemies zone ID: 255 | The event will trigger when the player enters zone 0. |
| [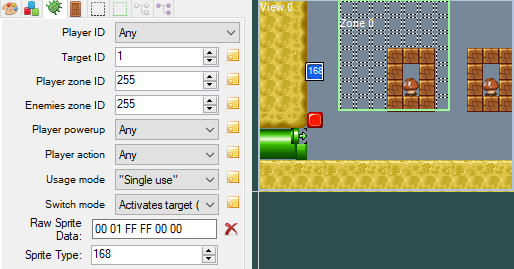](https://bookstack.nsmbcentral.net/uploads/images/gallery/2025-05/CAAimage.png) Player zone ID: 255 Enemies zone ID: 255 | The event will trigger once the player finishes entering the view. |
TODO:
- More filetypes
- Double-check course data block names
- Perhaps info on control bytes and slope controllers?
Modding MvsL is significantly more difficult than modding Singleplayer levels. If you're just getting started with modding the game, you might want to start [here](https://bookstack.nsmbcentral.net/books/new-super-mario-bros/page/modding-101-creating-a-bare-bones-level)
## FaQ > ##### *How do I play Mario vs Luigi hacks?* - The easiest way to play an MvsL hack on real hardware is by using “Multi-cart” - This requires that you own **two** flashcards (such as an R4 Card). - To set this method up, simply put **the same ROM** on both flashcards. Then, in the game, choose the option to “Compete with another New Super Mario Bros. Owner” and play MvsL as you normally would. - If you do not have access to two flashcards, then you have two, more difficult, options remaining - Your first option is to try and use a hacked NDS firmware that bypasses Download Play's signature check 1. Download [firmware.nds](https://bookstack.nsmbcentral.net/attachments/4) and put it on your flashcard. 2. Open this ROM on the DS you will launch Download Play from. 3. Now, eject the flashcard from the DS you just ran the ROM on. (This will not cause your DS to freeze) 4. Finally, put the flashcard back in the other DS. 5. Once you have done this, you can run the ROM of the MvsL hack and select “Play with someone who doesn't own New Super Mario Bros” - If the firmware ROM does not work on your flashcard, try this one instead. - Your final option is to use normal DS Download Play with “DLP Mode” in NSMBe 5 1. Open a **clean (unedited) ROM** 2. Open it in NSMBe 3. After you open the ROM, go to Tools and check “Enable DLP-friendly mode” 4. Now, you can make whatever changes you want to the ROM 5. When you're done, you can play with another DS through DS Download Play like you normally would using the “Play with someone who doesn't own New Super Mario Bros” option - If the game hangs at the Nintendo logo, you might have missed a step. Double check you did everything and try again with another **clean** ROM - If the DS freezes with a black screen after you select a level it can mean one of two things: - Your flashcard is not compatible with this method. - Some flashcards don't like firmware.nds. Try using [firmwarefix.nds](https://bookstack.nsmbcentral.net/attachments/5) instead. - There's something wrong with the level that is making the game freeze > ##### *My level crashes, what do I do now?* - If you are not using any Code Hacks, then here are some things to consider 1. Have you changed any object banks? This causes MvsL to crash so you need to change the object banks back to whatever the level had originally. 2. Double-check that you are not using an object that has been confirmed to crash MvsL. There is a table later on this page that shows what objects are compatible with MvsL. 3. Have you changed the number of Battle Stars that are in the level? Changing the number of Battle Stars in a level can cause MvsL to crash, and you will need to restore the original amount of Battle Stars the level had. > ##### *My level crashes, but I'm using Code Hacks!* - Even with Code Hacks, not all objects work in MvsL. Take a look at the table at the end of the page to see if all of the objects you're using are compatible with MvsL. > ##### *My level makes us de-sync, what's going on?* - Because of the nature of how multiplayer works in this game, the Random Number Generator seed is only synchronized once when the connection is established. Only inputs are sent from one console to another, so the code must account for both player actors. If code does not account for each player, the games will become de-synced. For example, if an enemy was coded to imply get the values of a player on the local console, it will read different data on each console. This causes the enemy to act differently on each DS, thus causing a de-sync. Implementation example: ```c++ // Enemy reads only the position of its own console player playerPositionX = Game::getPlayer(Game::localPlayerID)->position.x; // Now the position that was read is different between both consoles // for this enemy and he will behave differently for each console! // This is very bad! // A solution would be to get the position of the closest player playerPositionX = enemy->getClosestPlayer(nullptr, nullptr)->position.x; // This way, it gets the closest player instead of its console player ``` ## Object Compatibility (Vanilla) - These objects will work in MvsL regardless of if you are using code hacks - Most of the objects in this list are objects that are already used in MvsL| Object ID | Actor Name |
|---|---|
| 23 | Pipe Piranha Plant (Facing up) |
| 24 | Pipe Piranha Plant (Facing down) |
| 25 | Pipe Piranha Plant (Facing right) |
| 26 | Pipe Piranha Plant (Facing left) |
| 27 | Bill Blaster (Bullet Bill launcher) |
| 28 | Bob-omb |
| 71 | Stonewall moving up & down |
| 72 | Stonewall moving left & right |
| 95 | Spin Block |
| 148 | Goomba |
| 149 | Koopa Troopa |
| 210 | MvsL Big Star |
| Object ID | Object Name | Compatibility | Notes |
| 0 | Crash Object (Player Actor) | Crash | Needs the clone code hack |
| 1 | Crash Object (Player Actor) | Crash | Needs the clone code hack |
| 2 | Crash Object (Player Actor) | Crash | Needs the clone code hack |
| 3 | Crash Object (Player Actor) | Crash | Needs the clone code hack |
| 4 | Crash Object (Player Actor) | Crash | Needs the clone code hack |
| 5 | Crash Object (Player Actor) | Crash | Needs the clone code hack |
| 6 | Crash Object (Player Actor) | Crash | Needs the clone code hack |
| 7 | Crash Object (Player Actor) | Crash | Needs the clone code hack |
| 8 | Crash Object (Player Actor) | Crash | Needs the clone code hack |
| 9 | Crash Object (Player Actor) | Crash | Needs the clone code hack |
| 10 | Nothing | N/A | Technically works due to it being nothing |
| 11 | Nothing | N/A | Technically works due to it being nothing |
| 12 | Nothing | N/A | Technically works due to it being nothing |
| 13 | Nothing | N/A | Technically works due to it being nothing |
| 14 | Nothing | N/A | Technically works due to it being nothing |
| 15 | Nothing | N/A | Technically works due to it being nothing |
| 16 | Nothing | N/A | Technically works due to it being nothing |
| 17 | Nothing | N/A | Technically works due to it being nothing |
| 18 | Nothing | N/A | Technically works due to it being nothing |
| 19 | Nothing | N/A | Technically works due to it being nothing |
| 20 | Defunct Actor 22 | N/A | If using the Actor Spawner code hack it works |
| 21 | Mega Goomba | Works | If using Boss Particle code hack |
| 22 | Hammer Brother from map | N/A | MvsL is missing a world map so... |
| 23 | Pipe Piranha Plant (facing up) | Works | |
| 24 | Pipe Piranha Plant (facing down) | Works | |
| 25 | Pipe Piranha Plant (facing right) | Works | |
| 26 | Pipe Piranha Plant (facing left) | Works | |
| 27 | Bill Blaster (Bullet Bill launcher) | Works | |
| 28 | Bob-omb | Works | |
| 29 | Princess Peach | Works | |
| 30 | Monty Tank | Works | If using Boss Particle code hack |
| 31 | Cheep Cheep | Works | |
| 32 | Goal Pole's Flag | Works | |
| 33 | Trampoline (portable springboard) | Crash | |
| 34 | Red Ring | Crash | |
| 35 | Final Bowser Controller | Crash | |
| 36 | Thwomp | Works | |
| 37 | Spiny | Works | |
| 38 | Boo | Works | |
| 39 | Castle boss controller | Partial | Some of the options crash the game, you can use a switch instead. |
| 40 | Lakitu (unused object) | Works | |
| 41 | Bowser bridge switch | Works | Loads, but graphics are not loaded correctly |
| 42 | Chain Chomp/Log | Works | |
| 43 | Chain Chomp (unused object) | Works | |
| 44 | Fire Snake (unused Actor 46) | Works | |
| 45 | Respawnable Hidden Block | Works | |
| 46 | Event controller - activates Spiked Ball when touched by Snake Block | Works | |
| 47 | Lakithunder | Works | |
| 48 | Aquatic bubble current (up) | Works | |
| 49 | Aquatic bubble current (down) | Works | |
| 50 | Aquatic bubble current (right) | Works | |
| 51 | Aquatic bubble current (left) | Works | |
| 52 | Buzzy Beetle | Works | |
| 53 | Dry Bones | Works | |
| 54 | Lava Bubble (Podoboo) | Works | |
| 55 | Bullet Bill Spawner | Works | |
| 56 | Fire Bar | Works | |
| 57 | Coin | Works | |
| 58 | Bowser | Works | |
| 59 | Hammer Brother | Works | |
| 60 | Nothing | N/A | Technically works due to it being nothing |
| 61 | Nothing | N/A | Technically works due to it being nothing |
| 62 | Big Bowser (unused object) | Works | |
| 63 | Dry Bowser | Works | |
| 64 | Whomp | Works | |
| 65 | Cheepskipper | Works | |
| 66 | P Switch | Works | Graphics are not loaded correctly |
| 67 | Sushi (shark) | Works | |
| 68 | Lift moving up and down | Works | |
| 69 | Lift moving left and right | Works | |
| 70 | Rotating log lift (unused actor) | Works | |
| 71 | Stonewall moving up and down | Works | |
| 72 | Stonewall moving left and right | Works | |
| 73 | Wobbly metal lift | Works | |
| 74 | Wobble Rock | Works | |
| 75 | Seesaw lift | Works | |
| 76 | Scale lift | Works | |
| 77 | Flimsy Lift (falls once touched) | Works | |
| 78 | Lift moving one way once stood on | Works | |
| 79 | Three-platform rickshaw lift (rotates in place by self) | Works | |
| 80 | Lift spawner | Works | |
| 81 | Nothing | N/A | Technically works due to it being nothing |
| 82 | Rotating rectangle lift | Works | |
| 83 | Self-activating block | Works | |
| 84 | Zoom | Works | |
| 85 | Flip fence (duplicate object) | Works | |
| 86 | Rotating triangle lift | Works | |
| 87 | Nothing | N/A | Technically works due to it being nothing |
| 88 | Brick Block containing P Switch | Works | P-Switch graphics are not loaded correctly |
| 89 | Snailicorn | Works | |
| 90 | Wiggler | Works | |
| 91 | Track-controlled lift | Works | |
| 92 | Unagi (eel) | Works | |
| 93 | Arrow signboard | Works | |
| 94 | Swooper | Works | |
| 95 | Spin Block | Works | |
| 96 | Seaweed | Works | |
| 97 | Nothing | N/A | Technically works due to it being nothing |
| 98 | Camera vertical scrolling | N/A | |
| 99 | Four-platform rickshaw lift | Works | |
| 100 | Vertical camera offset (unused actor) | N/A | |
| 101 | Event controller - view enter | Works | |
| 102 | Spiked Ball | Works | |
| 103 | Dorrie | Works | |
| 104 | Tweester (Tornado) | Works | |
| 105 | Whirlpool | Works | |
| 106 | Red Coin | Crashes | |
| 107 | ? Switch | Works | Graphics are not loaded correctly |
| 108 | ! Switch | Works | Graphics are not loaded correctly |
| 109 | Amp | Works | |
| 110 | Brick Block containing !-Switch | Works | !-Switch graphics are not loaded correctly |
| 111 | Floating log | Works | |
| 112 | Nothing | N/A | Technically works due to it being nothing |
| 113 | Cheep Chomp | Works | |
| 114 | Burner (Small) | Works | |
| 115 | Large Spiked Ball | Works | |
| 116 | Skeeter (Water Bug) | Works | Causes a desync however |
| 117 | Map Flying ? Block | N/A | |
| 118 | Burner | Works | |
| 119 | Swinging lift (pendulum-like) | Works | |
| 120 | Grounded Piranha Plant | Works | |
| 121 | Nothing | N/A | Technically works due to it being nothing |
| 122 | Big Grounded Piranha Plant | Works | |
| 123 | Grounded Fire Piranha Plant | Works | |
| 124 | Large grounded Fire Piranha Plant | Works | |
| 125 | Defunct Actor 229 | N/A | |
| 126 | Drawbridge lift | Works | |
| 127 | Big four-platform rickshaw lift | Works | |
| 128 | Warp Cannon | Works | |
| 129 | Boss Key Location | Works | |
| 130 | Jumping Cheep Cheep | Works | |
| 131 | Checkpoint - vertical | Works | Does the animation but doesn't set anything |
| 132 | Checkpoint | Works | Does the animation but doesn't set anything |
| 133 | Nothing | N/A | Technically works due to it being nothing |
| 134 | Nothing | N/A | Technically works due to it being nothing |
| 135 | Nothing | N/A | Technically works due to it being nothing |
| 136 | Pokey | Works | |
| 137 | Nothing | N/A | Technically works due to it being nothing |
| 138 | Nothing | N/A | Technically works due to it being nothing |
| 139 | Nothing | N/A | Technically works due to it being nothing |
| 140 | Boss Key | Works | |
| 141 | Swelling ground | Works | |
| 142 | Tightrope | Works | |
| 143 | Spiked ? Block (unused actor 251) | Crashes | |
| 144 | Spiked ? Block | Crashes | |
| 145 | Spiked ? Block (unused actor 253) | Crashes | |
| 146 | Ground-pound panel | Works | |
| 147 | Bump from below platform | Works | |
| 148 | Goomba | Works | |
| 149 | Koopa Troopa | Works | |
| 150 | Koopa Paratroopa | Works | |
| 151 | Nothing | N/A | Technically works due to it being nothing |
| 152 | Event trigger block | Crash | |
| 153 | Nothing | N/A | Technically works due to it being nothing |
| 154 | Nothing | N/A | Technically works due to it being nothing |
| 155 | Special exit controller (warp entrance) | Crash | Sometimes just corrupts graphics and does nothing |
| 156 | Nothing | N/A | Technically works due to it being nothing |
| 157 | Fire Brother | Partial | Causes a desync |
| 158 | Boomerang Brother | Partial | Causes a desync |
| 159 | Nothing | N/A | Technically works due to it being nothing |
| 160 | Nothing | N/A | Technically works due to it being nothing |
| 161 | Nothing | N/A | Technically works due to it being nothing |
| 162 | Mushroom Platform lift | Works | |
| 163 | Nothing | N/A | Technically works due to it being nothing |
| 164 | Event controller - "AND" | Works | |
| 165 | Event controller - "OR" (If X OR Y, do Z) | Works | |
| 166 | Event controller - "RANDOM" | Works | |
| 167 | Event controller - chainer (If X, do Y) | Works | |
| 168 | Event controller - "IF" (uses zones) | Works | |
| 169 | Spin Block (unused Actor 255) | N/A | Doesn't spawn |
| 170 | Nothing | N/A | Technically works due to it being nothing |
| 171 | Spin Block (unused Actor 256) | N/A | Doesn't Spawn |
| 172 | Nothing | N/A | Technically works due to it being nothing |
| 173 | Swinging/able rope | Works | |
| 174 | Mushroom Platform lift | Works | |
| 175 | Bouncy bricks (Unused) | Works | |
| 176 | Nothing | N/A | Technically works due to it being nothing |
| 177 | Nothing | N/A | Technically works due to it being nothing |
| 178 | Nothing | N/A | Technically works due to it being nothing |
| 179 | Nothing | N/A | Technically works due to it being nothing |
| 180 | Climbing Koopa | Works | |
| 181 | Nothing | N/A | Technically works due to it being nothing |
| 182 | Nothing | N/A | Technically works due to it being nothing |
| 183 | Lakitu spawner | Works | |
| 184 | Nothing | N/A | Technically works due to it being nothing |
| 185 | Cheep Cheep random spawner | Works | |
| 186 | Paragoomba | Works | |
| 187 | Balance lift | Works | |
| 188 | Nothing | N/A | Technically works due to it being nothing |
| 189 | Pipe Cannon | Works | Desynchronizes the game |
| 190 | Nothing | N/A | Technically works due to it being nothing |
| 191 | Hanging Bouncing ? Block | Works | |
| 192 | Coin Spawner (unused actor) | Crash | |
| 193 | Big Dry Bones | Works | |
| 194 | Big Thwomp | Works | |
| 195 | 0 Stick to bottom length activator left | Works | |
| 196 | 0 Stick to bottom length activator right | Works | |
| 197 | Tile Creator/Destroyer (Tile God) | Crash | |
| 198 | In air vertical scroll stop left | N/A | |
| 199 | In air vertical scroll stop right | N/A | |
| 200 | Nothing | N/A | Technically works due to it being nothing |
| 201 | Nothing | N/A | Technically works due to it being nothing |
| 202 | Nothing | N/A | Technically works due to it being nothing |
| 203 | Unused Purple Mushroom Platform Lift | Works | |
| 204 | Fire Snake | Works | |
| 205 | Flame Chomp Spawner | Works | |
| 206 | Ghost house goo | Works | |
| 207 | Big Cheep Cheep | Works | |
| 208 | Nothing | N/A | Technically works due to it being nothing |
| 209 | Sledge Brother | Works | Causes a desync however |
| 210 | MvsL Battle Star | Works | Who would've thought |
| 211 | Blooper | Works | |
| 212 | Blooper Nanny (unused actor 144) | Works | |
| 213 | Blooper Nanny that w/ Baby Bloopers | Works | |
| 214 | Nothing | N/A | Technically works due to it being nothing |
| 215 | Nothing | N/A | Technically works due to it being nothing |
| 216 | Nothing | N/A | Technically works due to it being nothing |
| 217 | Nothing | N/A | Technically works due to it being nothing |
| 218 | Auto-scrolling controller | Works | If the players spawn in the same position after respawning it stops working |
| 219 | Spike Top | Works | |
| 220 | Bowser Jr. | Works | |
| 221 | Nothing | N/A | Technically works due to it being nothing |
| 222 | Mini Goomba | Works | |
| 223 | Flip fence | Works | |
| 224 | Big flip fence | Works | |
| 225 | Nothing | N/A | Technically works due to it being nothing |
| 226 | Scuttlebug | N/A | |
| 227 | Moneybag | Works | |
| 228 | Roulette Block | Crash | |
| 229 | Petey Piranha | Works | |
| 230 | Nothing | N/A | Technically works due to it being nothing |
| 231 | Water | Works | |
| 232 | Hanging ? Block | Works | |
| 233 | Swinging/able pole | Works | |
| 234 | Lava | Partial | Causes a desync is not using [mvslLiquidFix.cpp](https://bookstack.nsmbcentral.net/attachments/6) |
| 235 | Star Coin | Crash | |
| 236 | Rotating square lift | Works | |
| 237 | Broozer | Works | |
| 238 | Purple Mushroom Platform lift | Works | |
| 239 | Yellow/Orange Mushroom Platform | Works | |
| 240 | Nothing | N/A | Technically works due to it being nothing |
| 241 | Bill Blaster Turret | Works | |
| 242 | Blue Mushroom Platform | Works | |
| 243 | Roof Spiny | Works | |
| 244 | Bouncy Mushroom Platform | Works | |
| 245 | Corked Pipe + foot pump | Crashes | |
| 246 | Floating barrel | Works | |
| 247 | Sushi spawner (shark spawner) | Works | |
| 248 | Balloon Boo | Works | |
| 249 | Track-controlled wall-jump lift | Works | |
| 250 | Crowber | Works | |
| 251 | Big Unagi | Crash | |
| 252 | Banzai Bill Blaster | Works | |
| 253 | Nothing | N/A | Technically works due to it being nothing |
| 254 | Kab-omb | Works | |
| 255 | Jungle FG Effect (Unused Actor) | Works | |
| 256 | Rotating carry-through-wall turntable-like lift | Works | |
| 257 | Coin trail Cheep Cheep | Works | |
| 258 | Spike Bass (unused object) | Works | |
| 259 | Poisoned Water | Partial | Causes desync if not using [mvslLiquidFix.cpp](https://bookstack.nsmbcentral.net/attachments/6) |
| 260 | Fast Spike Pillar - Down | Works | |
| 261 | Fast Spike Pillar - Up | Works | |
| 262 | Fast Spike Pillar - Left | Works | |
| 263 | Fast Spike Pillar - Right | Works | |
| 264 | Mega Ground Pound's sky drops + | Crash | |
| 265 | Phantom Hand (Pointing hand) | Works | |
| 266 | Invisible Lava Bubble (unused actor) | Works | |
| 267 | Nothing | N/A | Technically works due to it being nothing |
| 268 | Underwater bounce bubble | Works | |
| 269 | Giant Wiggler | Works | |
| 270 | Smashed pipe object | Works | |
| 271 | Crowber spawner | Works | |
| 272 | Snowy branch | Works | |
| 273 | Snow Spike | Works | |
| 274 | Sinking-snow pile | Works | |
| 275 | Blockhopper | Partial | Desyncs |
| 276 | Scroll and Mario stop sideways | Works | |
| 277 | Arrow sign | Works | |
| 278 | Groundpound-able ghost house goo | Works | |
| 279 | Flipper (one-way gate) | Works | |
| 280 | Horizontal camera offset | N/A | Not sure how this object works |
| 281 | Squiggler | Works | |
| 282 | Swinging/able vine | Works | |
| 283 | Spike Bass spawner | Works | |
| 284 | Splunkin (pumpkin) | Works | |
| 285 | Scuttlebug spawner | N/A | |
| 286 | Event controller - multi-chainer | Works | |
| 287 | Enemy-in-Pipe Generator | Works | |
| 288 | Nothing | N/A | Technically works due to it being nothing |
| 289 | Platform Block (expandable block) | Works | Doesn't respawn if it turns into bricks and you collect a battle star. |
| 290 | Flying ? Block | Crash | Black screen |
| 291 | Brick Block containing ? Switch | Works | ? Switch graphics are not loaded correctly |
| 292 | Event Activated Door | Works | |
| 293 | Touching ground vertical scroll stop left | Works | |
| 294 | Touching ground vertical scroll stop right | Works | |
| 295 | Mummipokey | Works | Use a P-Switch |
| 296 | Lift moving left and right | Works | |
| 297 | Stonewall moving left and right | Works | |
| 298 | Stonewall moving u, d, l, r | Works | |
| 299 | Snake Block | Works | |
| 300 | Haunted lift | Works | |
| 301 | Toadsworth | Works | Only freezes Mario for a few seconds, and Luigi can roam freely. Background chooser will break because of BMG differences. |
| 302 | Toad House block | Doesn't work | Garble graphics. |
| 303 | Ball 'n' Chain | Works | |
| 304 | Spike Pillar - down | Works | |
| 305 | Final Castle Create Loop | N/A | I have no idea how this works. |
| 306 | Final Castle Wrong Path | N/A | I have no idea how this works. |
| 307 | Spike Pillar - up | Works | |
| 308 | Spike Pillar - left | Works | |
| 309 | Spike Pillar - right | Works | |
| 310 | Fog FG effect | Partial | Graphics are not loaded correctly |
| 311 | Snow FG effect 1 | Works | |
| 312 | Rise or lower while/once on Mushroom Platform lift - mechanical | Works | |
| 313 | Snow FG effect 2 | Works | |
| 314 | Snow FG effect 3 | Works | |
| 315 | Cloud FG effect | Partial | Graphics are not loaded correctly |
| 316 | Water FG effect 1 | Works | |
| 317 | Water FG effect 2 | Works | |
| 318 | Fire FG effect 1 | Works | |
| 319 | Fire FG effect 2 | Works | |
| 320 | Fire FG effect 3 | Works | |
| 321 | Light FG Effect 1 | N/A | |
| 322 | Light FG Effect 2 | Works | |
| 323 | Squishy cloud platform | Works | Both players can interact with it at the same time |
| 324 | Grassland Clouds FG effect | Partial | Graphics are not loaded correctly |
| 325 | Small Grassland Clouds FG effect | Partial | Graphics are not loaded correctly |
**Important:** Replace `/home/yourname` with your actual username. Do **not** use `~` in these paths.
#### Step 3: Reload Your Session Log out and log back in for the changes to take effect. Then confirm your tools are available: ```bash which arm-none-eabi-gcc which ncpatcher ```You’re done! Now your environment is ready for NSMB DS modding on Linux using the latest tools.
# Modding 101 - Creating a Bare-Bones Level Welcome to the world of New Super Mario Bros. DS modding. Making your first level is the first step every modder takes when starting from scratch.In this tutorial, you'll learn how to:
- Install the necessary tools to start modding - Open your ROM in the editor - Open a level from your ROM - Create a bare-bones level to build from #### Section 1: Getting Ready To edit the game, you'll need a copy of your New Super Mario Bros. DS ROM and the New Super Mario Bros. Editor (NSMBe).We are not allowed to give a download to the ROM. If you have a 3DS, [here is a guide](https://3ds.hacks.guide/dumping-titles-and-game-cartridges.html) that lets you dump your game cartridge ROM using a modded 3DS.
For the best compatibility for more complex tasks, you will need a US region ROM.
Head over to [GitHub](https://github.com/MammaMiaTeam/NSMB-Editor/releases) to download the latest version of NSMBe from the Mamamia Team. When you click the link, you will be taken to a page that looks like this: [](https://bookstack.nsmbcentral.net/uploads/images/gallery/2024-02/image.png) Just click on **NSMBeX.X.X.zip** to download the editor. (The X's will match with whatever version the editor is on. As of writing this version is 5.4.1, as seen in the screenshot) Now, in your downloads folder, you need to extract the zip file. On Windows, this is done by right-clicking the **.zip** and clicking **Extract All...** Just click extract on the window that appears. You should now have a folder in your Downloads folder named **NSMBeX.X.X**. The final folder will look something like this: [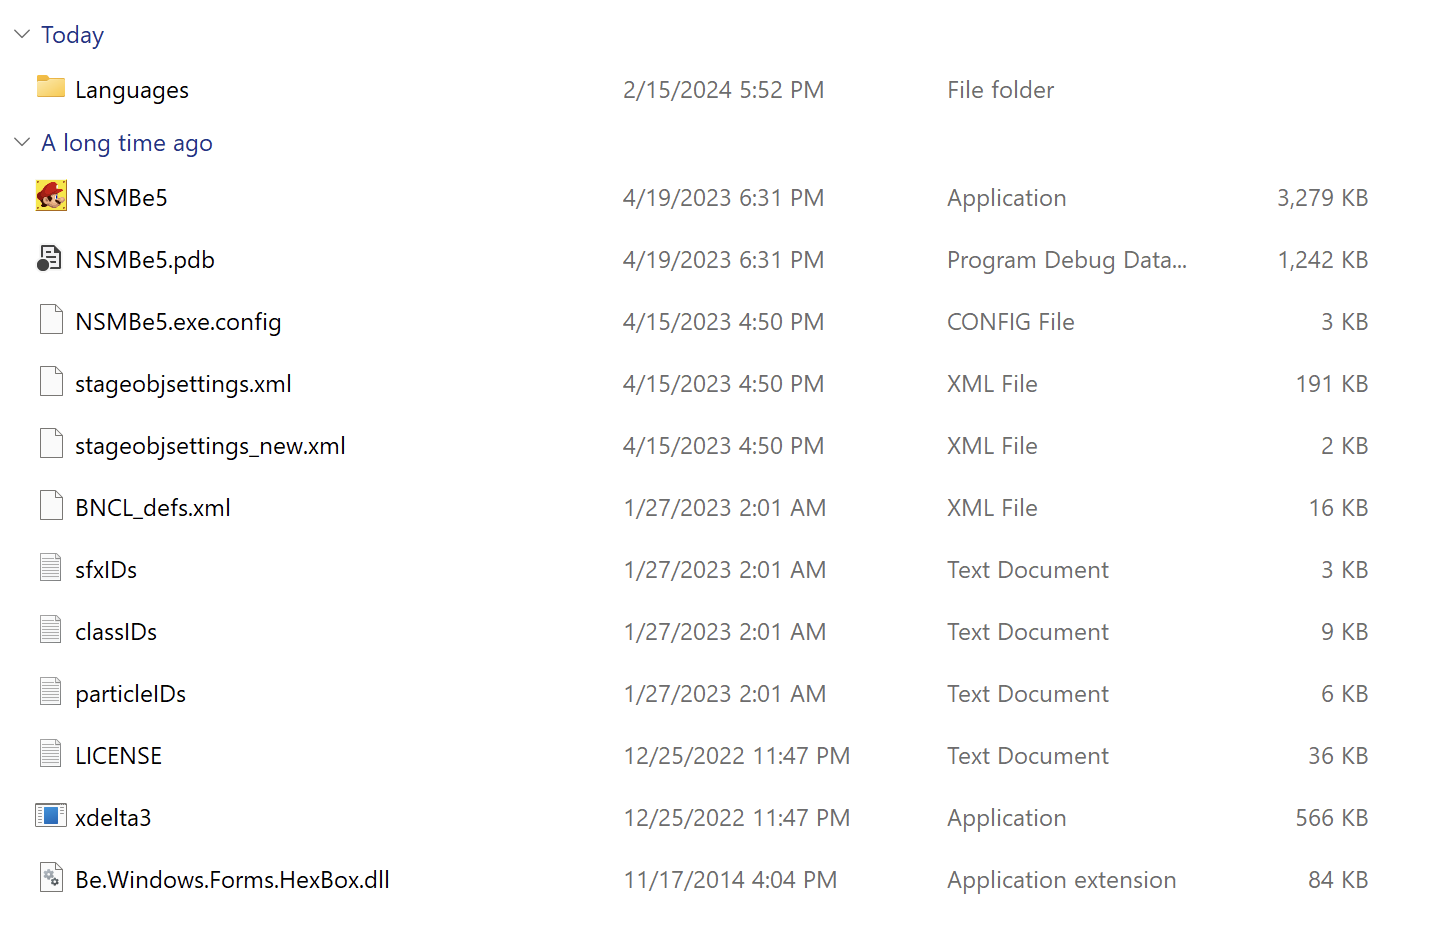](https://bookstack.nsmbcentral.net/uploads/images/gallery/2024-02/MqDimage.png)You have now installed the necessary tools to begin modding
#### Section 2: Opening Your ROM Now that you have the editor extracted, let's open up your ROM! Inside of the **NSMBeX.X.X** folder, open the app named **NSMBe5.exe**. You should see a window that looks something like this: [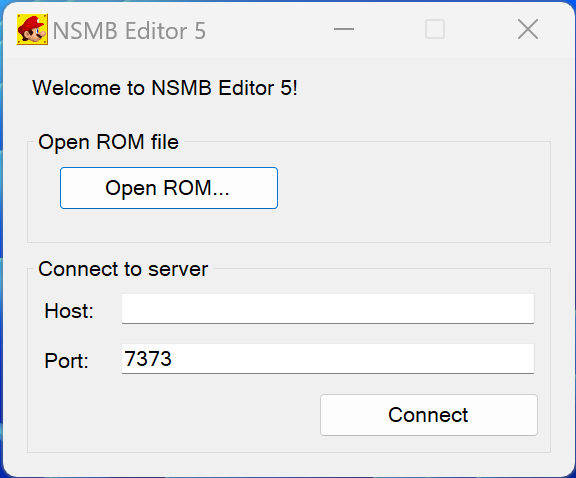](https://bookstack.nsmbcentral.net/uploads/images/gallery/2024-02/RBmimage.png) Now, click on **Open ROM...** and open your dumped ROM of New Super Mario Bros. DSThe ROM will have an extension of **.nds**
You should now see this: [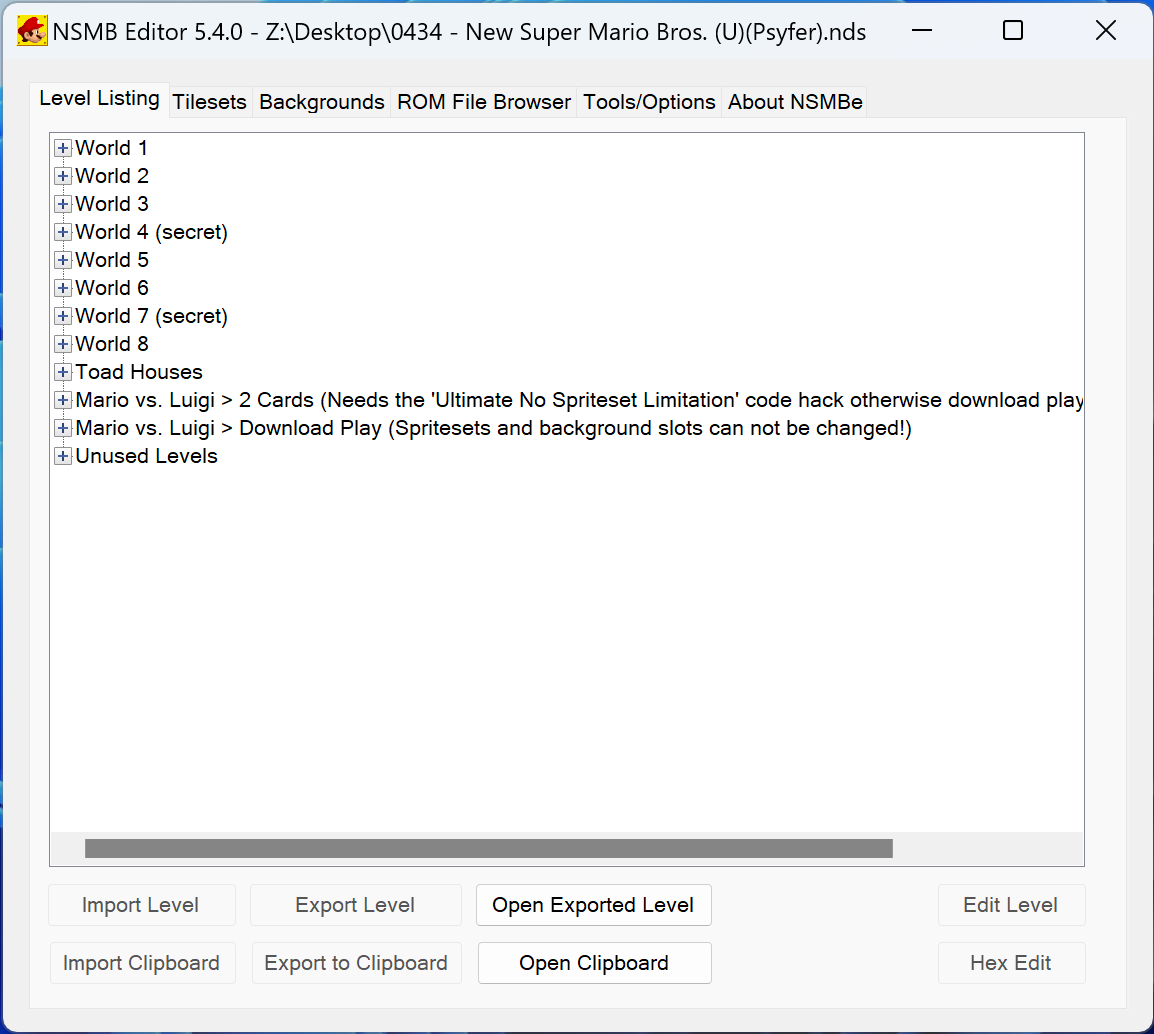](https://bookstack.nsmbcentral.net/uploads/images/gallery/2024-02/lrUimage.png)You have now opened your ROM in the editor
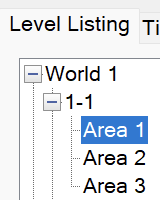
#### Section 3: Opening a Level Now for the fun part, editing a level! To start, we will open 1-1, Area 1. To do this, open the **World 1** drop down, open the **1-1** dropdown, and finally double click on **Area 1**.Each level in the game has a various number of **Areas**. Nintendo used these as a way to keep each sub-area separated. For example, **Area 1** of 1-1 is where you start the level, and **Area 2** is the bonus room found in **Area 1**.
[](https://bookstack.nsmbcentral.net/uploads/images/gallery/2024-02/YpKimage.png) You will now be presented with the level view: [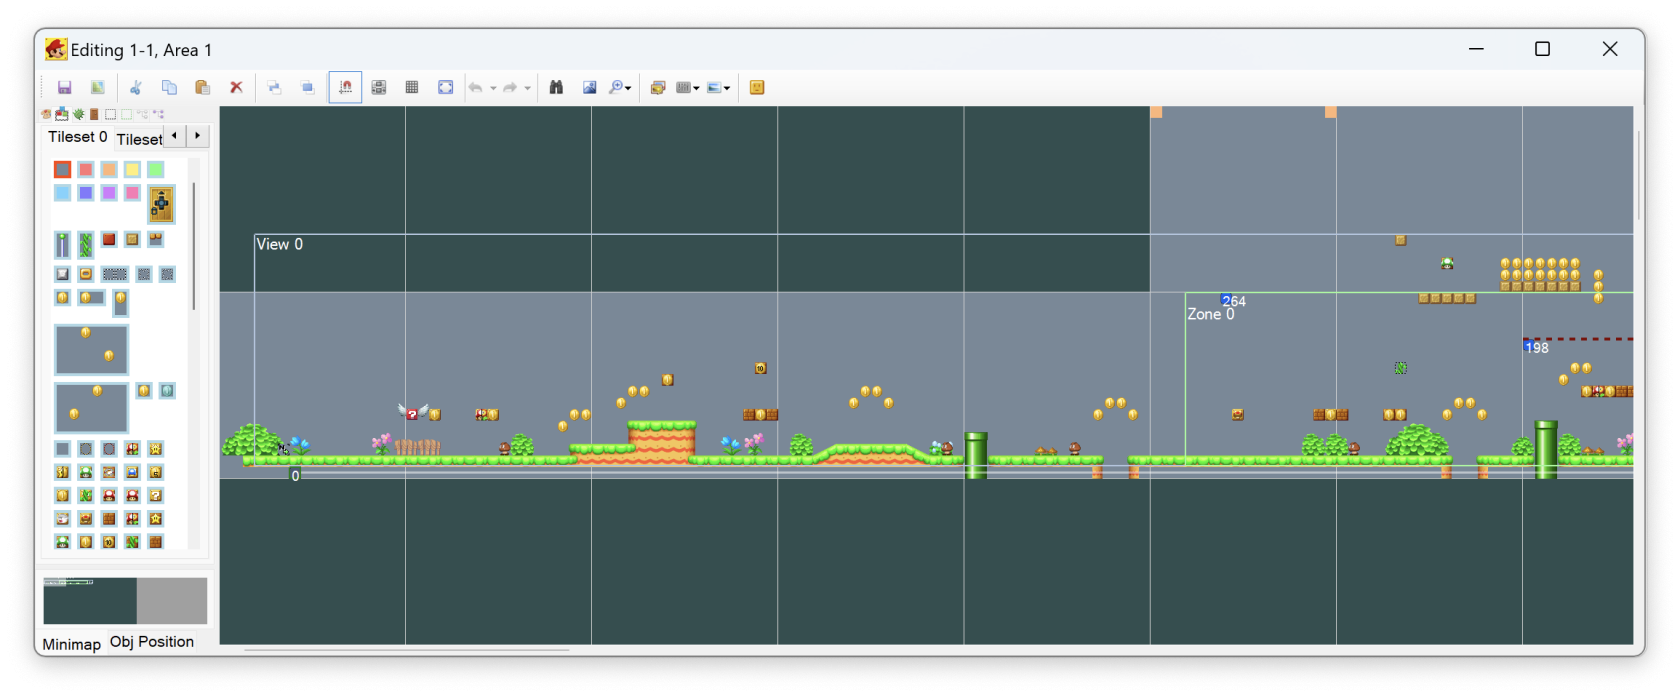](https://bookstack.nsmbcentral.net/uploads/images/gallery/2024-02/Vlbimage.png)If the level view appears too small, you may need to modify the config file. To do this: open the file named "NSMBe5.exe.config" using Notepad, delete the lines: **<System.Windows.Forms.ApplicationConfigurationSection> <add key="DpiAwareness" value="PerMonitorV2"/></System.Windows.Forms.ApplicationConfigurationSection>** After deleting the lines, save the file, restart the editor, and open **Area 1** again.
You have now opened a level from your ROM
#### Section 4: Creating a Bare-Bones Level It is best practice to start from a blank level, so let's clear out the existing level by pressing **Ctrl+A** to select everything in the level, followed by clicking the [](https://bookstack.nsmbcentral.net/uploads/images/gallery/2024-02/dktimage.png)at the top of the editor window. Your blank level will look like this: [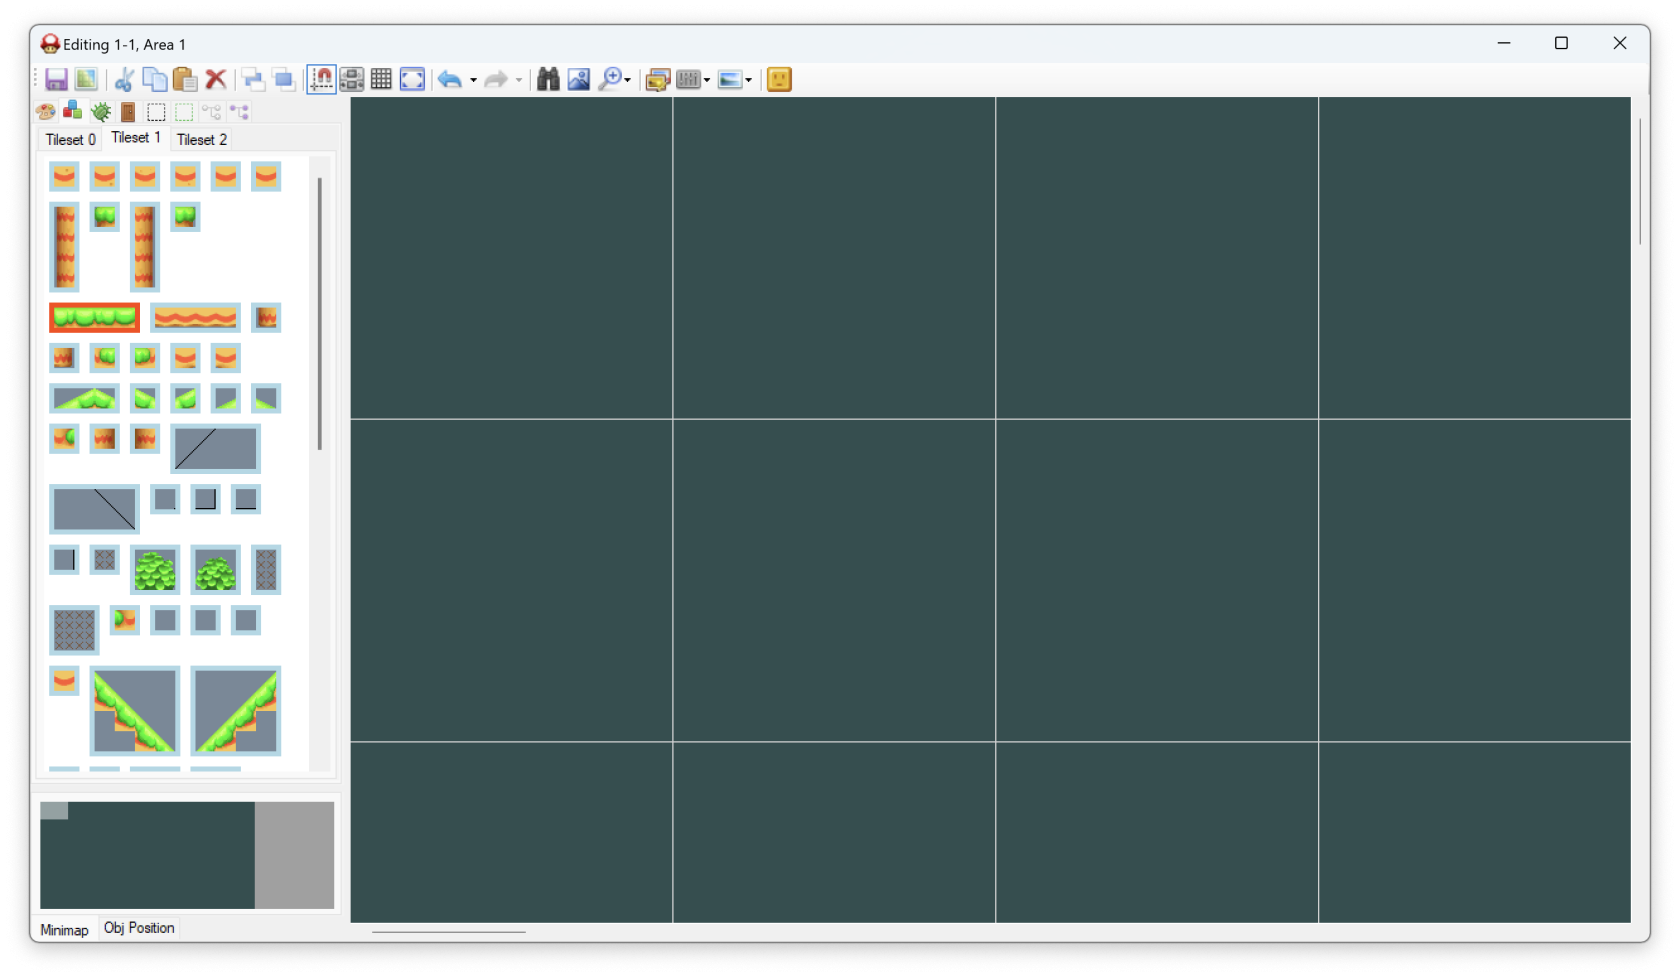](https://bookstack.nsmbcentral.net/uploads/images/gallery/2024-02/mVEimage.png) > ##### Now that we have a blank level, what do we need to add back? All levels in NSMB DS must at *minimum* have a **Start Entrance** and at least one main **View**. With that being said, let's add them back! To begin, we will add the main view. To do this, click on [](https://bookstack.nsmbcentral.net/uploads/images/gallery/2024-02/9sYimage.png) in the sub-menu bar. This will show a list of all the views in the level (or it would if we didn't just delete everything in the level). To create a view, all we need to do is click on **Add**. Your level will now have a transparent box: [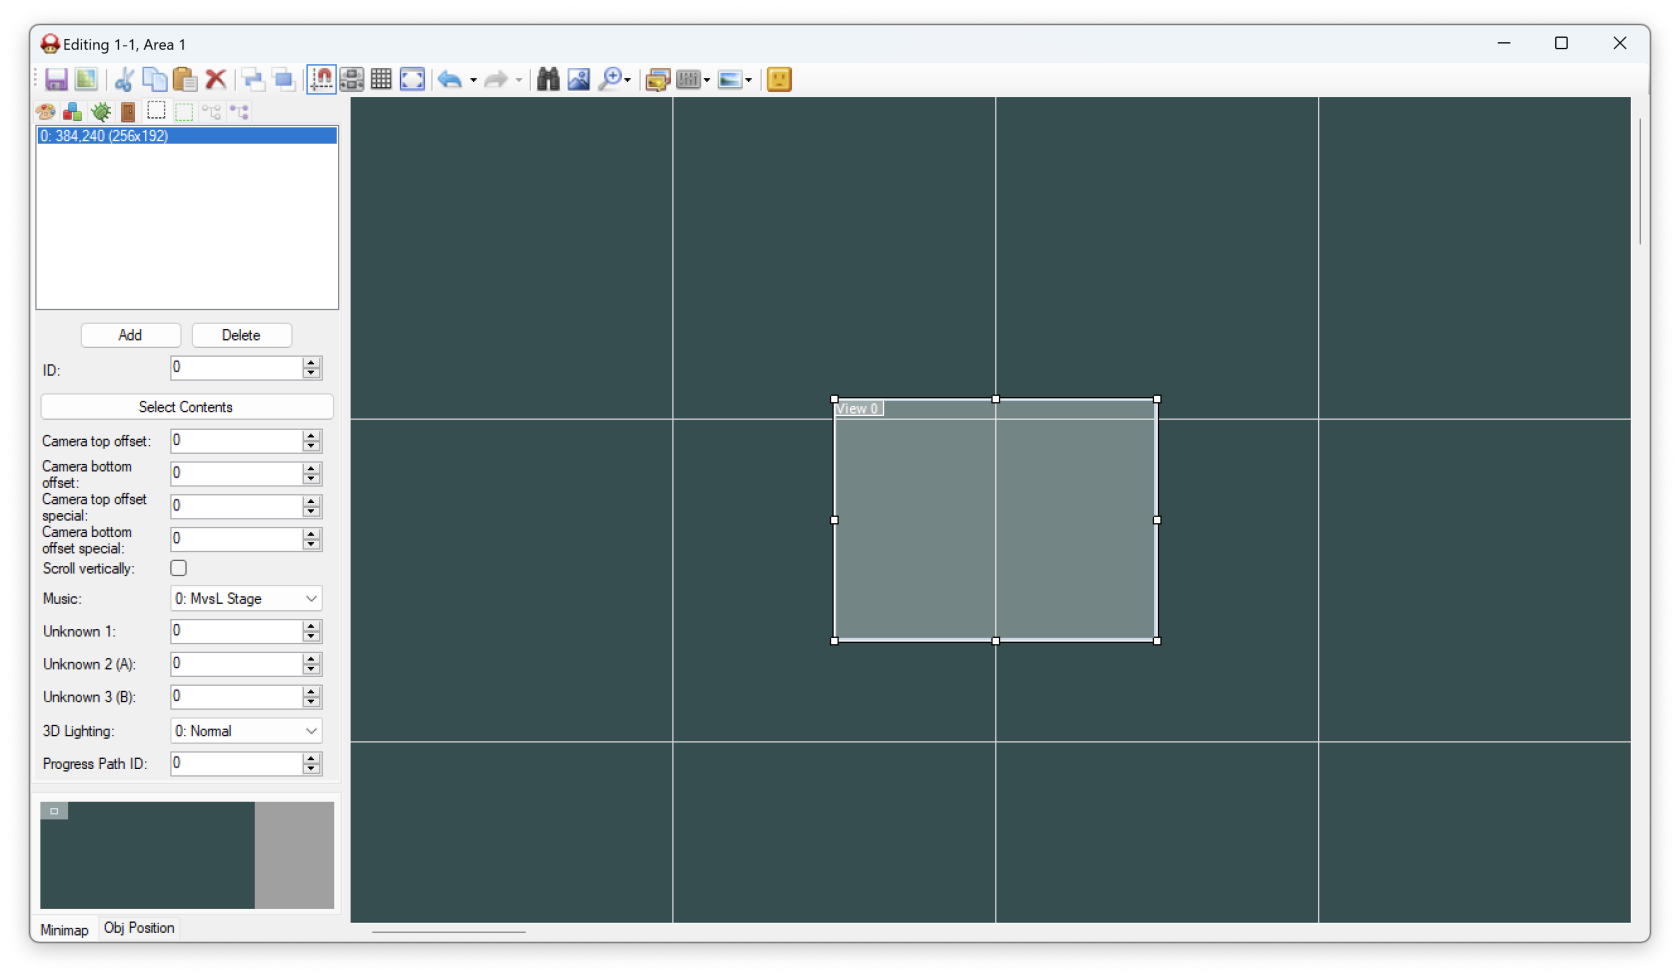](https://bookstack.nsmbcentral.net/uploads/images/gallery/2024-02/YQiimage.png) You'll notice a bunch of settings here. For now, the only thing you need to worry about is checking **Scroll vertically**. This allows the in-game camera to follow Mario up and down inside of your level.The **View** defines the bounds of your level. The camera is not allowed to go outside of the current view. Mario can go above the view, however the camera will not follow him. The sides of a view will stop Mario. Mario will die if he falls below the bottom of the view.
Click and drag the small box that says **View 0** and move the **View** to the top left of the level. While we're moving the view, go ahead and grab the bottom right box and extend the view to be one square big. You're level should look like this now: [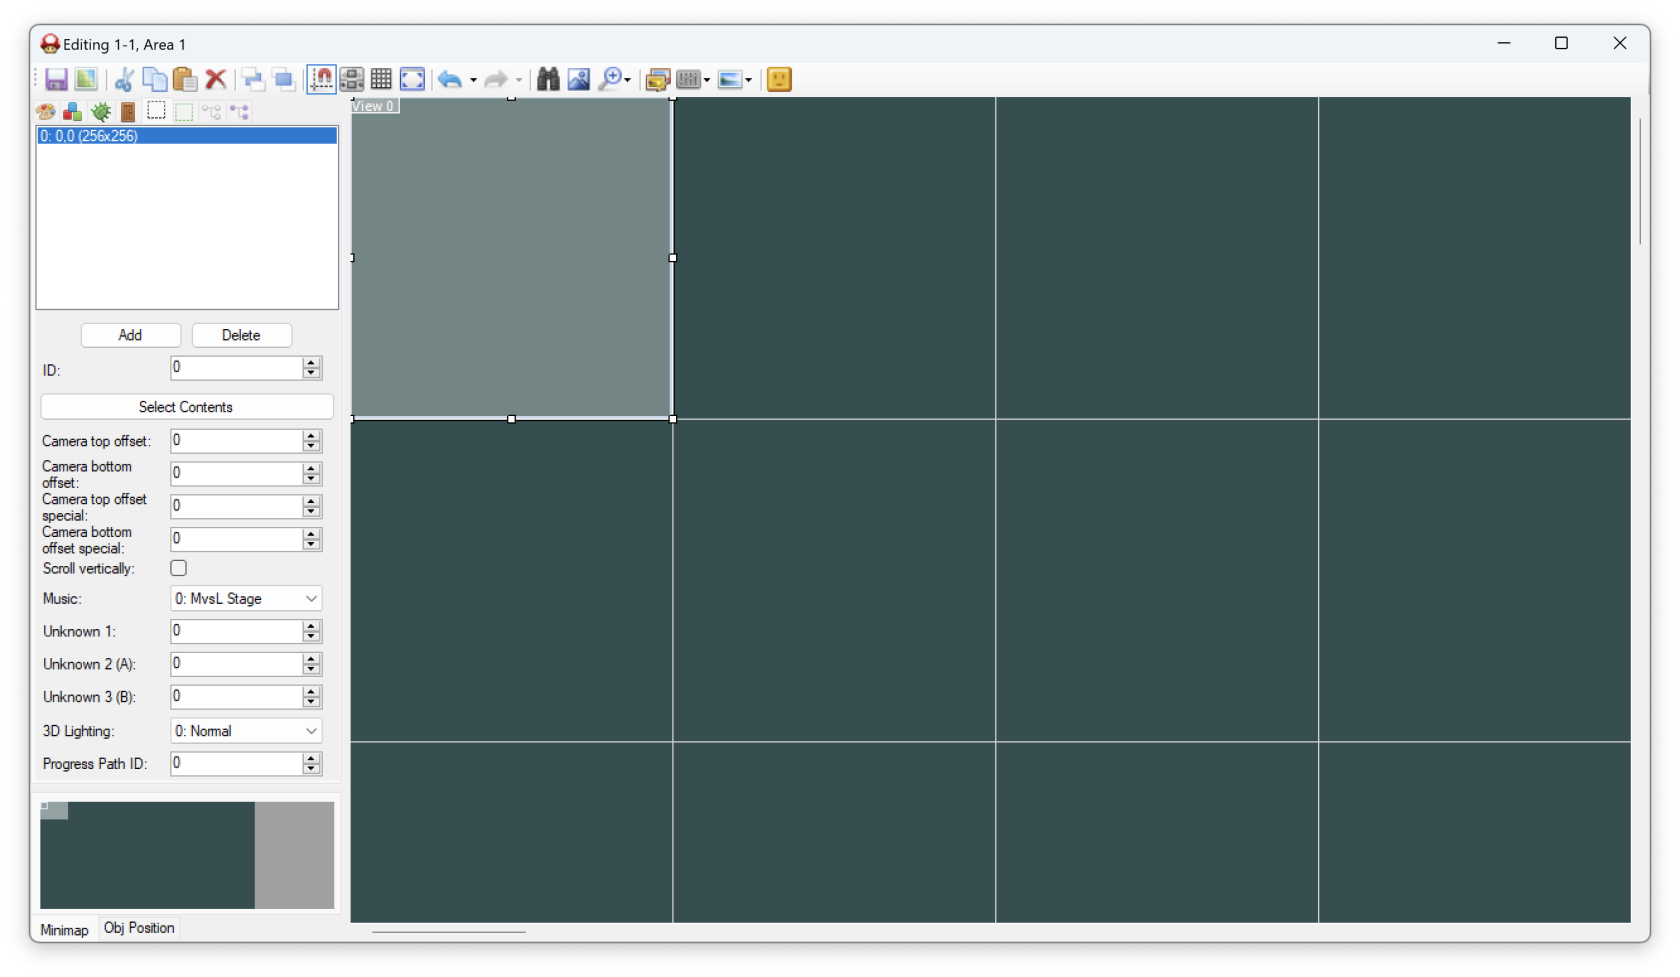](https://bookstack.nsmbcentral.net/uploads/images/gallery/2024-02/IG1image.png) Now, let's create the **Start Entrance**. Click on the [](https://bookstack.nsmbcentral.net/uploads/images/gallery/2024-02/Mehimage.png) button in the sub-menu. Similarly to the views button, this will give a list of every **Entrance** that is in this level. Go ahead and click on **Add** to create a new **Entrance**. [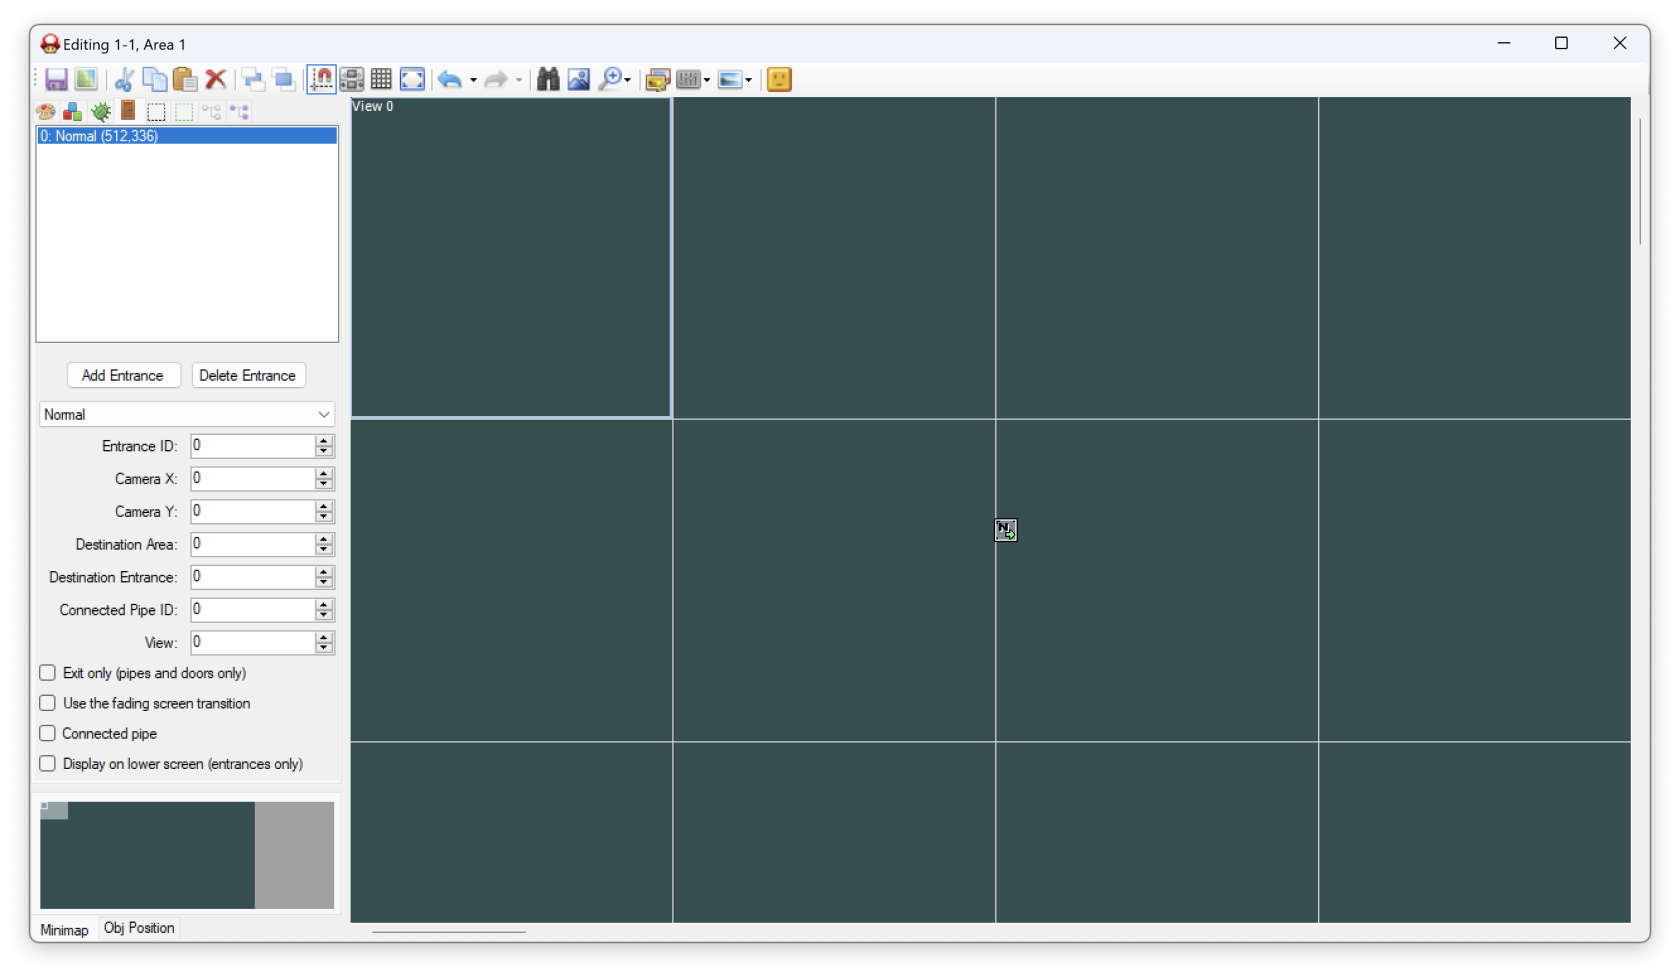](https://bookstack.nsmbcentral.net/uploads/images/gallery/2024-02/TZeimage.png) Once again, there are a few settings on the entrance that you can play with but for now let's just move the entrance inside of our **View**. [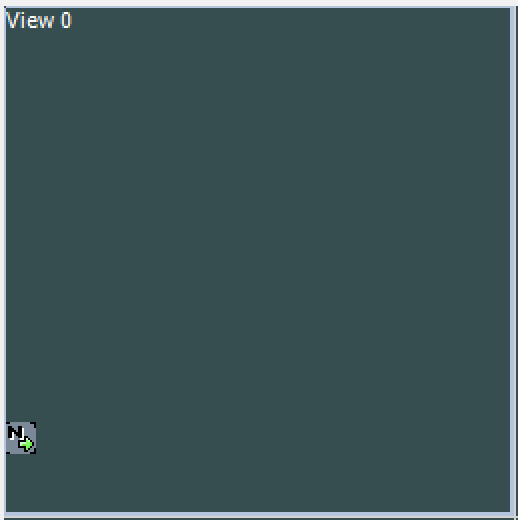](https://bookstack.nsmbcentral.net/uploads/images/gallery/2024-02/TU5image.png) There we go! We have what's at *minimum* required. However...if we were to play this level now, Mario would just fall down and die. Let's add a floor and the **Goal Pole's Flag** to this level! To get to the **Tile** picker, click on the [](https://bookstack.nsmbcentral.net/uploads/images/gallery/2024-02/Q9wimage.png) button (and also click on **Tileset 1** if it is not already selected). Your side bar should now be filled with **Tiles**! [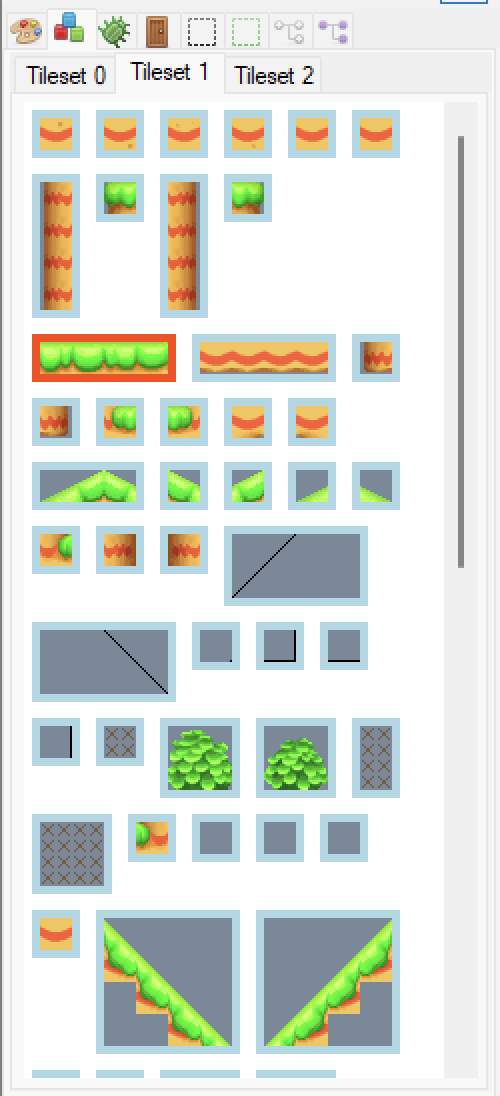](https://bookstack.nsmbcentral.net/uploads/images/gallery/2024-02/pxeimage.png) Go ahead and pick the tile I have selected (highlighted in red in the screenshot), then right-click to place the tile in our view. After this, you can grab the corner of the tile and stretch it out across the view. [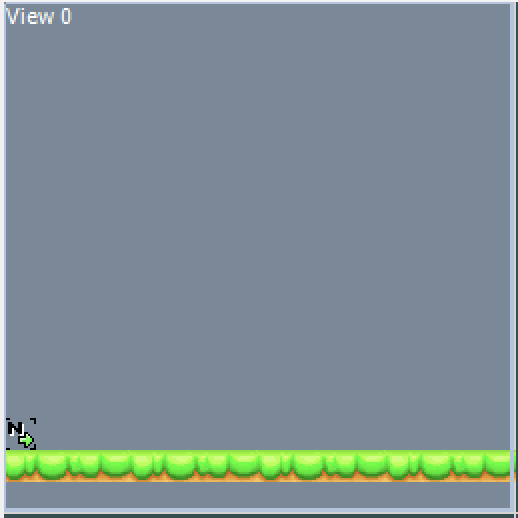](https://bookstack.nsmbcentral.net/uploads/images/gallery/2024-02/ceoimage.png) Not bad! Now, let's make a **Goal Pole** for Mario to clear the level with. First off, click on the [](https://bookstack.nsmbcentral.net/uploads/images/gallery/2024-02/Ob6image.png) button in the sub menu to bring up the **Actor List**. [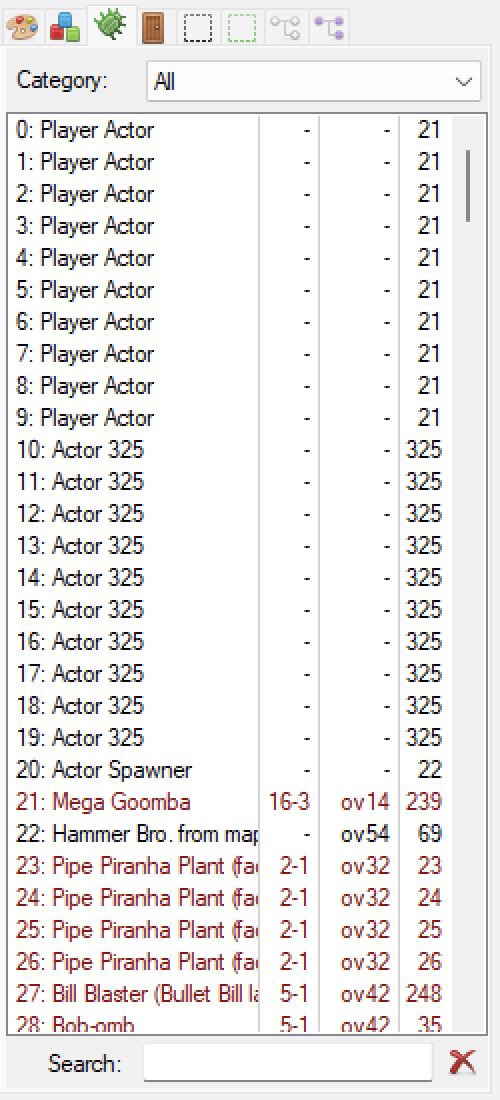](https://bookstack.nsmbcentral.net/uploads/images/gallery/2024-02/O9rimage.png) This is every **Actor** in the game. You'll become familiar with more **Actors** as you begin making levels. For now, enter "Goal Pole's Flag" into the search box. This will now filter out all other **Actors**. [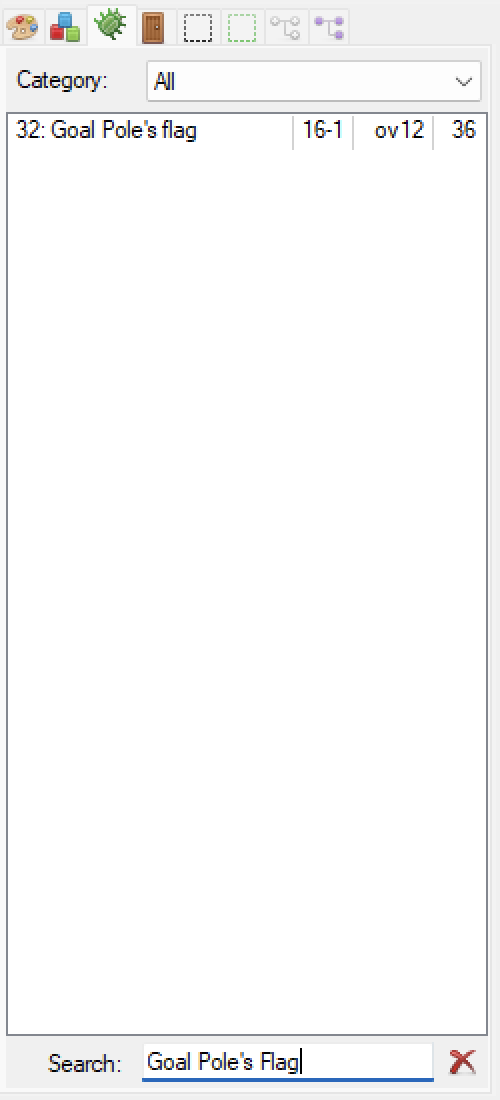](https://bookstack.nsmbcentral.net/uploads/images/gallery/2024-02/6Ubimage.png) Click on the **Actor** in the list, then right click in the level like you did for the tile. This will add the **Goal Pole's Flag** into the level. [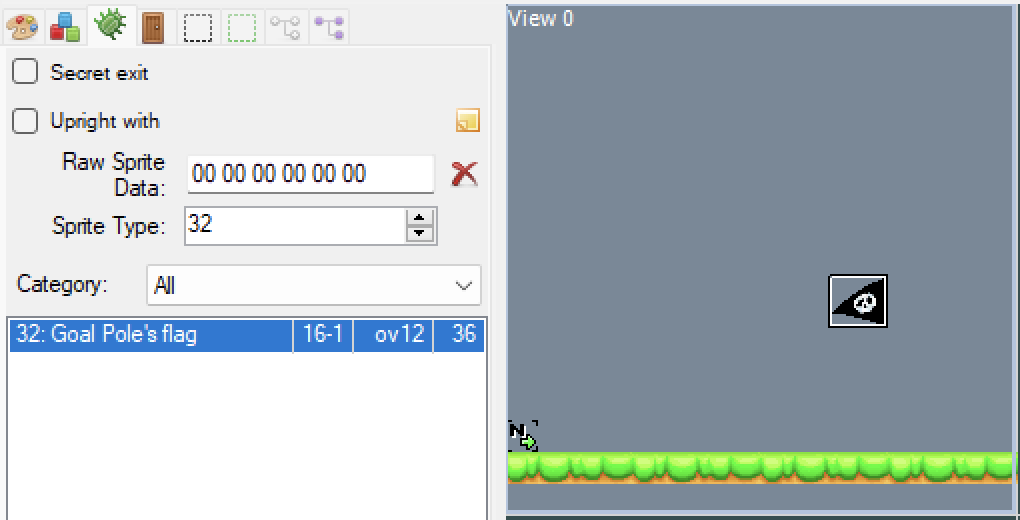](https://bookstack.nsmbcentral.net/uploads/images/gallery/2024-02/hnXimage.png) On the left, you'll notice that some options for the **Goal Pole's Flag** has appeared. All **Actors** will have an options menu appear for them when they are highlighted in the level. All that's left to do now is finish tiling the **Goal Pole**.Test your knowledge! The **Goal Pole** tiles are located in **Tileset 0**, try and build the flag like the next screenshot! Here's a tip, the **Goal Pole** is 9 tiles high and two tiles wide.
[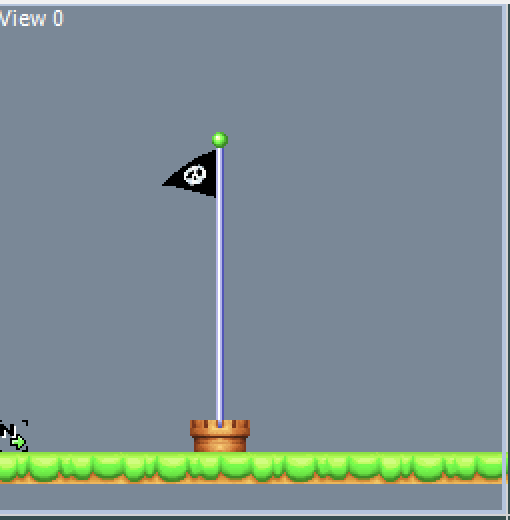](https://bookstack.nsmbcentral.net/uploads/images/gallery/2024-02/K3Oimage.png)With the flag created, we now need to build the castle. To begin, head over to **Tileset 2** and click on the castle. Now, right click to place the castle and drag it to create the castle. Your level will look like this now: [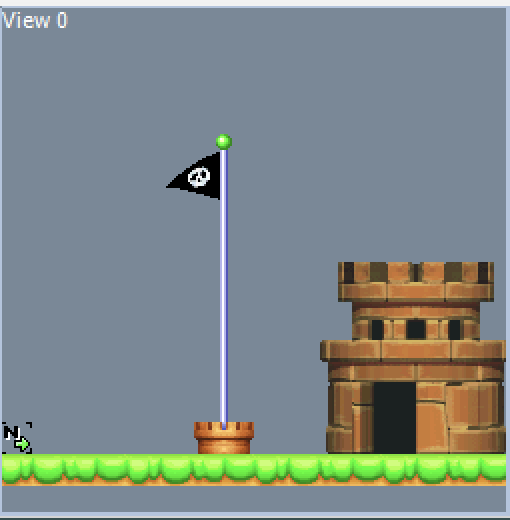](https://bookstack.nsmbcentral.net/uploads/images/gallery/2024-02/mciimage.png) We're almost done. The castle in this game is composed of three tiles: the castle we just created, the wall that will stop Mario, and the roof that allows the small flag to show up after you cleared the level. Select the wall from the tile picker: [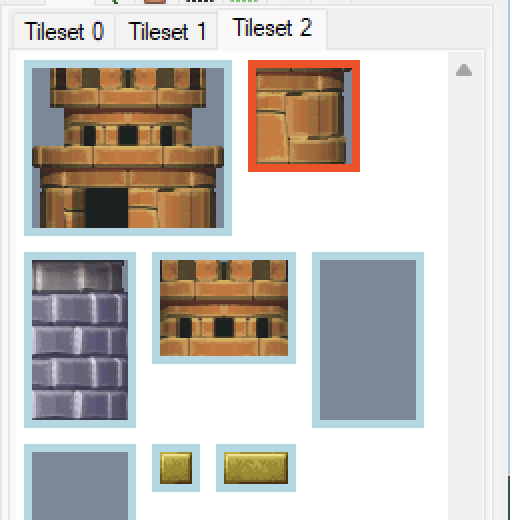](https://bookstack.nsmbcentral.net/uploads/images/gallery/2024-02/CPPimage.png)Drag this wall over the castle you created. [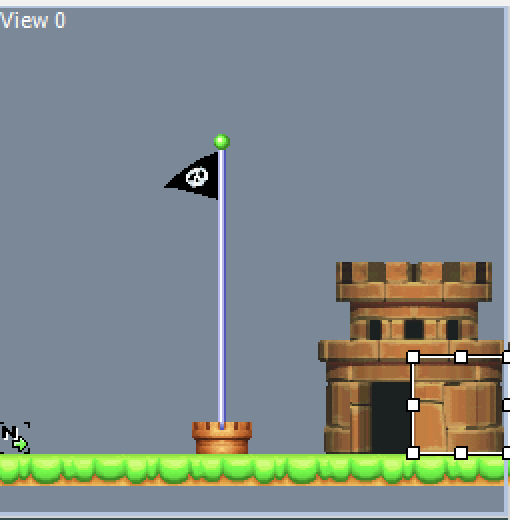](https://bookstack.nsmbcentral.net/uploads/images/gallery/2024-02/vSgimage.png)Lastly, drag the roof tile over the castle like you just did for the wall [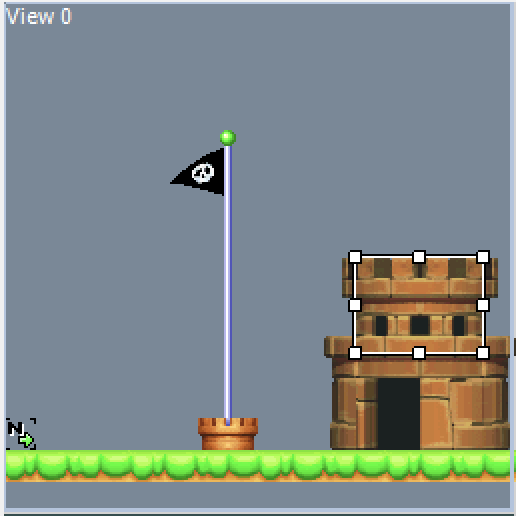](https://bookstack.nsmbcentral.net/uploads/images/gallery/2024-02/1fWimage.png)You have now created a bare-bones level
You can now save your level using the save icon or by pressing **Ctrl+S**. # Setting up NSMBe5 on Linux If you are considering swapping to Linux (or are already using Linux), modding NSMB DS is still perfectly doable! NSMBe just needs a little bit of setup before you can begin opening levels. After this tutorial, you'll be up and running with NSMBe on your favorite Linux distro. - This tutorial has been tested on the following operating systems: \- Fedora \- Manjaro (should work for every Arch-based distribution) \- Linux Mint (should work for every Debian-based distribution) Help us improve the compatibility list! ### Requirements: - A computer running Linux - [The latest build of NSMBe5](https://github.com/MammaMiaTeam/NSMB-Editor/releases/latest/ "NSMBe5 download link")While not *needed*, having administrator permission (sudo) is helpful for troubleshooting
### Step 1: Installing [PortProton](https://flathub.org/apps/ru.linux_gaming.PortProton) #### Method 1: Via Flathub (recommended) Follow the [Flathub setup guide.](https://flathub.org/setup) Then, install the app by opening a terminal and typing: ```bash flatpak install flathub ru.linux_gaming.PortProton ```If it doesn't work or you need admin rights, check the second method.
#### Method 2: Manual installation Go to [flathub.org/apps/ru.linux\_gaming.PortProton](http://flathub.org/apps/ru.linux_gaming.PortProton) and hit “download”. This will download a `.flatpakref` file. The file should appear in your Downloads folder. If your browser asks you where it should save it, choose a location that you will remember. [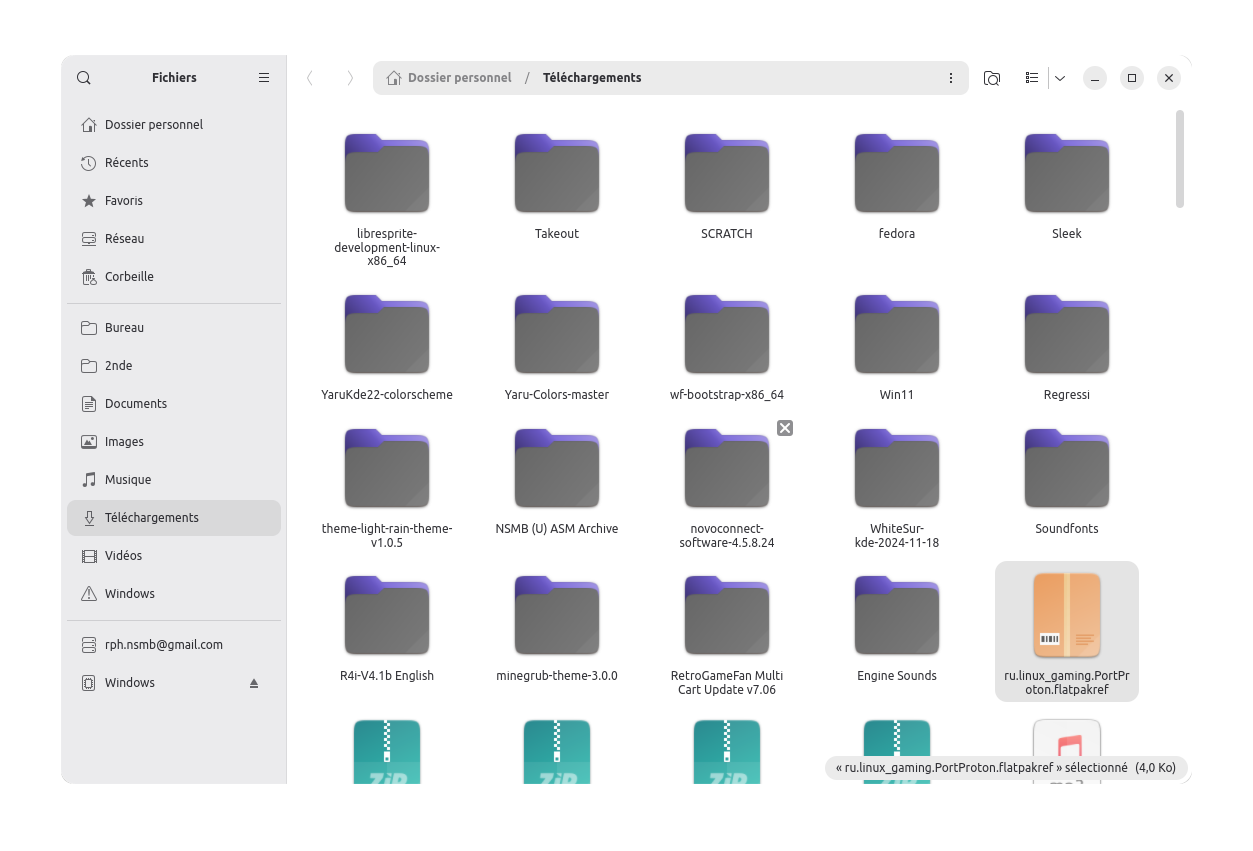](https://bookstack.nsmbcentral.net/uploads/images/gallery/2025-04/capture-decran-du-2025-03-23-12-42-49.png) Go to the file's location, right-click an empty space, and select "Open in a terminal". From there, type the following command: ```bash flatpak install ru.linux_gaming.PortProton.flatpakref ``` If it doesn't work because admin rights are needed, try the following command instead: ```bash flatpak install --user ru.linux_gaming.PortProton.flatpakref ```If this method still doesn't work, ask us in NSMB Central.
Congratulations! You're now ready to open NSMBe!
### Step 2: Installing NSMB EditorPortProton might download some files before starting the first time you launch it. That's normal.
Go to your NSMBe5 folder. Open `NSMBe5.exe` by double-clicking on it. You should see a window like this: [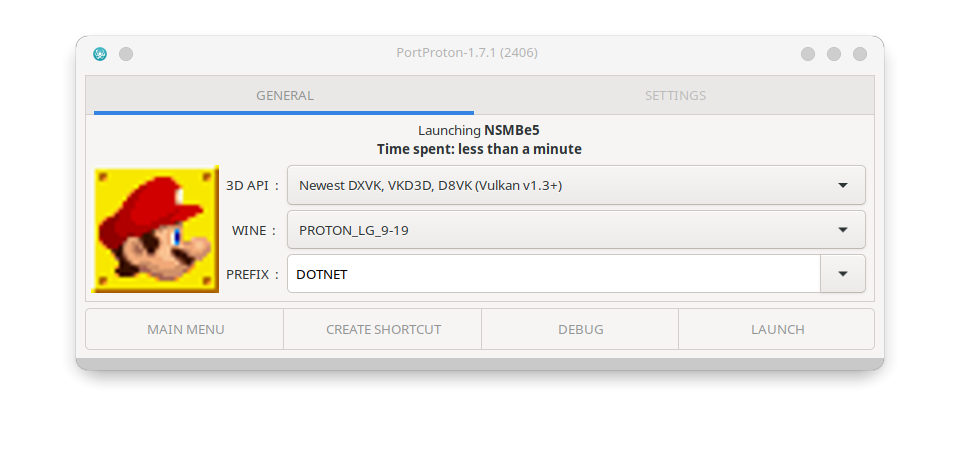](https://bookstack.nsmbcentral.net/uploads/images/gallery/2025-04/copie-decran-20250330-212505.png)Make sure to change the prefix to "DOTNET"
If you want to add a shortcut to your app menu, click on "Create shortcut". It will ask you where to put it: [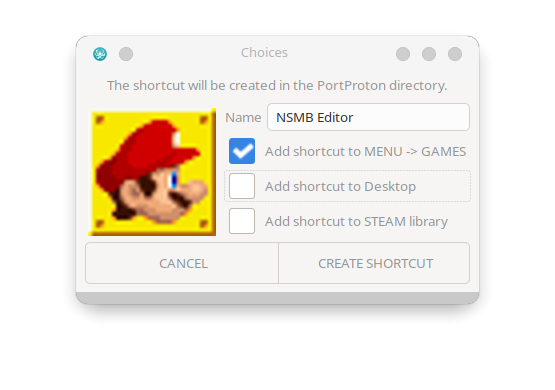](https://bookstack.nsmbcentral.net/uploads/images/gallery/2025-04/copie-decran-20250330-212530.png) Once it's done, click "create shortcut". Now, to launch the app, just have to click on the "Launch" button, and there you go! [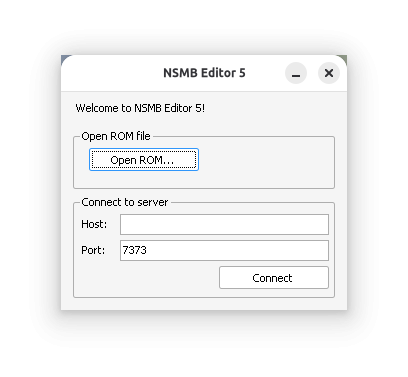](https://bookstack.nsmbcentral.net/uploads/images/gallery/2025-04/capture-decran-du-2025-03-23-12-51-25.png)Congratulations! Now, you are ready to make awesome stuff with Linux!
### FAQ / Troubleshooting > ##### Some actors appear weirdly, how can I fix it? When opening a level in the level editor, some elements may seem scaled incorrectly: [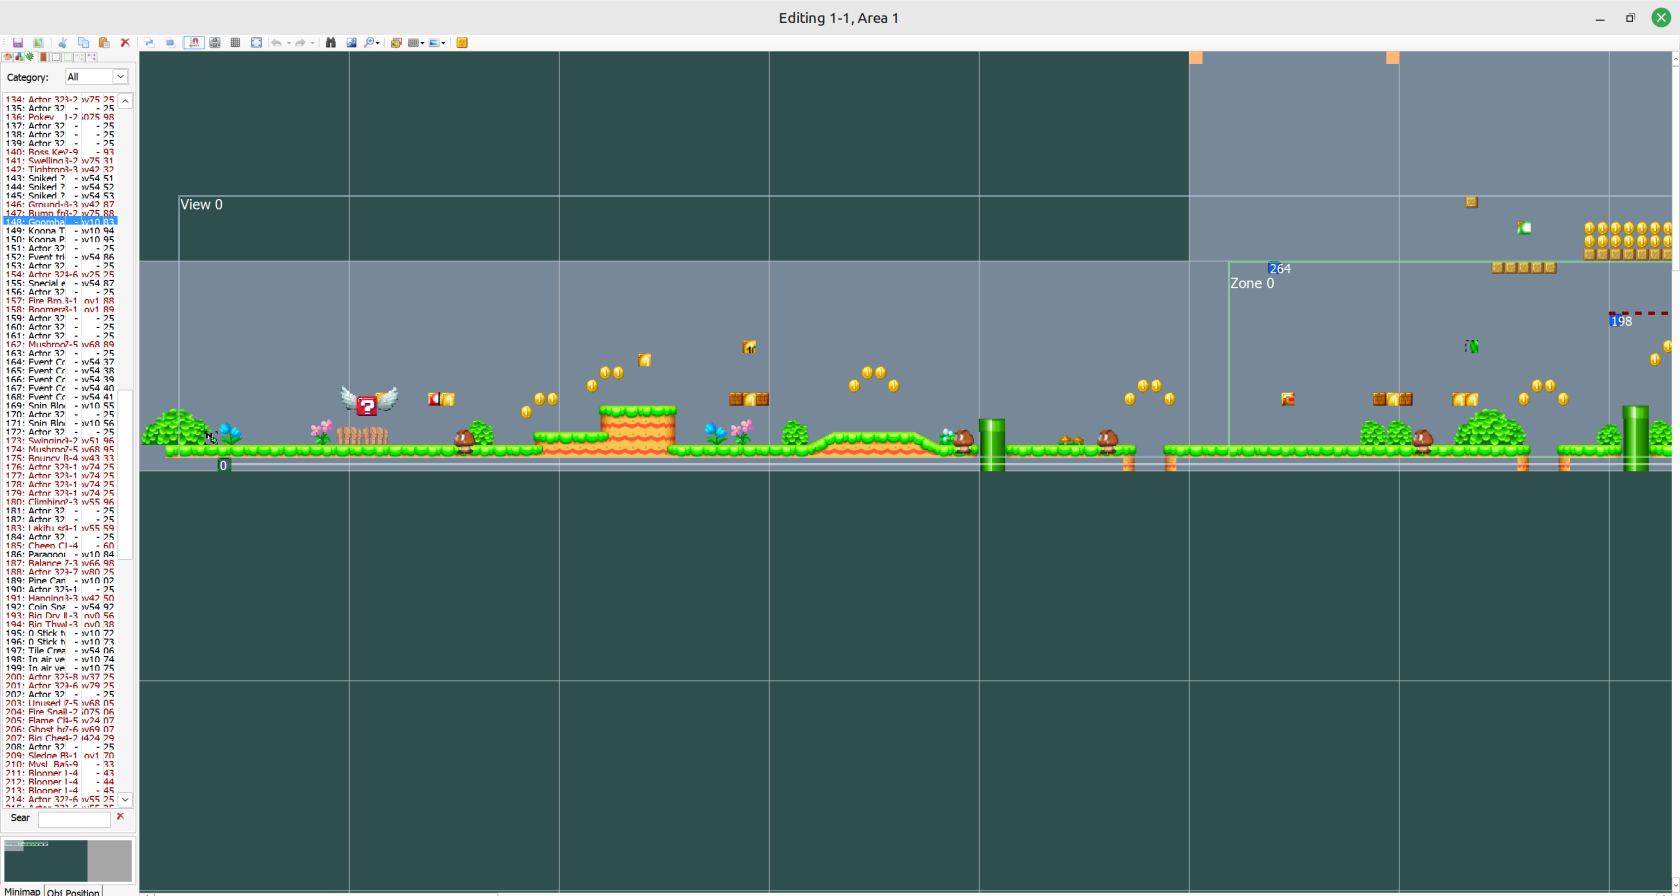](https://bookstack.nsmbcentral.net/uploads/images/gallery/2025-04/Qjvfractionnal-scaling-issue.png) This is because your computer is using **fractional scaling**. This zooms your screen, but not all elements in the app. To fix that, go into your display settings and select 100% or 200%: [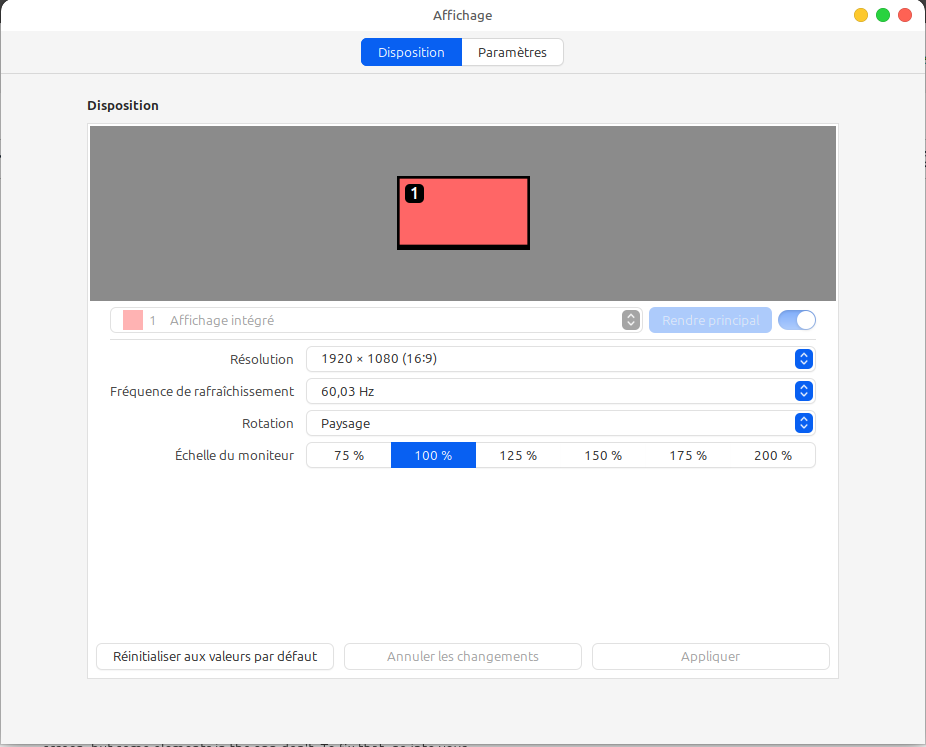](https://bookstack.nsmbcentral.net/uploads/images/gallery/2025-04/my0display.png) Now it's working better! [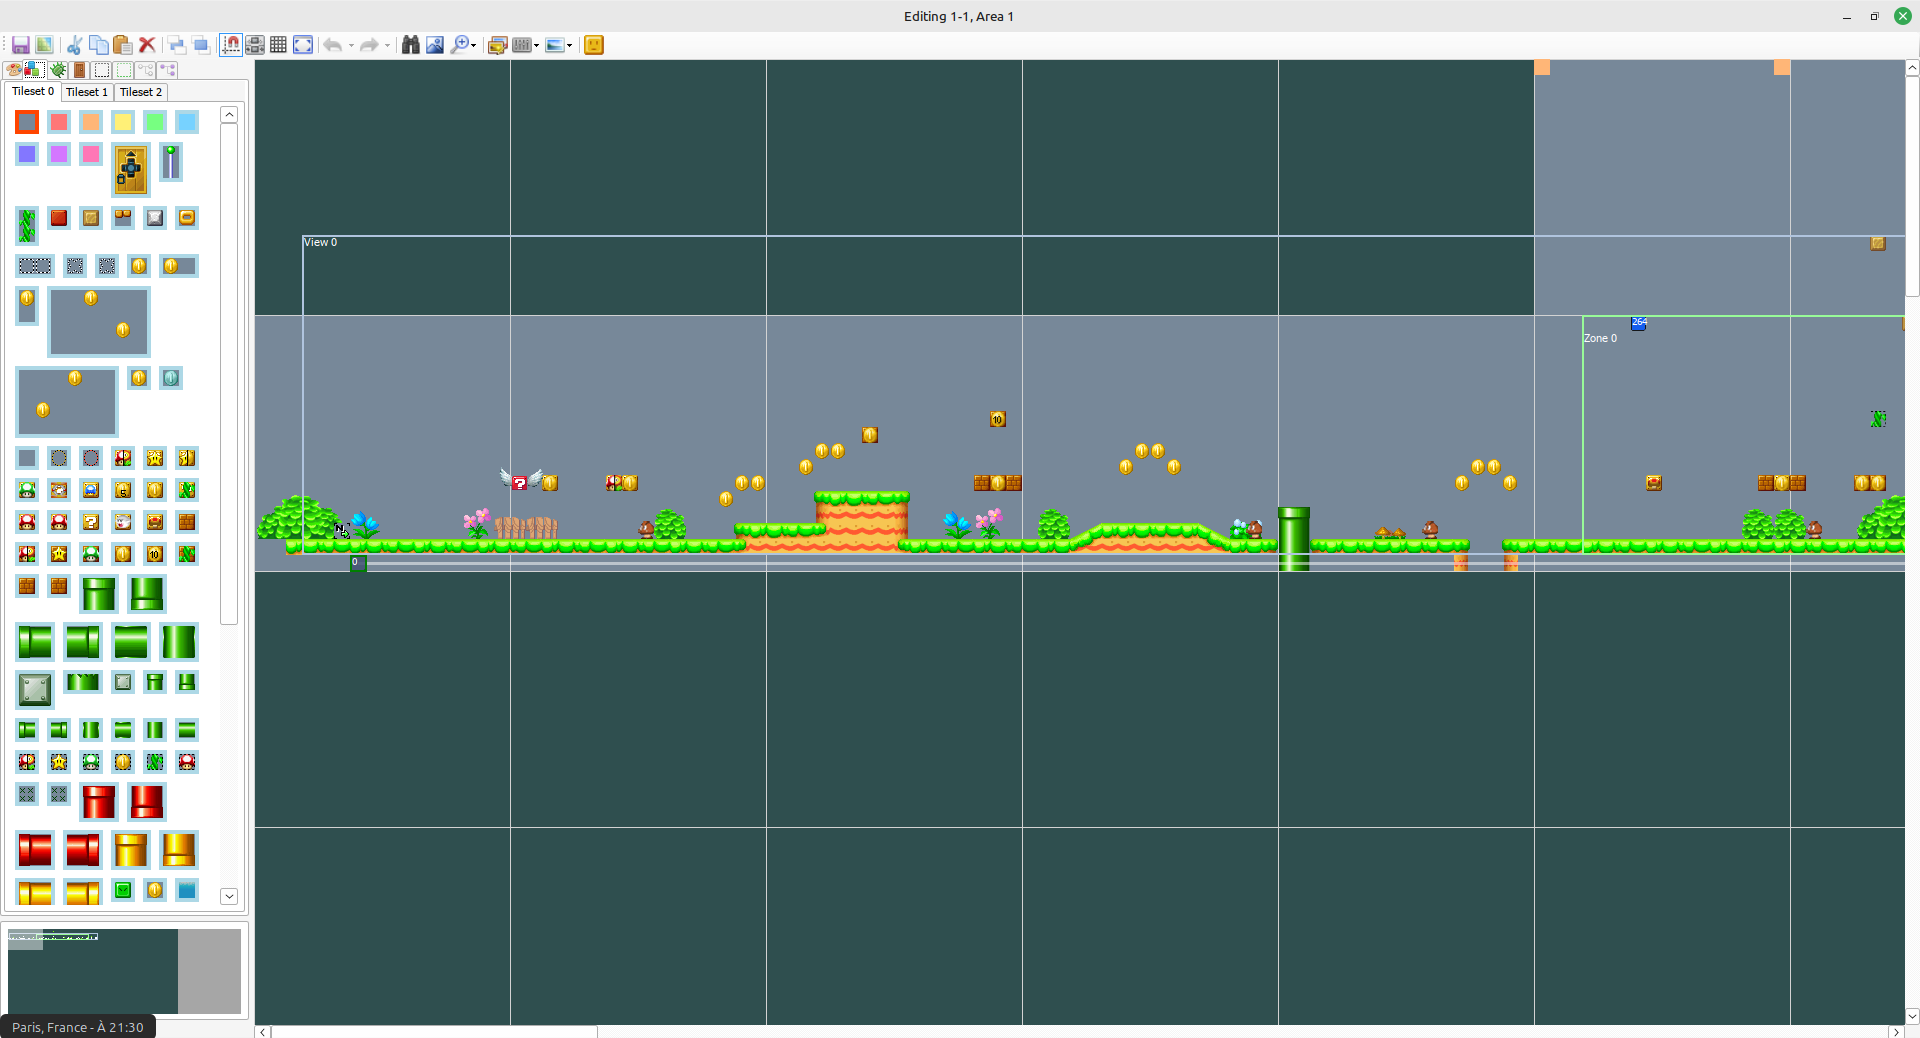](https://bookstack.nsmbcentral.net/uploads/images/gallery/2025-04/now-its-working.png)No better solution has been found yet. If you have one, please tell `@rph_nsmb` on the NSMB Central server.
> ##### It takes a while to navigate with the file explorer. Can't I add a shortcut? Of course you can! First, you will need to go to the parent folder of the one you want to make a shortcut (for example, I want to add `/home/rph/Documents/Template`, I'll go to `/home/rph/Documents`). Right-click on the folder you want to make a shortcut and select "create link". You should see something like this: [](https://bookstack.nsmbcentral.net/uploads/images/gallery/2025-04/link.png)If you don't see the "Create shortcut" option, take a look at the file explorer's menus or check its settings.
Right-click on the link and select "cut". Now, you will need to go to your PortProton setting folder. To do so, go to your home folder and go to `PortProton/prefixes/DOTNET/dosdevices`. Now paste your linked folder and rename it to a lowercase letter followed by a colon, for example: `n:`. [](https://bookstack.nsmbcentral.net/uploads/images/gallery/2025-04/drive.png) Now, if you open the file explorer, you should see your drive in "Computer": [](https://bookstack.nsmbcentral.net/uploads/images/gallery/2025-04/drive-2.png)Congratulations! You have your shortcut.
# Code Modification Going beyond the basics and modifying the game's code. # Custom Actors Sometimes the base game doesn't offer exactly what you need for your level. That's when you should turn to custom actors!This guide provides a basic overview of how to create custom actors. A decent understanding of C++ along with some prior NSMB code modding knowledge are recommended for this tutorial.
### Section 1 - The Boiler Plate This is code you will be writing basically every time you go to create a custom actor. It is standard practice to split your actor into two files `myActor.cpp` and `myActor.hpp` #### `myActor.cpp` ```c++ #include "nsmb.hpp" #include "myActor.hpp" ncp_over(0x020c560c, 0) const ObjectInfo objectInfo = MyActor::objectInfo; //Stage Object ID 44 (use this in the editor) ncp_over(0x02039a34) static constexpr const ActorProfile* profile = &MyActor::profile; //objectID 46 s32 MyActor::onCreate(){ return true; } bool MyActor::loadResources() { return true; } s32 MyActor::onDestroy(){ return true; } s32 MyActor::onRender(){ return true; } bool MyActor::updateMain(){ return true; } ``` This file is where you program your actor. At the beginning of the file is where you define: - Where in the object bank table your actor's object info is stored. The array index is what you place in the editor to "place" your object. In the sample above, it is replacing ID 44. The beginning of this array is located at `0x020c529c` - Where in the main process table your actor's profile is stored. The beginning of this array is located at `0x0203997c` Here's an overview of what these functions are usually used for:| **Function** | **Purpose** |
| `onCreate()` | This function is ran when your actor is first created. This function is used for initalizing variables and anything that should be done once. |
| `loadResources()` | This function is called when the game is setting up your actor. \[Todo\]: Find the normal use case for this function. |
| `onDestroy()` | This function is called when your Actor is being removed from the stage. This function is used for cleaning up after the actor (i.e. freeing resources). |
| `onRender()` | This function is called every game tick while your actor is in view of the camera. This is typically used for graphics related code (for example, changing what texture an NSBTX is currently drawing). |
| `updateMain()` | This function is called every game tick while your actor is loaded. This function is used for the main functionality of your code (i.e. calculating positions, updating variables, etc). |
TODO: Expand this table with more functions you can override in a `StageEntity`
#### `myActor.hpp` ```c++ #pragma once #include "nsmb.hpp" class MyActor: public StageEntity { public: virtual s32 onCreate() override; static bool loadResources(); virtual bool updateMain() override; virtual s32 onRender() override; virtual s32 onDestroy() override; static constexpr u16 objectID = 46; static constexpr ObjectInfo objectInfo = { 0, 0, 0, 0, 0, 0, 0, 0, CollisionSwitch::None, }; static constexpr u16 updatePriority = objectID; static constexpr u16 renderPriority = objectID; static constexpr ActorProfile profile = {&constructObject| **Function/Variable** | **Purpose** |
| `updateStep` | This variable keeps track of what update step the current state is in. 1 (or `Func::Init`) is used for when a state function is entered for the first time. Useful for setting variables related to the current state. -1 (or `Func::Exit`) is used for when a state function is being exited. Used for cleaning up any state specific code before the code changes to the next state. All other update step values can be used inside a step to create "sub steps" via conditional code. |
| `switchState()` | This function will swap the current state to the function passed as a parameter. Call this function when you want to change what state you are in. |
TODO: Expand this page with more actor components (for example, colliders)
# Porting old patch syntax to NCPatcher This page will help you understand how you can port any patching syntax to NCPatcher's. You are searching through NSMBHD or NSMB Central and you find a shiny code patch, you rush and put it in the `source` folder of your project only to find that a code patch is not compatible with your code! That sucks. So what can we do? For this example NSMB E3 Recreation's `PlayerAnims.cpp` code patch will be used. ## Step 1 - Investigation Let's start by taking a look at `PlayerAnims.cpp`. ```c++ #includeIn this tutorial, you will learn how to:
- Set up the NSMB DS Code Template - Set up ARM GCC - Set up NCPatcher - Extract/Build your ROMThis guide will cover the "NCPatcher Standalone" method described in the code template as the steps are more synchronized between all operating systems.
#### Setting Up the Code Template 1. Head over to the [code template's GitHub](https://github.com/MammaMiaTeam/NSMB-Code-Template "Code Template GitHub") 2. Click on **Code** **-> Download ZIP** 3. Now extract this zip and rename the folder to what you want to call your project (this will be referred to as your **project root**) 4.Don't put any spaces in your folder name!
You have now set up the code template
##### Setting up ARM GCC 1. Head to the [Arm GNU Toolchain Download Page](https://developer.arm.com/downloads/-/arm-gnu-toolchain-downloads "Arm GNU Toolchain Download Page") 2. Now search (using CTRL/CMD + F) for **AArch32 bare-metal target (arm-none-eabi)** and download the correct installer for your operating system. 3. Open the installer and install the toolchain. 4.Pick a location without spaces to install the toolchain!
You have now set up ARM GCC
#### Setting Up NCPatcher 1. Head over to the [NCPatcher GitHub releases page](https://github.com/TheGameratorT/NCPatcher/releases/ "NCPatcher Releases") 2. Download the latest release for your operating system 3. Extract NCPatcher Now, NCPatcher depends on **ncpatcher.json**, so lets make it!If you'd like to learn more about this file, head over to the [NCPatcher GitHub](https://github.com/TheGameratorT/NCPatcher "NCPatcher GitHub")!
In your **project root**, create the following files: - **ncpatcher.json** - Copy/Paste the following JSON into the file ```json { "$arm_flags": "-masm-syntax-unified -mno-unaligned-access -mfloat-abi=soft -mabi=aapcs", "$c_flags": "-Os -fomit-frame-pointer -ffast-math -fno-builtin -nostdlib -nodefaultlibs -nostartfiles -DSDK_GCC -DSDK_FINALROM", "$cpp_flags": "-fno-rtti -fno-exceptions -std=c++20", "$asm_flags": "-Os -x assembler-with-cpp -fomit-frame-pointer", "$ld_flags": "-lgcc -lc -lstdc++ --use-blx", "backup": "backup", "filesystem": "nsmb", "toolchain": "arm-none-eabi-", "arm7": {}, "arm9": { "target": "arm9.json", "build": "build" }, "pre-build": [], "post-build": [], "thread-count": 0 } ```You have now set up NCPatcher
#### Extracting, Building, and Repackaging Your ROM ##### If you're on Windows 1. Download [fireflower.zip](https://github.com/MammaMiaTeam/Fireflower/releases/ "Fireflower Release Page") and extract it. 2. Move **nds-build.exe** and **nds-extract.exe** out from the folder ##### If you're on macOS/Linux 1. Download [nds-extract.zip](https://bookstack.nsmbcentral.net/attachments/2) 2. Download [nds-build.zip](https://bookstack.nsmbcentral.net/attachments/1) 3. Extract both ZIPs Now, you need to build the tools. For NDS Extract: 1. Open a new **Terminal** window in the folder of the code 2. Run this command: `g++ nds-extract.cpp -o nds-extract -std=c++20` For NDS Build: 1. Open a new **Terminal** window in the folder of the code 2. Run this command: `g++ nds-build.cpp -o nds-build -std=c++20`From here on, the instructions will work for all operating systems. If you are on Windows 10, you can use **Command Prompt** instead of **Terminal**
##### Extracting Your ROM 1. Open a **Terminal** window in your **project root** 2. Run this command: `/path/to/nds-extract rom.nds nsmb`Replace /path/to/ with the actual file path to nds-extract. Also replace "rom" with the actual name of your .nds file
This will extract the contents of your ROM into a folder named nsmbYou have extracted your ROM
##### Building Your ROM This step will compile and patch your ROM with any code files found in the **source** directory in your **project root**. The Code Template comes with a few examples included in the **source** directory. 1. Open a **Terminal** window in your **project root** 2. Run this command: `/path/to/ncpatcher`Replace /path/to/ with the actual file path to ncpatcher
You have built your ROM
##### Repackaging Your ROM nds-extract depends on **buildrules.txt**, so let's create it! - **buildrules.txt** - Copy/Paste the following text into the file: ``` rom_header nsmb/header.bin arm9_entry KEEP arm9_load KEEP arm7_entry KEEP arm7_load KEEP fnt nsmb/fnt.bin file_mode ADJUST arm9 nsmb/arm9.bin arm7 nsmb/arm7.bin arm9ovt nsmb/arm9ovt.bin arm7ovt nsmb/arm7ovt.bin icon nsmb/banner.bin rsa_sig nsmb/rsasig.bin data nsmb/root ovt_repl_flag 0xFF ov9 nsmb/overlay9 ov7 nsmb/overlay7 ``` This step will take the files form the **nsmb** folder and repackage them into a .nds file 1. Open a **Terminal** window in your **project root** 2. Run this command: `/path/to/nds-build buildrules.txt NSMB.nds`Replace /path/to/ with the actual file path to nds-build.
You have repackaged your ROM
# Using GDB with Ghidra and melonDS #### What you'll need: - The latest version of [Ghidra](https://github.com/NationalSecurityAgency/ghidra/releases/tag/Ghidra_11.0.3_build) - A build of melonDS that has the GDB enabled -The easiest way to get this is to grab a GitHub action build of melonDS. You can find that [here](https://github.com/melonDS-emu/melonDS/actions). (Note: you'll need to be signed into a GitHub account to download these builds)
- The [GNU ARM Embedded Toolchain](https://developer.arm.com/downloads/-/gnu-rm) installed on your system - A Ghidra database of NSMB DS -Eventually, NSMB Central will host a shared Ghidra project so we have one centralized project anyone can contribute to. For now, you can generate a Ghidra project using [this tool](https://github.com/Ed-1T/NDS-Decompilation-Project-Maker/releases/tag/v1.2 "The GitHub page for the NDS Decompilation Project Maker"). If you need help, please ask in our Discord!
#### Configuring melonDS To enable the GDB, you need to do the following: 1. Click on the **Config** menu at the top of the emulator, then click on **Emu Settings** 2. Click on the **Devtools** tab 3. Check Enable **GDB stub** 4.If you do not see the Devtools tab, then you have not built melonDS with GDB enabled. Please check the link at the start of the guide to find a download with GDB enabled or build it yourself enabling GDB in CMake
melonDS is ready to go!
#### Setting up Ghidra To begin, open your Ghidra project in the code viewer as you normally would. 1. Click on File -> Configure, which should open a list of tools 2. Check the "Debugger" box [](https://bookstack.nsmbcentral.net/uploads/images/gallery/2024-04/image.png) This should cause windows to appear in your current project, likely making the following steps redundant. If you are unable to find a window, the following steps will either open the window, or present it to you in the project. #### Creating a Debugger TargetThis method has been tested on Linux and macOS. You should be able to follow these steps using WSL on Windows. Follow [this guide](https://learn.microsoft.com/en-us/windows/wsl/install "Microsoft Tutorial for WSL") if you need help setting up WSL.
To begin, open the Debugger Targets window by navigating to Windows -> Debugger -> Debugger Targets. The window should look something like this: [](https://bookstack.nsmbcentral.net/uploads/images/gallery/2024-04/gjbimage.png)As you'll notice, there is an active connection in the screenshot but nothing on your end...let's fix that! Click on the [](https://bookstack.nsmbcentral.net/uploads/images/gallery/2024-04/ci5image.png) button to open the **connect** window. ##### If you are on Linux: - Choose **gdb** in the dropdown - Set **arm-none-eabi-gdb -ex "set arch armv5t"** as the **GDB Launch Command** -If you have not added arm-none-eabi-gdb to your PATH, you'll need to provide the absolute path
- Click [](https://bookstack.nsmbcentral.net/uploads/images/gallery/2024-04/Z1Gimage.png) ##### If you are on macOS - Choose **gdb via SSH** in the dropdown - Set **arm-none-eabi-gdb -ex "set arch armv5t"** as the **GDB Launch Command** -If you have not added arm-none-eabi-gdb to your PATH, you'll need to provide the absolute path
- Set **SSH hostname** to **localhost** - Set **SSH username** to your username -You can use the command **whoami** in the terminal to get your username if you don't know it
- Click [](https://bookstack.nsmbcentral.net/uploads/images/gallery/2024-04/Z1Gimage.png) ##### If you are on Windows -This still needs to be tested on Windows. This guide will be updated when steps have been made
You have now created a Debugger Target
#### Connecting to melonDS The **gdb interpreter** should have opened for you when you connected to the **debugging target.** -If you have lost the interpreter window, open the objects window (Window -> Debugger -> Objects) and click on [](https://bookstack.nsmbcentral.net/uploads/images/gallery/2024-04/WSwimage.png) to bring the menu back
- In melonDS, open your ROM. (You can either boot directly to the game or launch the firmware) Now, in the interpreter menu, run the command **target remote localhost:\[ARM9 Port\]** (Where \[ARM9 Port\] is the ARM9 Port set in the Devtools tab.) -By default, it should be 3333. The command would be **target remote localhost:3333**
If melonDS pauses after running this command, GDB is now talking to melonDS -If the connection immediately closes after running the command: change the ARM9 port to something else, restart melonDS, and close the current GDB connection.
You have now connected Ghidra to melonDS
#### Using Breakpoints If you would like to set breakpoints, you'll need to use the **Dynamic PC** 1. Open the **Dynamic PC** window by clicking **Window -> Listing -> Dynamic - Auto PC,** \[...\] 1.If you do not see this option, you can alternatively open it via **Window -> Debugger -> New Dynamic Listing**
2. Next, open the **Modules** window by clicking **Window -> Debugger -> Modules** 3. Lastly, click on [](https://bookstack.nsmbcentral.net/uploads/images/gallery/2024-04/BeZimage.png) in the **Modules** window. Now, setting a breakpoint in your code view should set a breakpoint in the **Dynamic PC** -Breakpoints will only update if the emulator has hit a breakpoint or has been paused by pressing [](https://bookstack.nsmbcentral.net/uploads/images/gallery/2024-04/ED1image.png)
You have now set up Ghidra to debug melonDS. Happy coding!
# Public Code Mods This is a collection of locations where you can find public code mods for your own NSMB mod. The header of each section links to the relevant server/board if you want to look around for anything scattered around those posts. If you find another location, feel free to add it to this list. All code here is for use with [NCPatcher ](https://bookstack.nsmbcentral.net/books/new-super-mario-bros/page/ncpatcher "Wiki page for NCPatcher")and MammaMia Team's [code template](https://github.com/MammaMiaTeam/NSMB-Code-Template "GitHub page for the NSMB Code Template") unless otherwise specified. #### [NSMB Central](https://discord.gg/x7gr3M9): - [\#nsmb-requests](https://discord.com/channels/399424476259024897/1290035837412573296) - [\#public-resources](https://discord.com/channels/399424476259024897/1207793065524199455) #### GitHub Repositories: - [https://github.com/NSMBC/Code-Mods](https://github.com/NSMBC/Code-Mods) - [https://github.com/pete420griff/nsmb-stuff](https://github.com/pete420griff/nsmb-stuff) - [https://github.com/illythecat/New-PlusPlus-Super-Mario-Bros](https://github.com/illythecat/New-PlusPlus-Super-Mario-Bros) - [https://github.com/mariomadproductions/nsmb-e3-rec](https://github.com/mariomadproductions/nsmb-e3-rec) (may be unpolished) - [https://github.com/Newer-Team/NewerSMBDS](https://github.com/Newer-Team/NewerSMBDS) (NSMBe patcher) #### [NSMBHD](https://nsmbhd.net): - [https://nsmbhd.net/thread/2569-misc-patches-thread/](https://nsmbhd.net/thread/2569-misc-patches-thread/) (NSMBe patcher; Dirbaio's template) # NSMB Co-op Development Guide ## Introduction This guide explains how to write code that works correctly with the NSMB Co-op hack. The co-op system allows two players (Mario and Luigi) to play simultaneously on separate consoles connected via local wireless. The biggest challenge in co-op development is preventing **desyncs** - situations where the two consoles have different game states. This document covers common desync patterns and how to avoid them, along with co-op-specific systems like player spectating.**Key Principle:** Any code that affects gameplay state must produce identical results on both consoles, regardless of which console is running it.
## Table of Contents 1. [Core Concepts](#core-concepts) - Understanding desyncs and co-op fundamentals 2. [Common Anti-Patterns to Avoid](#common-anti-patterns-to-avoid) - Quick reference of what NOT to do 3. [Understanding Desyncs: A Detailed Example](#understanding-desyncs-a-detailed-example) - Step-by-step desync analysis 4. [Co-op-Safe Patterns and Solutions](#co-op-safe-patterns-and-solutions) - Practical coding techniques 5. [Special Cases](#special-cases) - Exceptions and edge cases 6. [Debugging and Troubleshooting](#debugging-and-troubleshooting) - Tools and techniques for finding issues 7. [Advanced Systems](#advanced-systems) - Player spectating and complex features ## Core Concepts ### What is a Desync? A desync occurs when the two consoles have different game states. For example: - Console 1 thinks Mario has 3 lives, Console 2 thinks Mario has 2 lives - Console 1 shows an enemy as alive, Console 2 shows it as defeated - Console 1 has a different random number sequence than Console 2 ### Safe vs. Unsafe Operations - **Safe**: Operations that only affect local display/audio (sounds, UI elements, screen shaking) - **Unsafe**: Operations that modify gameplay state (player health, enemy behavior, item spawning, particle effects) ### The Golden Rule When writing gameplay logic, always consider: "What happens if both consoles run this code at the same time?" ## Common Anti-Patterns to Avoid Before diving into specific solutions, here are the most common mistakes that cause desyncs: ### ❌ DON'T: Use Game::localPlayerID for gameplay logic ```cpp // This will desync! if (shouldTriggerEvent()) { Player* player = Game::getPlayer(Game::localPlayerID); player->giveReward(); } ``` ### ✅ DO: Loop through all players or use linkedPlayerID ```cpp // This stays in sync! if (shouldTriggerEvent()) { for (s32 playerID = 0; playerID < Game::getPlayerCount(); playerID++) { Player* player = Game::getPlayer(playerID); if (playerMeetsCondition(player)) { player->giveReward(); } } } ``` ### ❌ DON'T: Use ViewShaker without playerID parameter ```cpp // This will desync! ViewShaker::start(type, viewID); ``` ### ✅ DO: Specify which player should feel the shake ```cpp // This stays in sync! ViewShaker::start(type, viewID, playerID, false); ``` ### ❌ DON'T: Use Game::getRandom() for gameplay logic ```cpp // This will desync! if ((Game::getRandom() & 0xFF) == 0) { spawnEnemy(); } ``` ### ✅ DO: Use Net::getRandom() for synchronized randomness ```cpp // This stays in sync! if ((Net::getRandom() & 0xFF) == 0) { spawnEnemy(); } ``` ## Understanding Desyncs: A Detailed Example Let's examine how a typical desync occurs using a Goomba collision example: Let's pretend this is how a Goomba is coded to hurt a player: ```cpp void Goomba::hurtPlayer() { // Game::localPlayerID is the ID of the player for *our* console s32 playerID = Game::localPlayerID; // Game::getPlayer(id) gives us a pointer to a Player object // id = 0 → Mario // id = 1 → Luigi Player* player = Game::getPlayer(playerID); // The local player gets hurt player->getHurt(); // Problem: // On Console 0 → local_player_id = 0 → only Mario gets hurt // On Console 1 → local_player_id = 1 → only Luigi gets hurt // // Bad result: // Console 0 sees: // Mario = HURT // Luigi = NOT HURT // // Console 1 sees: // Mario = NOT HURT // Luigi = HURT } ``` ### The Solution The fix is to use the collision information that's already available: Usually when a collision with an enemy occurs, the actor is informed of which player collided with it. This information is stored in `this->linkedPlayerID`. ```cpp void Goomba::hurtPlayer() { // this->linkedPlayerID is the ID of the player that collided with the Goomba // Let's assume it was Mario (0) s32 playerID = this->linkedPlayerID; // Game::getPlayer(id) gives us a pointer to a Player object // id = 0 → Mario // id = 1 → Luigi Player* player = Game::getPlayer(playerID); // The player that collided with the Goomba gets hurt player->getHurt(); // Good result: // Console 0 sees: // Mario = HURT // Luigi = NOT HURT // // Console 1 sees: // Mario = HURT // Luigi = NOT HURT } ``` ### Alternative: Player Loop Pattern When `this->linkedPlayerID` isn't available, use the player loop pattern: ```cpp bool Goomba::shouldPlayerGetHurt(Player* player) { // ... do any checks to decide if Player should get hurt // In this example we assume Mario (0) is in love with the Goomba return player->isInLoveWithGoomba(this); } void Goomba::hurtPlayer() { // Update the logic for all players for (s32 playerID = 0; playerID < Game::getPlayerCount(); playerID++) { // Game::getPlayer(id) gives us a pointer to a Player object // id = 0 → Mario // id = 1 → Luigi Player* player = Game::getPlayer(playerID); if (shouldPlayerGetHurt(player)) { // The player that collided with the Goomba gets hurt player->getHurt(); } } // Good result: // Console 0 sees: // Mario = HURT // Luigi = NOT HURT // // Console 1 sees: // Mario = HURT // Luigi = NOT HURT } ``` ## Co-op-Safe Patterns and Solutions ### Player Targeting: Finding the Right Player Use `ActorFixes_getClosestPlayer(this)` instead of `Game::getLocalPlayer()` or `Game::getPlayer(Game::localPlayerID)`. ```cpp void Volcano::spawnMeteor() { // BAD: Always targets the local player Player* target = Game::getLocalPlayer(); // GOOD: Finds the closest player to the volcano Player* target = ActorFixes_getClosestPlayer(this); // Spawn meteor at target's position Vec3 meteorPos = target->position; Actor::spawnActor(METEOR_ID, 0, &meteorPos, nullptr, nullptr, nullptr); } ``` For zone-specific targeting: ```cpp void SpikeBass::attack() { // Find the closest player in a specific zone Player* target = ActorFixes_getClosestPlayerInZone(this, zoneID); if (target == nullptr) { // Fallback to any closest player target = ActorFixes_getClosestPlayer(this); } // Attack the target fireProjectileAt(target->position); } ``` ### Audio: Console-Specific Sound EffectsThis is one of the few cases where it's safe to use `Game::localPlayerID`, as audio is local to each console - the other console doesn't receive or process your sound effects.
```cpp void MyHack::updatePlayerFlyState() { // Update the logic for all players for (s32 playerID = 0; playerID < Game::getPlayerCount(); playerID++) { Player* player = Game::getPlayer(playerID); // ... logic to update the fly state // Play flight finished jingle if (player->finishedFlying) { // Only the player that finished flying will hear the jingle if (playerID == Game::localPlayerID) { SND::playSFX(FLIGHT_FINISHED_SFX, &player->position); } } } } ``` Another common pattern is to play sound effects when items are collected or power-ups are switched: ```cpp void RedRing::spawnReward() { for (s32 playerID = 0; playerID < Game::getPlayerCount(); playerID++) { Player* player = Game::getPlayer(playerID); // Determine reward based on power-up PowerupState reward = calculateReward(player->currentPowerup); // Play sound only for the local player when they get Fire Flower if (reward == PowerupState::Fire && playerID == Game::localPlayerID) { SND::playSFX(0x17E, &this->position); } // Spawn the item for this player spawnItemForPlayer(reward, playerID); } } ``` ### Safe Uses of Game::localPlayerID There are specific cases where using `Game::localPlayerID` is not only safe, but necessary: 1. **Sound Effects**: Audio is local to each console 2. **Visual UI Elements**: Screen-specific UI components like menus and HUD 3. **Liquid Position**: Due to co-op forcing shared areas, liquid levels are stored per-console 4. **File Loading**: Loading graphics or UI resources that are console-specific ```cpp // ✅ SAFE: Sound effects if (playerID == Game::localPlayerID) { SND::playSFX(soundID, &position); } // ✅ SAFE: Liquid collision (special case - see liquid section) if (player->position.y < Stage::liquidPosition[Game::localPlayerID]) { // Handle liquid damage } // ✅ SAFE: UI updates if (playerID == Game::localPlayerID) { FS::loadFileLZ77(spectateTextFileID, (u16*)HW_OBJ_VRAM); } ``` ### View Shaking: Per-Player Screen Effects If you want to shake the screen for a specific player, never use the basic `ViewShaker::start` overloads with conditional logic: ```cpp // BAD: This causes instant desync if (canShakePlayer(Game::localPlayerID)) { ViewShaker::start(type, viewID); } ``` This causes an immediate desync. Instead, use the 4-argument overload without the conditional check: ```cpp void SledgeBro::doGroundPound() { for (s32 playerID = 0; playerID < Game::getPlayerCount(); playerID++) { Player* player = Game::getPlayer(playerID); // Check if this specific player should be affected if (ActorFixes_isPlayerInShakeRange(player)) { ViewShaker::start(3, this->viewID, playerID, false); // Play sound only for the local player if (playerID == Game::localPlayerID) { SND::playSFX(138, &this->position); } // Apply gameplay effects to this specific player if (!Game::getPlayerDead(playerID)) { player->takeDamage(); } } } } ``` ### Camera and Visibility Checks Never use `Game::isOutsideCamera(..., Game::localPlayerID)` for gameplay logic. Use `ActorFixes_isOutsideCamera` or `ActorFixes_isInRangeOfAllPlayers` instead: ```cpp void Enemy::updateBehavior() { // BAD: Only checks against local player's camera if (Game::isOutsideCamera(this->position, boundingBox, Game::localPlayerID)) { return; // Skip update } // GOOD: Checks against the closest player's camera if (ActorFixes_isOutsideCamera(this, boundingBox)) { return; // Skip update } // Continue with enemy logic... } ``` For entities that need to stay active when any player can see them: ```cpp void Enemy::onUpdate() { // This ensures the actor only updates if ANY player can see it if (!ActorFixes_isInRangeOfAllPlayers(this)) { return; // All players are too far away, skip update } // Continue updating since at least one player can see us updateLogic(); } ``` ### Rendering Optimization Use `ActorFixes_safeSkipRender` for 3D animated entities that need to update their models but may not render: ```cpp class HammerBro : public StageEntity3DAnm { bool skipRender() override { // This will update the model but only render for players who can see it return ActorFixes_safeSkipRender(this); } }; ``` ### Random Number Generation Use `Game::getRandom()` for local code (UI, effects, sounds). Use `Net::getRandom()` for gameplay logic that affects game state: ```cpp void Blockhopper::updateJump() { // BAD: Different random numbers on each console = desync if ((Game::getRandom() & 0xFF) == 0) { doJump(); } // GOOD: Synchronized random numbers across consoles if ((Net::getRandom() & 0xFF) == 0) { doJump(); } } ``` ## Special Cases ### Liquid/Lava Damage: The Exception to the Rule**Special Case:** Liquids are one of the few exceptions where you **DO** use `Game::localPlayerID`!
This is because the co-op implementation doesn't support per-player liquid levels - if liquid is detected in the level, both players are forced to always be in the same area, so they share the same liquid level. The liquid position is managed per-console, not per-player. ```cpp void checkLiquidDeath(Player* player) { s32 playerID = player->linkedPlayerID; // CORRECT: Use localPlayerID for liquid position // Both players share the same liquid level since they're in the same area if (player->position.y < Stage::liquidPosition[Game::localPlayerID]) { player->playSFXUnique(338, &player->position); Liquid_doWaves(player->position.x, 1); Game::losePlayerLife(playerID); Game::setPlayerDead(playerID, true); } } ``` The reason for this exception: - Liquid positions are stored per-console: `Stage::liquidPosition[Game::localPlayerID]` - Co-op forces both players to be in the same area at all times - Each console only tracks one liquid level (the local one) - Trying to use `Stage::liquidPosition[playerID]` would fail because only index `[Game::localPlayerID]` is valid ### StageLayout Data: Incomplete Arrays**Critical Issue:** Many parts of the StageLayout have arrays that appear to support both players (`PlayerCount`-sized arrays), but in reality **only the local player's data is populated or valid**.
This means that even though the StageLayout structure contains arrays like: ```cpp ScreenInfo screenFG[PlayerCount]; // Only [localPlayerID] is valid ScreenInfo screenBG[PlayerCount]; // Only [localPlayerID] is valid ```**You MUST use `Game::localPlayerID` when accessing these arrays**, regardless of which player you're working with:
```cpp // ❌ BAD: Will access invalid/empty data for non-local player u16 getForegroundID(u32 playerID) { return Stage_getFgScreenID(playerID); // This will fail for playerID != localPlayerID } // ✅ GOOD: Always use localPlayerID for StageLayout data u16 getForegroundID(u32 playerID) { return Stage_getFgScreenID(Game::localPlayerID); // This works correctly } ``` **Real Examples from the Codebase:** 1. **Pipes Background Fix**: The screen foreground data is only available for the local player: ```cpp // Fixed pipes background - must use localPlayerID instead of playerID // Original code caused desyncs by trying to access screenFG[playerID] // when only screenFG[localPlayerID] contains valid data ``` 2. **Volcano Eruption**: Background screen data is local-only: ```cpp // Check if we're in a volcano level (screen ID 15) if (Stage_getFgScreenID(Game::localPlayerID) == 15) { ActorFixes_updateVolcanoBackground(); } ``` 3. **BG1CNT Register Fix**: Background control data is per-console: ```cpp // Do not set BG1 CNT with other player's data - we don't have it! if (Game::localPlayerID == playerID) { // Apply background changes only for local player } ``` **Why This Happens:** - Nintendo's original game was single-player, so many systems only tracked one set of data - Background/foreground rendering data is managed per-console since each console renders independently - Screen effects, camera settings, and background animations are local to each console **When to Use localPlayerID for StageLayout:** - Screen/background data access (`screenFG`, `screenBG`, `screenTS`) - Camera and view-related information that's console-specific - Background effects and animations - Tile rendering and display settings ### Rotators: Forced View Synchronization**Critical Issue:** Levels with **rotators** (rotating/tilting level mechanics) force additional constraints that override normal co-op behavior.
Rotators are detected by checking if any tileset has `screenID == 0xFF00`: ```cpp bool Stage_areaHasRotator() { u32 tilesetCount = Stage::getBlockElementCount(StageBlockID::Tileset); for (u32 i = 0; i < tilesetCount; i++) { if (Stage::stageBlocks.tileset[i].screenID == 0xFF00) return true; } return false; } ``` **Rotator Restrictions:** When a level has a rotator, **both players must always be in the same view**. This limitation exists because each console only maintains its own StageLayout data, making it impossible to reliably detect or synchronize rotator states for the other player. Supporting independent rotators for both players would require a major overhaul of the system, so co-op forces both players to remain in the same view to guarantee that all rotator effects apply to a shared, consistent state. **Consequences of Rotators:** - Players cannot split into different areas/views - Door and pipe transitions affect both players simultaneously **Examples of Rotator Levels:** - W8 Final Castle ### Hardcoded Area Values**Important:** The codebase contains many hardcoded area number checks for specific levels and special behaviors. These represent special-case handling that you need to be aware of when modifying co-op behavior. There are plans to remove these hardcoded constraints by using actors that set flags on the levels and then despawn.
**Mini-Mushroom Cutscene Areas (180, 181):** ```cpp // Mini-mushroom cutscene areas u32& areaNum = *rcastRemember: When in doubt, loop through all players and apply logic based on each player's individual state rather than assuming anything about the local player!
**Key Questions to Ask:** - Does this code behave differently on Console 0 vs Console 1? - Am I using `Game::localPlayerID` for gameplay logic? - Are my random numbers synchronized between consoles? - Will both consoles execute this logic identically? ## Advanced Systems ### Player Spectate System The co-op hack includes a spectate system that allows dead players to watch the other player and automatically follow them through level transitions. This system maintains engaging co-op gameplay when one player dies, rather than forcing a restart or breaking the co-op experience. #### How Spectating Works When a player dies in co-op mode, instead of immediately respawning or ending the level, they enter **spectate mode**: 1. **Target Assignment**: The dead player's camera follows the living player ```cpp // playerID ^ 1 gives us the other player (0 becomes 1, 1 becomes 0) PlayerSpectate::setTarget(deadPlayerID, deadPlayerID ^ 1); ``` 2. **Camera Following**: The spectating player's camera smoothly lerps to follow their target ```cpp // Camera position updates to match the target player Player* target = PlayerSpectate::getTargetPlayer(spectatorPlayerID); target->followCamera(spectatorPlayerID); ``` 3. **View Transitions**: When the living player enters doors/pipes, spectators automatically follow ```cpp // All spectators following transitPlayerID will switch views too PlayerSpectate::syncSpectatorsOnViewTransition(transitPlayerID); ``` #### System Components - **Target Tracking**: Each player has a target they're spectating (`playerTarget[playerID]`) - **Local Target Cache**: Quick access to who the local player is watching (`localTarget`) - **Smooth Transitions**: Camera lerping prevents jarring jumps when switching targets - **Shared Camera Mode**: Special mode for certain levels (like the level looper in W8 Final Castle) where both players share one camera view - **Entrance Following**: Spectators automatically transition to new areas when their target does #### API Reference ```cpp // Check if a player is spectating someone else bool PlayerSpectate::isSpectating(u32 playerID); // Get who a player is currently spectating Player* PlayerSpectate::getTargetPlayer(u32 playerID); // Manually set spectate target PlayerSpectate::setTarget(spectatorID, targetPlayerID); // Enable smooth camera transitions PlayerSpectate::setLerping(playerID, true); ``` #### Spectate Mode Triggers **Entering Spectate Mode:** - **Player Dies (Other Alive)**: Player dies and other player is still alive → Enter spectate mode - **Level Start (No Lives)**: Player is dead when spawning (e.g., at level start with 0 lives) - **Warp Cannon**: When using warp cannons, all other players spectate player 0 during the shooting sequence - **Boss Victory Cutscenes**: Players not directly involved in the victory sequence spectate the player who triggered it - **Flagpole**: (NOT IMPLEMENTED YET) When one player hits the flagpole, the other player spectates them during the victory sequence **Exiting Spectate Mode:** - **Player Respawns**: The player spawns back into the level → Respawned player returns to normal - **New Level**: New level starts → Spectate targets reset to self (`PlayerSpectate::clearSpectators()`) - **Cutscene End**: Boss introduction cutscenes end → Players return to normal #### Camera Lerping System The spectate system includes smooth camera transitions via **lerping** (linear interpolation): **Automatic Lerp Activation:** - **Boss Victory**: When players miss cutscenes or are repositioned during boss victories - **Flagpole Hit**: (NOT IMPLEMENTED YET) Smooth transition when other player hits the flagpole **Automatic Lerp Deactivation:** The lerping system automatically stops itself when transitions complete: ```cpp // Position lerping stops when camera reaches close enough to target if (distanceX < 48fx && distanceY < 48fx) { if (distanceX == 0 && distanceY == 0) playerLerping[playerID] = false; // Auto-disable } // Zoom lerping stops when zoom difference is eliminated if (distance == 0) playerLerpingZoom[playerID] = false; // Auto-disable ``` **Key Lerping Properties:** - **Smooth Movement**: Camera doesn't snap instantly to new positions - **Distance Thresholds**: Lerping ends when within 48 units of target position - **Separate Zoom**: Zoom lerping is handled independently from position lerping - **Self-Terminating**: No manual intervention needed - lerping automatically stops when complete The spectate system ensures that co-op gameplay remains engaging even when one player dies, allowing them to continue following the action and automatically rejoin when appropriate. ## Summary This guide covered the essential principles for writing co-op compatible code in NSMB: **Remember these key points:** - Never use `Game::localPlayerID` for gameplay logic (except liquids and local-only effects) - Always loop through all players or use `this->linkedPlayerID` for collision-based logic - Use `Net::getRandom()` for synchronized randomness, `Game::getRandom()` for local effects only - Specify player IDs explicitly in functions like `ViewShaker::start()` - Use co-op-safe helper functions like `ActorFixes_getClosestPlayer()` **When in doubt:** - Ask yourself: "Will this code behave identically on both consoles?" - Test your changes with two consoles to verify synchronization - Use the debugging tools and desync guards to catch issues earlyFollowing these patterns will help ensure your code works seamlessly in the co-op environment while maintaining the engaging two-player experience.
# Tools The tools used to mod NSMB DS with a general overview of how to use them # Fire FlowerFire Flower has been replaced by [NCPatcher](https://bookstack.nsmbcentral.net/books/new-super-mario-bros/page/ncpatcher "NCPatcher")
[Fire Flower](https://github.com/MammaMiaTeam/Fireflower) is a patcher for Nintendo DS games. It works different to any other patchers and aims towards performance, user-friendliness and practicability. # NCPatcher NCPatcher is a program that modifies the executable binaries of a Nintendo DS ROM. It was created because of the need to have more flexible patching features that other patchers did not have. Check out the documentation over at [the NCPatcher GitHub.](https://github.com/TheGameratorT/NCPatcher)A tutorial will be created on using this tool for NSMB DS specifically soon
# NSMBeTODO: Maybe a different screenshot?
[](https://bookstack.nsmbcentral.net/uploads/images/gallery/2024-02/Vlbimage.png)NSMBe is a multipurpose modding tool for New Super Mario Bros., capable of editing levels, graphics, tilesets, and backgrounds. The editor is currently maintained by Mamma Mia Team. You can download the latest release from [GitHub](https://github.com/MammaMiaTeam/NSMB-Editor/releases/latest). ### Recognized NSMB ROMs When a ROM is opened in NSMBe, it checks the ROM's game code to see which release of New Super Mario Bros. it is. The following releases are recognized by NSMBe: - North American (A2DE) - European (A2DP) - Japanese (A2DJ) - Korean (A2DK) - Chinese (A2DC) If the ROM opened is not one of these versions (such as a kiosk demo ROM, or a ROM besides New Super Mario Bros.), NSMBe will not show the Level Listing, Tilesets, or Backgrounds tab. ### Known BugsTODO: - Does the "Data Finder" button throw an exception in the latest version? - Can .nml files be imported over MvsL Download Play levels as of the latest version? - Does 8-8 area 2 open properly as of the latest version? - What is the last version the "Decompress overlay" button is known to work on? It's functional in v5.3 b6
- The "Decompress overlay" button in the ROM File Browser tab is nonfunctional - Certain levels from the vanilla game (such as 1-4 area 2) cannot be opened and instead thrown an exception - Colour 0 is always rendered as transparent in the graphics editor, even in textures that are not meant to render it as transparent - Certain models (such as w8.nsbmd) will show a message stating "This file is already being edited" even when not opened in the graphics editor; they are suchly uneditable through NSMBe's graphics editor without modification - The "Edit Properties" button in the Backgrounds tab will not apply changes made to file IDs - The undo button in the tilemap editor will not properly undo tiles drawn over tiles which use a palette greater than the amount of palettes opened (such as the blue coins in the jyotyu tileset tilemap) - The object preview in the tile object editor does not accurately render the behaviour of slope control tiles as they function in-game - NSMBe will regard files closed in the graphics editor by right-clicking as still "open" and will throw an error upon attempting to reopen said file, even after closing the graphics editor window # Other ToolsTODO: - Sorting and general touching-up. - midi2sseq & sseq2midi; I believe NitroStudio makes the former obsolete... I'm not quite sure where the latter came from, originally. - Actually, there should be more sound tools in general. - bnbl & bncl editors under legacy tools? - Perhaps list the original NitroStudio under legacy tools? - Make mirrors of downloads? - Some descriptions should be improved (Nitro Studio 2 in particular) - Also, there seems to be a Nitro Studio 2 Deluxe (forked from the original), but I'm not sure what all's different. Should it replace Nitro Studio 2 here? - ^Goes for other random ass forks of programs listed here - Add [this](https://github.com/TheGameratorT/NDS_BMG_Editor "NDS BMG Editor on GitHub")? - if your reading this why not add more tools
This page lists tools useful for modding which don't need a dedicated page. ### New Super Mario Bros. Tools Tools specifically made for New Super Mario Bros. modding. #### Goombatlas Author: RicBent A world map path editor. [Download](http://kuribo64.net/get.php?id=96ijEmlpzTnQq3Lq "Goombatlas download") — [GitHub repository](https://github.com/RicBent/Goombatlas "Goombatlas GitHub repository") — [NSMBHD thread](https://nsmbhd.net/post/53197/ ""Goombatlas - The NSMB Worldmap Editor" on NSMBHD") #### NSMB Titlescreen Editor Author: RicBent Arranges titlescreen logo graphics as needed for importing. [Download](https://nsmbhd.net/get.php?id=FpMFSBw5nyMCkPeH "NSMB titlescreen editor download") — [NSMBHD thread](https://nsmbhd.net/post/30549/ ""NSMB Titlescreen Editor" on NSMBHD") #### Title Logo 256 Colors ASM Image Tiler Author: TheGameratorT Tiles titlescreen logo graphics as needed for the 256 colour title logo code patch. Can reverse tiling. [Download](https://mega.nz/file/WsoHnJiJ#23DbU6XIcqs-uRG3WZMSPAZISfwVzPCqo9-Vk1fwiBA "Title Logo 256 Colors ASM Image Tiler downlaod") #### NSMB Save Editor Author: newluigidev A tool for modifying game save files. [Download](http://github.com/newluigidev/New-Super-Mario-Bros-Save-Editor/releases/latest "New Super Mario Bros Save Editor GitHub latest release page") — [GitHub repository](https://github.com/newluigidev/New-Super-Mario-Bros-Save-Editor "New Super Mario Bros Save Editor GitHub repository") — [NSMBHD thread](https://nsmbhd.net/post/59251/ ""Save Editor Tool" on NSMBHD") #### Address Helper Author: Newer Team A simple tool which converts Ghidra database addresses to memory addresses and vise versa [Download](https://github.com/Newer-Team/NSMBDS-Address-Helper/releases/latest "NSMBDS Address Helper GitHub latest release page") — [GitHub repository](https://github.com/Newer-Team/NSMBDS-Address-Helper "NSMBDS Address Helper GitHub repository") #### ASM Converter Author: Will Smith Converts legacy code patches written in assembly into patches for the NCPatcher template. [GitHub directory](https://github.com/pete420griff/nsmb-stuff/tree/main/asm-converter "ASM Converter GitHub directory") #### Credits Tool Author: Ndymario A python program which generates a code patch to edit the game credits. [Download](https://bookstack.nsmbcentral.net/attachments/7 "Credits Tool download") #### ClassID Tool Author: ELMario A python program for modifying the objects IDs (class IDs) assigned to stage object IDs. Useful moreso for simple modifications than, for example, assigning custom actor IDs to stage object IDs (for which a code patch is more advisable). [Download](https://github.com/Eloston/nsmb-tools/releases/latest "NSMB Tools GitHub latest release page") — [GitHub directory](https://github.com/Eloston/nsmb-tools/tree/master/classidtool "ClassID Tool GitHub directory") ### Graphics Tools for modifying game graphics. #### NitroPaint Author: Garhoogin Supports a wide variety of NDS graphical formats and handles colour quantization, texel compression and, image-to-tilemap conversion with superior fidelity than NSMBe's importers. [Download](https://github.com/Garhoogin/NitroPaint/releases/latest "NitroPaint GitHub latest release page") — [GitHub repository](https://github.com/Garhoogin/NitroPaint "NitroPaint GitHub repository") #### Paint.NET ENPG Plugin Author: TheGameratorT Allows Paint.NET to open and save ENPG files. [Download](https://github.com/TheGameratorT/pdn-enpg/releases/latest "Paint.NET ENPG Plugin GitHub latest release page") — [GitHub repository](https://github.com/TheGameratorT/pdn-enpg "Paint.NET ENPG Plugin GitHub repository") ### Emulators Tools to emulate NDS hardware for playing, recording, or debugging mods. #### MelonDS Athor: Arisotura A highly accurate emulator capable of emulating the NDS's wireless play capabilities. Advisable for screenshots and testing, especially for multiplayer hacks or when real-hardware testing isn't viable. [Download](https://melonds.kuribo64.net/downloads.php "MelonDS downloads page") — [GitHub repository](https://github.com/melonDS-emu/melonDS "MelonDS GitHub repository") — [Webpage](https://melonds.kuribo64.net/ "MelonDS home page") #### DeSmuME Author: DeSmuME Team A less accurate emulator with a number of nifty features, such as a disassembler, memory viewer and watcher, and cheat code and Lua script support. Useful for debugging. [Download](https://github.com/TASEmulators/desmume/releases/latest "DeSmuME GitHub latest release page") — [Website](https://desmume.org/ "DeSmuME home page") #### No$GBA Debug Author: Martin Korth An emulator with powerful debugging faculties. [Download](https://problemkaputt.de/no$gba.zip "No$GBA debug download") — [Webpage](https://problemkaputt.de/gba-dev.htm "No$GBA debug home page") ### Code Modification Tools useful for code hacking. #### Ghidra Author: NSA An open-source reverse-enginering tool. [Download](https://github.com/NationalSecurityAgency/ghidra/releases/latest "Ghidra GitHub latest release page") — [GitHub repository](https://github.com/NationalSecurityAgency/ghidra "Ghidra GitHub repository") ### Sound Tools for changing game sounds and music. #### Nitro Studio 2 Author: Gota7 Capable of opening and editing sound data archives (SDAT files). [GitHub repository](https://github.com/Gota7/NitroStudio2 "Nitro Studio 2 GitHub repository") — [Webpage](https://gota7.github.io/NitroStudio2/ "Nitro Studio 2 home page") ### 3D Modeling #### NNS Blender Plugins Author: jellees Blender plugins which allow models and animations to be exported from Blender in the Nintendo Nitro System intermediate formats. [Download](https://github.com/jellees/nns-blender-plugin/archive/refs/heads/master.zip "NNS Blender Plugins download") — [GitHub repository](https://github.com/jellees/nns-blender-plugin "NNS Blender Plugins GitHub repository") #### Apicula Author: scurest Command line tool to convert Nitro System runtime formats into more common 3D model formats. [Download](https://github.com/scurest/apicula/releases/latest "Apicula GitHub latest release page") — [GitHub repository](https://github.com/scurest/apicula "Apicula GitHub repository") ### Miscellaneous Tools which don't flushly fit in prior categories. #### Every File Explorer Author: Gericom A multipurpose file viewer and editor with support for a wide swath of formats beyond NDS ones and plugins. Useful for adding files to your ROM and fixing file overlap. [GitHub repository](https://github.com/Gericom/EveryFileExplorer "Every File Explorer GitHub repository") — [GBATemp thread](https://gbatemp.net/threads/release-every-file-explorer.373615/ ""[Release] Every File Explorer" on GBATemp") #### NDS Banner Editor Author: TheGameratorT A tool to create NDS game banners. Also allows for the creation of animated banner icons, as supported by the DSi. [Download](https://github.com/TheGameratorT/NDS_Banner_Editor/releases/latest "NDS Banner Editor GitHub latest release page") — [GitHub repository](https://github.com/TheGameratorT/NDS_Banner_Editor "NDS Banner Editor GitHub repository") ### Legacy Tools Tools whose use have been superseded by other tools; most are no longer maintained. These can still be quite useful, however, depending on your workflow. #### Legacy Code Patching Template Author: Dirbaio A code patching template which uses [outdated devkitARM libraries](https://wii.leseratte10.de/devkitPro/devkitARM/r41%20%282012%29/ "Archive of devkitARM r41") and NSMBe's code patching syntax. No longer advisable since the introduction of more comprehensive [NCPatcher code template](https://github.com/MammaMiaTeam/NSMB-Code-Template "MammaMia Team's code patching template for NCPatcher"). [Download](https://github.com/Dirbaio/ASMPatchTemplate/archive/master.zip "ASM Patch Template download") — [GitHub repository](https://github.com/Dirbaio/ASMPatchTemplate "ASM Patch Template GitHub repository") #### NSMB Worldmap Editor Author: RicBent An open-source worldmap editor made after development stopped on Ray and Freeze's worldmap editor. Notable in being able to create worldmap path animations, which is not supported by Goombatlas (though doable using the NNS blender plugins). [Download](https://github.com/Mariomaster/NSMB-Worldmap-Editor/releases/download/v1.3.1/NSMB-Worldmap-Editor-v1.3.1.7z "NSMB Worldmap Editor GitHub v1.3.1 release page") — [GitHub repository](https://github.com/Mariomaster/NSMB-Worldmap-Editor "NSMB Worldmap Editor GitHub repository") — [NSMBHD thread](https://nsmbhd.net/post/44015/ ""NSMB Worldmap Editor" on NSMBHD") #### Worldmap Editor Authors: Ray and Freeze The first worldmap editor, listed here only for posterity --- its functionality has been entirely suceeded by Goombatlas and RicBent's worldmap editor. [Download](http://www.mediafire.com/download/di7vs7rplmcfyt9/Worldmap_Editor_-_by_Freeze_and_ray.rar "Worldmap Editor download") — [NSMBHD thread](https://nsmbhd.net/post/41279/ ""Worldmap editor and all the information you'll need" on NSMBHD") #### MKDSCM Author: Gericom That is, Mario Kart DS Course Modifier. Has some model-related faculties, such as an OBJ to NSBMD converter, but basically all of the features it has which made it useful for NSMB modding are handled by other tools now. [Download](https://bookstack.nsmbcentral.net/attachments/9 "MKDSCM download") — [Source (3.0.0.2)](https://nsmbhd.net/file/P40G1zHDKfuMQEK5/MKDSCE%203.0.0.2%20Source.7z "thanks poudink") — [GBATemp thread](https://gbatemp.net/threads/mkds-course-modifier.299444/ ""MKDS Course Modifier" on GBATemp") #### AssToIMD Author: Ermelber Command line program for converting various 3D model formats into the NDS intermediate format. Functionally superseded by the [blender plugins](https://bookstack.nsmbcentral.net/books/new-super-mario-bros/page/other-tools#bkmrk-nns-blender-plugins), but perhaps useful for those who don't use Blender. [Download](https://github.com/Ermelber/nitro-g3d-tools/releases/latest "AssToIMD GitHub latest release page") — [GitHub directory](https://github.com/Ermelber/nitro-g3d-tools/tree/master/IntermediateConverter "Intermediate Converter GitHub directory") #### Background Tiler Author: Dirbaio Command line tool to convert images into tiled backgrounds, meant to be used when NSMBe's importer didn't net good results. Nowadays, NitroPaint's importer is perhaps the best option. [Download](http://nsmbhd.net/file/9ec7b1ad067ac4ef380b/BackgroundTiler2.zip "Background Tiler download") — [NSMBHD thread](http://nsmbhd.net/thread/2601/ ""Dirbaio's Background Tiler v1.0" on NSMBHD") #### Zoom Sprite Helper Author: MeroMero An HTML tool which models zoom actor behaviour visually. No longer needed as NSMBe now shows the same information. [Download](https://nsmbhd.net/file/c2ce7a8ea94581f1d114/Zoom.zip "Zoom Sprite Helper download") — [NSMBHD thread](https://nsmbhd.net/thread/2821-zoom-sprite-helper-download/ ""Zoom sprite helper" on NSMBHD") # 2D Graphics Documentation of 2D graphics (anything that uses NCG, NCL and NSC) # New Page # Background InformationTODO: A lot.
- Tile and palette animations
- Backgrounds with other special properties (e.g., Underwater, Peach's Castle, etc.)
- Table for BGs that use tile share?
- Details on BGs that are broken?
TODO: Can we get more detailed information on how type 2 works specifically? Additionally, add source.
Vertical range is relative to the top of the background. Speed is relative to the [background scroll speed](https://bookstack.nsmbcentral.net/books/new-super-mario-bros/page/background-scrolling-data-info#bkmrk-data) the level is set to use, being either automatic scrolling in addition to the background speed (measured by pixels per frame — denoted "ppf") or as a percentage of the background scroll speed. Several types also do not have any parallax data and are not used in any capacity. #### Top Backgrounds ##### Type 1 No parallax data ##### Type 2 This type doesn't have any meaningful parallax data, but it is special in that it causes the background to wave when liquid is nearby. ##### Type 3 | Vertical Range | Speed | | -------------- | ------------- | | 0-344px | 0.25ppf left | ##### Type 4 No parallax data ##### Type 5 | Vertical Range | Speed | | -------------- | --------------- | | 0-440px | 0.125ppf left | | 440-512px | 0.3125ppf left | ##### Type 6 | Vertical Range | Speed | | -------------- | --------------- | | 0-304px | 0.375ppf left | | 304-320px | 0.3125ppf left | ##### Type 7 | Vertical Range | Speed | | --------------- | --------------- | |Entire background| 0.25ppf left | ##### Type 8 | Vertical Range | Speed | | --------------- | --------------- | | 0-312px | 0.25ppf left | | 312-344px | 0.125ppf left | ##### Type 9 | Vertical Range | Speed | | --------------- | --------------- | | 0-328px | 0.25ppf left | ##### Type 11 | Vertical Range | Speed | | -------------- | --------------- | | 0-255px | 0.25ppf left | | 255-335px | 0.1875ppf left | ##### Type 12 | Vertical Range | Speed | | -------------- | --------------- | | 0-319px | 0.25ppf left | ##### Type 13 No parallax data ##### Type 14 | Vertical Range | Speed | | -------------- | --------------- | | 0-39px | 0.25px left | | 39-55px | 0.125px left | ##### Type 15 | Vertical Range | Speed | | -------------- | --------------- | | 0-247px | 0.375ppf left | | 247-311px | 0.5ppf left | ##### Type 16 No parallax data ##### Type 17 | Vertical Range | Speed | | -------------- | --------------- | | 0-327px | 0.25ppf left | ##### Type 18 | Vertical Range | Speed | | -------------- | --------------- | | 0-359px | 0.25ppf left | | 359-512px | 0.4375ppf left | ##### Type 19 No parallax data ##### Type 20 No parallax data ##### Type 21 No parallax data #### Bottom Backgrounds ##### Type 1 | Vertical Range | Speed | | -------------- | ------------- | | 384-512px | 162.5% | ##### Type 2 This type doesn't have any meaningful parallax data, but it is special in that it causes the background to wave when liquid is nearby. ##### Type 3 | Vertical Range | Speed | | -------------- | ------------- | | 0-344px | 0.125ppf left | ##### Type 4 | Vertical Range | Speed | | -------------- | ------------- | | 0-384px | 0.125ppf left | ##### Type 5 No parallax data ##### Type 6 | Vertical Range | Speed | | -------------- | -------------- | | 0-335px | 0.25ppf left | | 335-351px | 0.1875ppf left | | 351-367px | 0.125ppf left | | 367-375px | 0.0625ppf left | ##### Type 7 | Vertical Range | Speed | | --------------- | --------------- | |Entire background| 0.125ppf left | ##### Type 8 No parallax data ##### Type 9 | Vertical Range | Speed | | -------------- | -------------- | | 0-360px | 0.125ppf left | ##### Type 10 | Vertical Range | Speed | | -------------- | -------------- | | 0-231px | 0.25ppf left | | 231-263px | 0.1875ppf left | | 263-335px | 0.125ppf left | | 335-351px | 0.0625ppf left | ##### Type 11 | Vertical Range | Speed | | -------------- | -------------- | | 0-327px | 0.125ppf left | | 327-399px | 0.0625ppf left | ##### Type 12 | Vertical Range | Speed | | -------------- | -------------- | | 0-327px | 0.25ppf left | | 327-359px | 0.125ppf left | ##### Type 13 | Vertical Range | Speed | | -------------- | -------------- | | 0-383px | 0.25ppf left | | 383-391px | 0.1875ppf left | | 391-399px | 0.125ppf left | | 399-407px | 0.0625ppf left | ##### Type 14 No parallax data ##### Type 15 | Vertical Range | Speed | | -------------- | -------------- | | 0-279px | 0.0625ppf left | | 279-335px | 0.125ppf left | | 335-364px | 0.25ppf left | ##### Type 16 | Vertical Range | Speed | | -------------- | -------------- | | 0-135px | 0.0625ppf left | | 135-247px | 0.125ppf left | | 247-319px | 0.1875ppf left | | 319-343px | 0.3125ppf left | ##### Type 17 | Vertical Range | Speed | | -------------- | -------------- | | 0-351px | 0.125ppf left | | 351-391px | 0.0625ppf left | ##### Type 18 No parallax data ##### Type 19 | Vertical Range | Speed | | -------------- | -------------- | | 0-295px | 0.375ppf left | | 295-342px | 0.25ppf left | | 342-375px | 0.125ppf left | ##### Type 20 | Vertical Range | Speed | | --------------- | -------------- | |Entire Background| 0.5ppf right | ##### Type 21 | Vertical Range | Speed | | -------------- | -------------- | | 0-215px | 0.125ppf left | | 215-319px | 0.25ppf left | | 319-343px | 0.375ppf left | ### Jyotyu Palette Tables The bottom background slot determines the [jyotyu](https://bookstack.nsmbcentral.net/books/new-super-mario-bros/page/jyotyu-tileset#bkmrk-1.-jyotyu-palette) and [enemy](https://bookstack.nsmbcentral.net/books/new-super-mario-bros/page/enemy-palettes#bkmrk-1.-enemy-palettes) palettes used in the course. | Slot | Palette | |-|-| | 0: Grassland (orange hills and clouds) | Normal | | 1: Castle | Blue | | 2: Desert (blue sky, pyramids, W2-Cannon) | Normal | | 3: Underground | Blue | | 4: Clouds | Normal | | 5: Underwater | Normal | | 6: Desert (yellow sky, pyramids) | Normal | | 7: Volcanoes 1 (inside) | Red | | 8: Grassland (pastel hills and clouds) | Normal | | 9: Background clouds | Normal | | 10: Background mountains | Normal | | 11: Forest | Normal | | 12: Grassland (blue/white hills and clouds) | Normal | | 13: Background clouds 2 [Unused] | Normal | | 14: Background clouds 2 [Unused] | Normal | | 15: Volcanoes 2 (outside) [including raining debris] | Normal | | 16: Volcanoes 3 (outside) [Unused] | Normal | | 17: Snowy trees | Grey | | 18: Snowy hills | Grey | | 19: Background clouds (W4-Cannon) | Normal | | 20: Desert (blue sky, pyramids, higher) | Normal | | 21: Bonus room (NES Mario and Luigi 1) | Normal | | 22: Volcanoes 3 (outside) [Unused] | Normal | | 23: Ghost house | Grey | | 24: Background mountains | Normal | | 25: Background mountains | Normal | | 26: Purple sky (W5-Cannon) | Normal | | 27: Grassland (orange hills and clouds) | Normal | | 28: Snowy hills | Normal | | 29: Pipes | Blue | | 30: Empty | Normal | | 31: Volcano tower | Red | | 32: Castle 2 | Normal | | 33: Clouds with orange hills at back | Normal | | 34: Snowy hills (W1-Cannon) | Normal | | 35: Cave | Blue | | 36: Stalagmites (glitchy) [Unused] | Blue | | 37: Dark world 1 (dead trees, purple clouds) | Red | | 38: Dark world 2 (rocks, purple clouds) | Red | | 39: Tower | Blue | | 40: Ghost house exit | Normal | | 41: Final Castle (Normal Jyotyu) | Normal | | 42: Toad house 1 | Normal | | 43: Toad house 2 | Normal | | 44: Toad house 3 | Normal | | 45: Final Castle (Blue Jyotyu) | Blue | | 46: Toad house 4 | Normal | | 47: Bowser Jr battle | Blue | | 48: Background clouds (tall) | Normal | | 49: Boss battle | Blue | | 50: Background clouds | Normal | | 51: Background clouds | Normal | | 52: Desert (blue sky, pyramids) | Normal | | 53: Desert (yellow sky, higher) | Normal | | 54: Background mountains | Normal | | 55: Final boss battle | Normal | | 56: Volcanoes 2 | Normal | | 57: Underwater cave | Normal | | 58: Light grey castle (W8 Castle 1) | Blue | | 59: Yellow clouds (Desert) | Normal | | 60: Big mountains (higher, world 6 beach) | Normal | | 61: Background clouds | Blue | | 62: Background mountains | Normal | | 63: Mummy-Pokey battle | Normal | | 64: Desert (yellow sky, pyramids) | Normal | | 65: Desert (yellow sky, pyramids) | Normal | | 66: Desert (blue sky, pyramids, higher) | Normal | | 67: Bonus room (NES Lakitu) [Unused] | Normal | | 68: Bonus room (NES Mario + Bowser) [Unused] | Normal | | 69: Bonus room (NES M/L swimming) [Unused] | Normal | | 70: Bonus room (NES Mario and Luigi 2) | Normal | | 71: Bonus room (NES Mario on vine) [Unused] | Normal | | 72: Bonus room (NES Mario and Luigi 3) [Unused] | Normal | | 73: Underground cave (red) | Blue | | 74: Bonus room | Normal | | 75: Grassland (orange hills and clouds) | Normal | # Tileset tutorial ## **Tutorial on making DS styled tilesets** ### **Part 0 - Important things before starting.** #### First of all, you need to know these things: **1. Basics of pixel art** **2. Have small knowledge about making generally somekind of graphics. Especially how the tilesets should be set, size etc.** **3. Knowledge of NSMBe** **4. Patience** **5. Take inspiration and look how original tilesets by Nintendo/other we're made and try understand them why those we're made like this and "re-create" them.** **6. You need to practice, outside of NSMB tilesets too.** **7. Each palette can have up to 256 colours (4 palettes - 1024 colours in total.)** **8. Read the full tutorial so you wouldn't be mad that i said like this and later something changed for some reason.** #### What do you need for making tilesets: **1. Art program** (Paint.net , Aseprite, Gimp, Photoshop ...(Personally i use paint.net and Aseprite for it's few functions) **2. Optional: 3D software** (Maya, Blender, 3ds max ...) **3. Ideas.** ##### Note that this tutorial won't cover everything and it's mainly for basic stuff for newbies. ##### If you need any tips on making other stuff that weren't cover, please ask me about that on NSMBc discord server. **(@Bouner)** ##### This tutorial will cover how to make a basic grassland tileset and how to make few specific tiles and give idea for the other ones in terms of making them. ##### After it i there will be a list of good inspirations you could take to make your own tileset. Feel free to use them ### **Part 1 - Setup.** ##### **Start with a canvas size of 256x224 (Which is a default size for 2 palette size tileset.)** ##### After it make a **16x16** texture which you will use to create your first tile.Before it i recommend you setting a few layers for the future that will make your making tilesets much easier, especially in later stages: ##### **- Decorations - Top tiles (Grass / TopGround pattern) - Shadows - Inner tiles pattern - Inner tiles - Other (Optional) - Darker bg (Optional)** [](https://bookstack.nsmbcentral.net/uploads/images/gallery/2025-04/image.png) ##### Basically like this! ##### Now returning to your 16x16 tile, the theme i have choosen for this tilesets tutorial is grassland that i got inspired by few screenshots from **Mario & Luigi Bowser's inside story.** ##### **Choose your palette of colours that you will be using (You don't have to choose them even before making the tile, you can make a palette throughout the process.).** ### **Part 1.1 - Basic needed tiles:** #### **The image below shows what most of Nintendo, or custom tilesets do have (I explain it below it)** #### [](https://bookstack.nsmbcentral.net/uploads/images/gallery/2025-04/jMSimage.png) ##### **1. Red (Top) - Top tiles, top corner tiles** **2. Yellow - Side blocks, side blocks corner tiles** **3. Red-pink - Inner tiles.** I won't explain it fully because i believe that you understand what exactly should a tileset have. Note that there is also 4x1 slope which i didn't draw here. ### **Part 2.1 - How to make tiles and which you're supposed to?** ##### After doing all of this, paint the whole tile into the main colour of ground tile (In your layer for this.) and later in another layer draw a rectangle in the colour of the ground (Grass) which will be the main shape that will help you to not make a mistake of not connecting tiles. ##### **Let me explain things in 4 steps of how the process of making the full looking tile with how to make shape to how does shading look.** ##### **1.** Paint the inner tile to colour you want, and later in another layer draw a rectangle shape that you will be using as a reference to not make mistakes in further processes **(Meaning that you wouldn't make accidentally non connecting well tiles so much.)** ##### **2.** Remove and add pixels to draw your wanted shape for you tile. ##### **3. Shading. It's very important and i recommend you looking at how Nintendo did the shading for grass. Notice every little thing like the colours of the light and how are the shapes drawn. (2.)** ##### **You do need to know basics of pixel art too**[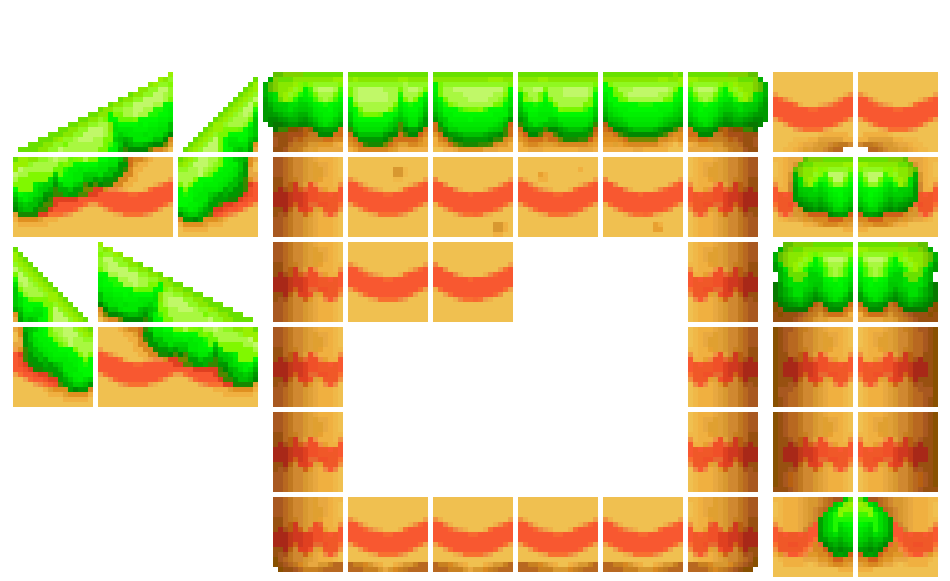](https://bookstack.nsmbcentral.net/uploads/images/gallery/2025-04/kgyimage.png) ##### 4. Adding "Antiliasing" **(Painting the edges with a softbrush to make it blend bit more and give it extra colours.)** ##### I'm going to say already that i'm not drawing shadows by hand everytime if not needed but just skip to part 4. This process will be reacurring every time throughout this tutorial. ##### Great, now you should be able now how to make a basic top grass tile! It doesn't need to be perfect, throughout this tutorial i changed few things and improve them so they could looks better and that's okay! ##### Now just make more of those for better variation, it's not necesserilly. ##### I recommend doing 3 variation for top tiles but that depends on you and theme. [](https://bookstack.nsmbcentral.net/uploads/images/gallery/2025-04/rXKimage.png) [](https://bookstack.nsmbcentral.net/uploads/images/gallery/2025-04/UPVimage.png) ### **Part 2.2 - Inner tiles and pattern.** ##### We'll start with a pattern since in the case of the tileset it's the main part. ##### I typically use Aseprite to make well connecting pattern, since i'm inspiring of one of the ##### screenshots from Part 1. i'll go with zig-zag like pattern. ##### I'll be using **Aseprite** for this one as i said so i'll show how to make it with this program, it might ##### be a different process or similiar if you're using different one obviously. ##### Set your canvas to 16x16. **Point to View tab, "Tiled Mode" and select Tiled in X Axis.** [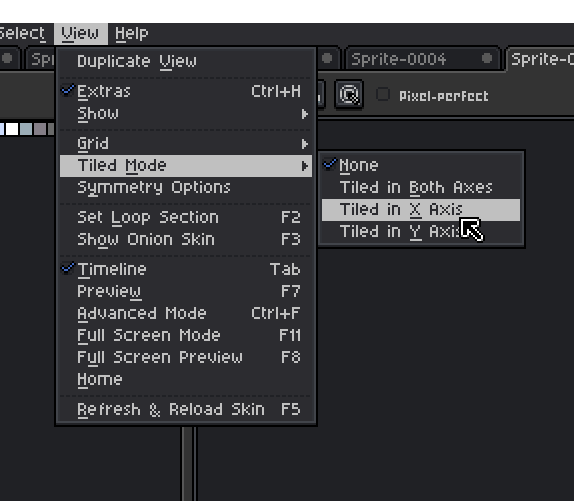](https://bookstack.nsmbcentral.net/uploads/images/gallery/2025-05/aseprite-5culcwrzbq.png) ##### **After that it should be looking like this and your canvas should be mirrored (Canvas is set to 16x16).** [](https://bookstack.nsmbcentral.net/uploads/images/gallery/2025-05/image.png) ##### **Then just draw your pattern the way you want to and be sure it's connecting well** [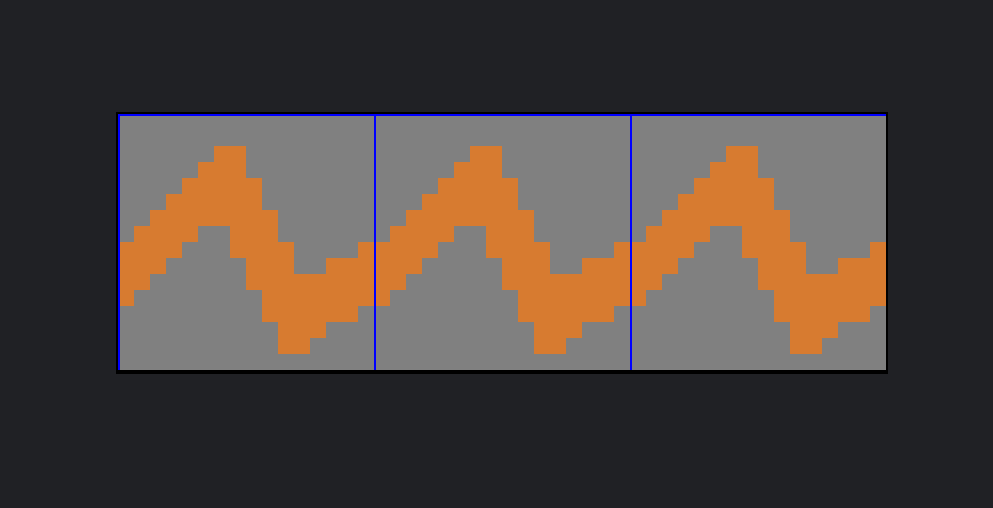](https://bookstack.nsmbcentral.net/uploads/images/gallery/2025-05/aseprite-npi7xg2zki.png) ##### **Later just improve them, give the "AA" treatment, improve the colours and add the details if you want. Since i made 6 inner tiles i want to make them little bit more unique (And i update them in the throughout the tutorial too if i miss something without the mentioning it.)** [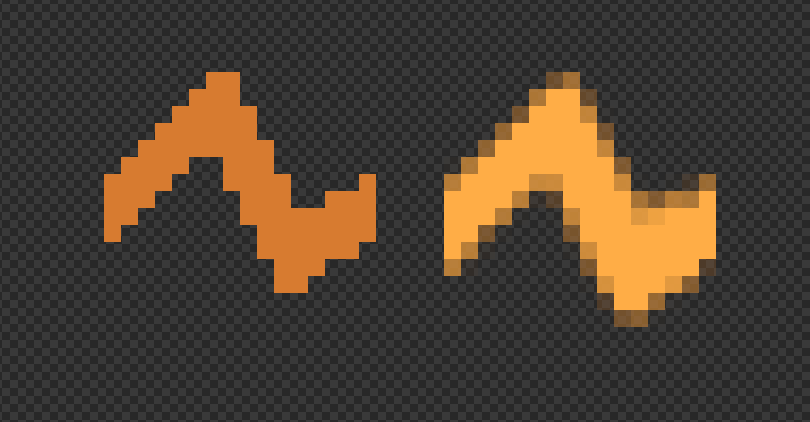](https://bookstack.nsmbcentral.net/uploads/images/gallery/2025-05/lqQpaintdotnet-hndzpumxap.png) [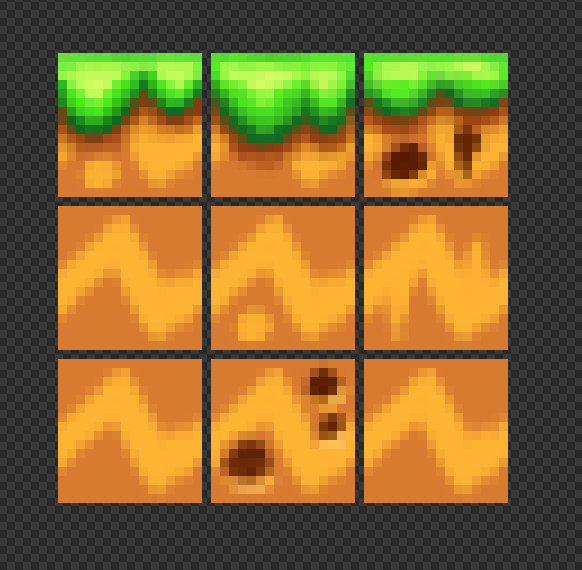](https://bookstack.nsmbcentral.net/uploads/images/gallery/2025-05/Kynimage.png) [](https://bookstack.nsmbcentral.net/uploads/images/gallery/2025-05/dMmimage.png) ### **Part 2.3 - Side tiles and corner tiles.** ##### It's a pretty similiar process like in the previous steps but with some changes. **Make the ground tile little bit less wider** (It's optional and depending on the tileset you're making.) **Start with doing the grass and round it at the end. Like in the screenshot.** [](https://bookstack.nsmbcentral.net/uploads/images/gallery/2025-05/paintdotnet-cjtitib4gv.png) ##### Give it the shadow under the grass the same way as you did the other tiles ##### **For the pattern, copy your pattern and make it less wider so it could give a small illusion that it rounds up (If more = even** [](https://bookstack.nsmbcentral.net/uploads/images/gallery/2025-05/paintdotnet-zblscqvvbr.gif) ##### **Now you need to give it a shadow, i use a basic gradient and just move it slightly to the right/left** (depending on which side you do the side tiles at) [](https://bookstack.nsmbcentral.net/uploads/images/gallery/2025-05/jV2paintdotnet-qumnacge8y.png) ##### **And voila, you made your side tiles.** I personally give it an extra detail which is just slightly removing the furthest colours so it could be a bit lighter, but it's completaly optional. ##### **Now for the corner tiles of the ceiling tiles which is basically the same thing but the corner tiles are slightly rounded** [](https://bookstack.nsmbcentral.net/uploads/images/gallery/2025-05/vBkpaintdotnet-miefjotwka.png) [](https://bookstack.nsmbcentral.net/uploads/images/gallery/2025-05/paintdotnet-nbudjhammn.png) [](https://bookstack.nsmbcentral.net/uploads/images/gallery/2025-05/paintdotnet-ofrrxrcpbf.gif) ##### **coming back to this screenshot below, there are few tiles left, we focus now on the the middle ones which are just mix of side tiles and inner ground.** #### [](https://bookstack.nsmbcentral.net/uploads/images/gallery/2025-04/jMSimage.png) ##### **It's literally the same process as before but slightly different, i won't explain it over and over, just look up the screenshot.** [](https://bookstack.nsmbcentral.net/uploads/images/gallery/2025-05/zBiimage.png) ### **Part 2.4 - Slopes** ##### **Since for the tileset i made 1x1 and 2x1 slopes then i will be showing just how to make those.** ##### Many people consider making slopes as hard and just rotate the grass pattern. Which looks sometimes off and bad, personally making slopes is pretty simple and actually mostly similiar to the way you are making normal tiles. ##### Start off with a referance/guide [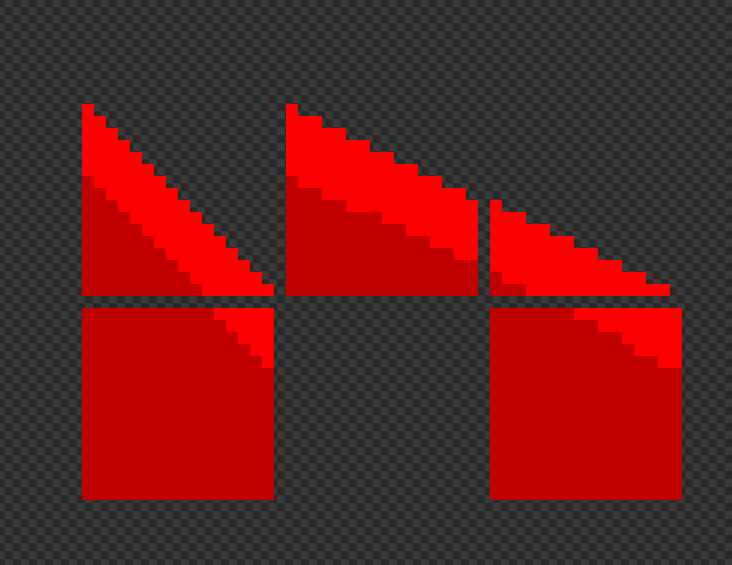](https://bookstack.nsmbcentral.net/uploads/images/gallery/2025-05/paintdotnet-jctkkmkvnm.png) ##### **I recommend putting the top tiles and slopes close to each other and draw a line on where the grass ends so you wouldn't make a mistake that the grass on slopes ends lower and looks bad.** [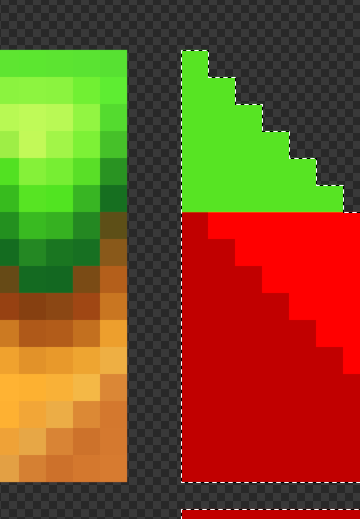](https://bookstack.nsmbcentral.net/uploads/images/gallery/2025-05/paintdotnet-msqepjrsum.png) ##### **Draw the grass pattern and make the tile below connected too to the grass pattern. Don't forget that it should also tile properly with the tile above.** [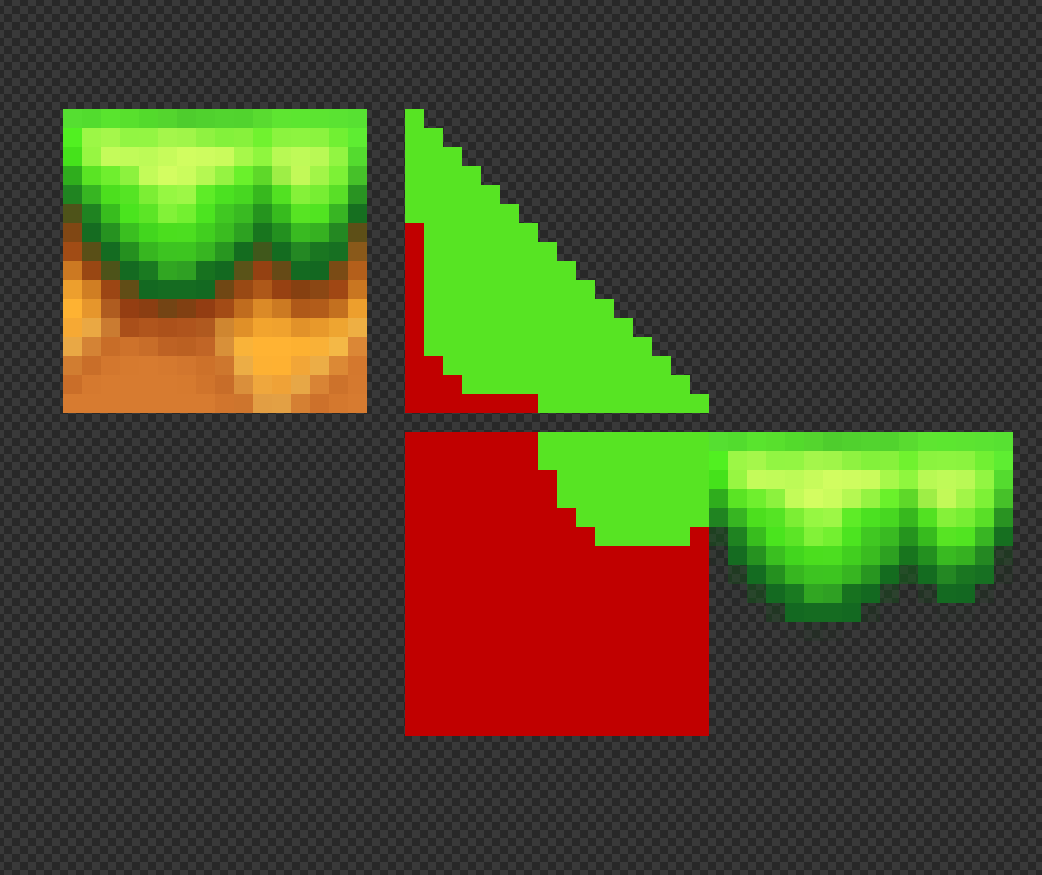](https://bookstack.nsmbcentral.net/uploads/images/gallery/2025-05/paintdotnet-ongfe31hcw.png) ##### **And now just make the same process as before, always check if it looks good after connecting to the top tile** [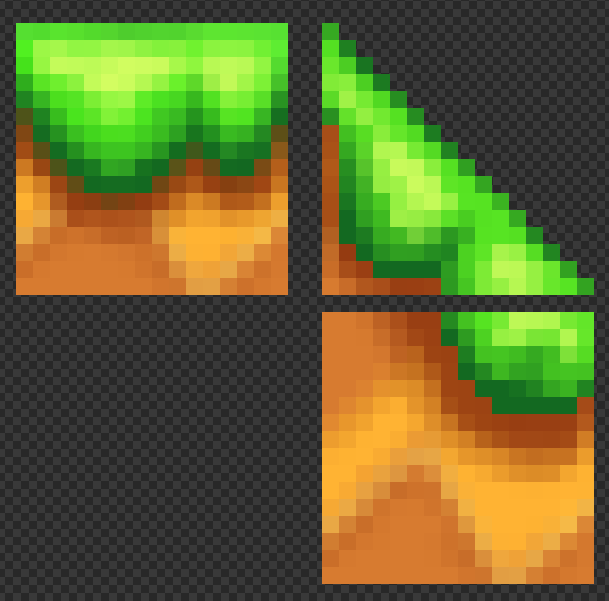](https://bookstack.nsmbcentral.net/uploads/images/gallery/2025-05/paintdotnet-yngu7xio5k.png) [](https://bookstack.nsmbcentral.net/uploads/images/gallery/2025-05/paintdotnet-gppswhxrvb.png) ### **Part 2.5 - Decorations** ##### This part was very hard to make for this tutorial which resulted in not great looking examples or examples that changed completaly at the end or even weren't explained in anyway. ##### **The decorations you can make either by pre-rendering somekind of object (Example: Drybones head) or drew it.** ##### There are many decorations in original game which are completaly drawn with few colours (Basically pixel art!) ##### **I have made one quick example of this which was a wooden fence.** [](https://bookstack.nsmbcentral.net/uploads/images/gallery/2025-05/paintdotnet-c4f5ay6xiq.png) ##### I basically just recommend you making a basic shape and later just add the detail. I'm not the best still at it but basically like this. [](https://bookstack.nsmbcentral.net/uploads/images/gallery/2025-05/Yzwimage.png) ##### **Here is another examples of drawn decoration of mine:** (Right flower) [](https://bookstack.nsmbcentral.net/uploads/images/gallery/2025-05/paintdotnet-givwjkh4hr.png) [](https://bookstack.nsmbcentral.net/uploads/images/gallery/2025-05/6IRimage.png) ##### I have made for this tutorial a completaly different tree that later was in "finished" version which was reused from my another tileset i have made (Pinkleaf plains) which i didn't screenshot my process but i'll explain ##### **I basically used for the leafs unused version of bushesh from origiinal game, slightly modified and just copy pasted it over till it made a shape of a typical tree bush.** [](https://bookstack.nsmbcentral.net/uploads/images/gallery/2025-05/Tm7image.png) **Comparing to the one i have made for this tutorial...** [](https://bookstack.nsmbcentral.net/uploads/images/gallery/2025-05/paintdotnet-gum5kffbk3.png) Yeah, this happens when you don't make your tutorial at the same time... hah # Title Screen InformationTODO: - title logo bncl
This page details files for graphics related to the title screen. ### Upper Screen Logo: - Palette: d\_2d\_UI\_O\_menu\_title\_logo\_o\_u\_ncl.bin Uses: - UI\_O\_menu\_title\_logo\_o\_u\_ncg.bin \[4bpp\] Contents: graphics for upright title logo - "NEW" blurb \[palette 1\] - "super MARIO BROS." text (no dropshadow) \[palette 0\] - "©2006 Nintendo" text \[palette 0\] - "super MARIO BROS." text (dropshadow) \[palette 2\] - ### Lower Screen Background: - Bitmap: d\_2d\_UI\_O\_menu\_common\_b\_d\_ncg.bin \[4bpp\] Contents: - Bricks - Unused Super Mario Bros. castle-styled bricks - Unused pipe - Palette: d\_2d\_UI\_O\_menu\_common\_b\_d\_ncl.bin - Tilemap: d\_2d\_UI\_O\_menu\_common\_kabe\_b\_d\_nsc.bin Settings: - Tile Width: 32 - Bitmap Offset: 0 - Palette Offset: 13 #### Game Select #### File Select Back button: - Bitmap: d\_2d\_UI\_O\_menu\_common\_o\_d\_nce\_ncg.bin \[4bpp\] - Palette: d\_2d\_UI\_O\_menu\_common\_o\_d\_ncl.bin Uses: - 0: Not pressed - 1: Pressed #### Options # Enemy Palettes The enemy palette is used by various in-level sprites. Like the jyotyu palette, the palette used will change depending on the bottom BG to better fit the level theme. All palettes, as well as the bitmaps of the sprites that use them, can be found in the /OBJ folder. #### **1. Enemy palettes**| **File** | **Description** |
| I\_enemy\_ncl.bin | Normal enemy palette |
| I\_enemy\_B\_ncl.bin | Blue (underground) enemy palette |
| I\_enemy\_R\_ncl.bin | Red (volcanic) enemy palette |
| I\_enemy\_W\_ncl.bin | Grey (winter) enemy palette |
| **Bitmap** | **Description** | **Palette Number** |
| I\_awa\_ncg.bin | Underwater pipe current bubble | 0 |
| I\_bubble256\_ncg.bin | Podoboo (lava bubble) | 0 |
| I\_dokan\_hahen\_ncg.bin | Broken pipe fragments | 0 (yellow), 1 (green), 3 (red) |
| I\_dokan\_yajirushi\_ncg.bin | Yellow sewer arrow (2-3) | 1 |
| I\_fireball\_ncg.bin | Fireball; used by Fire Mario/Luigi, firebar, fire bros., and venus fire trap(?) | 0 |
| I\_item\_ncg.bin | Power-up and vine top graphics | 0 (for star flash; jyotyu palette is used otherwise) |
| I\_kazandan\_hahen\_ncg.bin | Broken volcanic meteor fragments | 0 |
| I\_kuribo256\_ncg.bin | Goomba, paragoomba, paragoomba wings | 0 |
| I\_nokonoko256\_ncl.bin | Koopa Troopa, Koopa Paratroopa, Paratroopa wings | 0 (green), 1 (red), 2 (blue) |
| I\_obj\_yougan\_ncg.bin | Background volcanic meteor | 1 |
| I\_ochiruhashi\_ncg.bin | Falling beach platform | 1 |
| I\_switch\_ncg.bin | P-switch, ?-switch, !-switch, and boss (skull) switch | 2 |
| I\_teresa256\_ncg.bin | Boo | 1 |
| W\_kinoko\_ncg.bin | Graphics for the blue/yellow/red Toad house blocks and cards | 3 (for red/yellow Toad house graphics; enemy256 palette is used otherwise) |
| **Bitmap** | **Description** | **Palette Number** |
| I\_star\_red\_ncg.bin | MvsL big star | 1 |
| W\_kinoko\_ncg.bin | Graphics for the blue/yellow/red Toad house blocks and cards | 0 (for blue Toad house graphics; enemy palettes are used otherwise) |
TODO: 3d tile table, hardcoded tile properties, pictures, lede
#### **1. Jyotyu Palette** These files are the palettes used by the Jyotyu tileset:| **File** | **Description** |
| /BG\_ncl/d\_2d\_A\_J\_jyotyu\_B\_ncl.bin | Blue (underground) jyotyu palette |
| /BG\_ncl/d\_2d\_A\_J\_jyotyu\_F\_ncl.bin | Blue coin palette |
| /BG\_ncl/d\_2d\_A\_J\_jyotyu\_ncl.bin | Normal jyotyu palette |
| /BG\_ncl/d\_2d\_A\_J\_jyotyu\_R\_ncl.bin | Red (volcanic) jyotyu palette |
| /BG\_ncl/d\_2d\_A\_J\_jyotyu\_W\_ncl.bin | Grey (winter) jyotyu palette |
| **Folder** | **Bitmap** | **Description** | **Palette Number** |
| /BG\_ncg | d\_2d\_A\_J\_jyotyu\_ncg.bin | Graphics for the jyotyu tileset | Either + blue coin palette |
| /BG\_ncg | d\_2d\_TEN\_A\_J\_jyotyu\_ncg.bin | Animated tiles for the jyotyu tileset | Either + blue coin palette |
| /obj | A\_block\_hahen\_ncg.bin | Destroyed block debris | 0 (brick block, wood block, question block, red block, used block, boss gate debris), 1 (hard block, boss bridge debris) |
| /obj | A\_block\_ncg.bin | Bumped blocks/coin, event trigger block, roulette block, spiked question block, snake block ends, face block, coin bubble | 0 (question block, used block, brick block, event trigger block (hit), coin, face block), 1 (roulette block, spiked question block, snake block, coin bubble) |
| /obj | A\_hyouji\_8bit\_ncg.bin | Shown when unused VsTimesUp StageFX type is used | 0 |
| /obj | A\_tikuwa\_block\_ncg.bin | Donut lift (stood on) | 0 |
| /obj | I\_item\_ncg.bin | Power-ups and vine top | 0 (super mushroom, blue shell), 1 (fire flower, star, mini mushroom, 1up mushroom, vine top) |
| /obj | I\_kakushitobira\_ncg.bin | Event Activated Door | 1 |
| /obj | I\_mark\_star\_ncg.bin | Unused | 1 |
| /obj | I\_minigame\_block\_ncg.bin | 1-Up Toad house block graphics | 0 |
| /obj | I\_minigame\_item\_ncg.bin | 1-Up Toad house card graphics | 0 (Bowser card), 1 (1up cards) |
| /obj | I\_obj\_kira\_I\_ncg.bin | Mega Mario sparkles | 0 |
| /obj | I\_obj\_kira\_ncg.bin | Small sparkles. Appear around a blue shell when dropped by a blue koopa troopa | 0 |
| **Map16 tile** | **Changed behavior** |
|---|---|
| 36 (P-switch blue coin) | `0x04000200` - Coin (blue sparkles) |
| 37 (P-switch red-coloured coin) | `0x02000200` - Coin (Unk param 2) |
| **Map16 tile** | **Changed behavior** |
|---|---|
| 29 (Red block outline) | `0x00000800` - Explodes into used block |
| 30 (Red block outline) | `0x00000800` - Explodes into used block |
| 39 (Red coin outline) | `0x02000200` - Coin (Unk param 2) |
| 40 (Snake block) | `0x00000200` - Coin |
| **Map16 tile** | **Changed behavior** |
|---|---|
| 29 (Red block outline) | `0x04000800` - Explodes into brick block |
| 30 (Red block outline) | `0x04000800` - Explodes into brick block |
TODO:
- Add more info for palette animations (such as which colours animate & info on slots 7 and 31) and tile animations (such as bg animations)
- Verify animation speeds
- Mention unused files? Unused 3D tile IDs?
- Add info from here: https://nsmbhd.net/post/46490/
- Add info on subnohara castle flag
- How do sound effects for boss doors work?
TODO: Finish the rest & update the descriptions
### Map Folder:| Files | Description / Information |
| cursor\_koopa\_jr.nsbca | Bowser Jr's Animation (Joint) |
| cursor\_koopa\_jr.nsbmd | Bowser Jr's World Map Textures |
| cursor\_peach.nsbca | Peach's Animation (Joint) |
| cursor\_peach.nsbmd | Peach's World Map Textures |
| hammer\_map.nsbmd | Hammer Bro's Hammer Texture |
| map\_dragon.nsbca | Star Coin Sign's Animation (Joint) |
| map\_dragon.nsbmd | Star Coin Sign's Textures |
| map\_dragon.nsbtp | Star Coin Sign's Animation (Pattern) |
| map\_hole.nsbmd | ? |
| map\_point.nsbmd | World Map Node's Textures |
| map\_point.nsbtp | World Map Node's Animation (Pattern) |
| map\_shadow.nsbca | ? |
| map\_shadow.nsbmd | ? |
| map\_swing.nsbca | ? |
| w1.nsbmd | World 1's Textures (Doesn't have the texture for the elevated ground near the first tower & the green layering in the background) |
| w1.nsbca | World 1's Animation (Joint) |
| w1.nsbtp | World 1's Animation (Pattern) |
| w1\_castle.nsbca | World 1 Castle's Animation (Joint) |
| w1\_castle.nsbmd | World 1 Castle's Textures |
| w1\_kinoko\_a.nsbmd | Blue Mushroom House's Texture |
| w1\_kinoko\_b.nsbmd | Mega Mushroom House's Texture |
| w1\_kinoko\_g.nsbmd | 1-Up Mushroom House's Texture |
| w1\_kinoko\_p.nsbmd | Wood Mushroom House Holder's Texture |
| w1\_kinoko\_r.nsbmd | Item Bonus House's Texture |
| w1\_move.nsbca | The animation where Bowser Jr. brings Peach to 1-Tower |
| w1\_tower.nsbca | World 1 Tower's Animation (Joint) |
| w1\_tower.nsbmd | World 1 Tower's Textures |
| w1\_tree.nsbca | World 1 Tree's Animation (Joint) |
| w1\_tree.nsbmd | World 1 Tree's Textures |
| w2.nsbmd | World 2's Textures |
| w2.nsbca | World 2's Animation (Joint) |
| w2.nsbtp | World 2's Animation (Pattern) |
| w2\_castle.nsbmd | World 2 Castle's Textures |
| w2\_kinoko\_b.nsbmd | Mega Mushroom House's Texture |
| w2\_kinoko\_g.nsbmd | 1-Up Mushroom House's Texture |
| w2\_kinoko\_p.nsbmd | Wood Mushroom House Holder's Texture |
| w2\_kinoko\_r.nsbmd | Item Bonus House's Texture |
| w2\_move.nsbca | The animation where Bowser Jr. brings Peach to 2-Tower |
| w2\_tower.nsbca | World 2 Tower's Animation (Joint) |
| w2\_tower.nsbmd | World 2 Tower's Textures |
| w2\_tree.nsbca | World 2 Tree's Animation (Joint) |
| w2\_tree.nsbmd | World 2 Tree's Textures |
TODO: An explanatory sentence or two. Verify 128. Maybe combine with Level List?
Note: If you're making a world map using Goombatlas, setting the area ID of a node to 185 or higher will make it not react when pressing "A". ### World 1 | Area ID | Area | |---------|------| | 000 | 1-1 Area 1 | | 001 | 1-1 Area 2 | | 002 | 1-1 Area 3 | | 003 | 1-2 Area 1 | | 004 | 1-2 Area 2 | | 005 | 1-2 Area 3 | | 006 | 1-3 | | 007 | 1-4 Area 1 | | 008 | 1-4 Area 2 | | 009 | 1-4 Area 3 | | 010 | 1-5 Area 1 | | 011 | 1-5 Area 2 | | 012 | 1-A Area 1 | | 013 | 1-A Area 2 | | 014 | 1-Tower Area 1 | |015|1-Tower Area 2| |016|1-Tower Area 3| |017|1-Castle Area 1| |018|1-Castle Area 2| |019|1-Castle Area 3| |020|1-Cannon| ### World 2 | Area ID | Area | |---------|------| | 021 | 2-1 Area 1 | | 022 | 2-1 Area 2 | | 023 | 2-1 Area 3 | | 024 | 2-2 Area 1 | | 025 | 2-2 Area 2 | | 026 | 2-3 Area 1 | | 027 | 2-3 Area 2 | | 028 | 2-4 Area 1 | | 029 | 2-4 Area 2 | | 030 | 2-5 Area 1 | | 031 | 2-5 Area 2 | | 032 | 2-6 Area 1 | | 033 | 2-6 Area 2 | | 034 | 2-A Area 1 | | 035 | 2-A Area 2 | | 036 | 2-A Area 3 | | 037 | 2-Tower Area 1 | | 038 | 2-Tower Area 2 | | 039 | 2-Tower Area 3 | | 040 | 2-Castle Area 1| | 041 | 2-Castle Area 2| | 042 | 2-Castle Area 3| | 043 | 2-Cannon| ### World 3 | Area ID | Area | |---------|------| | 044 | 3-1 Area 1 | | 045 | 3-1 Area 2 | | 046 | 3-2 Area 1 | | 047 | 3-2 Area 2 | | 048 | 3-3 Area 1 | | 049 | 3-3 Area 2 | | 050 | 3-3 Area 3 | | 051 | 3-A Area 1 | | 052 | 3-A Area 2 | | 053 | 3-A Area 3 | | 054 | 3-B Area 1 | | 055 | 3-B Area 2 | | 056 | 3-C Area 1 | | 057 | 3-C Area 2 | | 058 | 3-Ghost House Area 1 | | 059 | 3-Ghost House Area 2 | | 060 | 3-Ghost House Area 3 | | 061 | 3-Tower Area 1 | | 062 | 3-Tower Area 2 | | 063 | 3-Castle Area 1 | | 064 | 3-Castle Area 2 | | 065 | 3-Cannon | ### World 4 | Area ID | Area | |---------|------| | 066 | 4-1 | | 067 | 4-2 Area 1 | | 068 | 4-2 Area 2 | | 069 | 4-3 Area 1 | | 070 | 4-3 Area 2 | | 071 | 4-4 Area 1 | | 072 | 4-4 Area 2 | | 073 | 4-5 Area 1 | | 074 | 4-5 Area 2 | | 075 | 4-5 Area 3 | | 076 | 4-6 Area 1 | | 077 | 4-6 Area 2 | | 078 | 4-A Area 1 | | 079 | 4-A Area 2 | | 080 | 4-Ghost House Area 1 | | 081 | 4-Ghost House Area 2 | | 082 | 4-Ghost House Area 3 | | 083 | 4-Tower Area 1 | | 084 | 4-Tower Area 2 | | 085 | 4-Castle Area 1 | | 086 | 4-Castle Area 2 | | 087 | 4-Cannon | ### World 5 | Area ID | Area | |---------|------| | 088 | 5-1 | | 089 | 5-2 Area 1 | | 090 | 5-2 Area 2 | | 091 | 5-3 Area 1 | | 092 | 5-3 Area 2 | | 093 | 5-4 | | 094 | 5-A Area 1 | | 095 | 5-A Area 2 | | 096 | 5-B | | 097 | 5-C Area 1 | | 098 | 5-C Area 2 | | 099 | 5-Ghost House Area 1 | | 100 | 5-Ghost House Area 2 | | 101 | 5-Ghost House Area 3 | | 102 | 5-Tower Area 1 | | 103 | 5-Tower Area 2 | | 104 | 5-Castle Area 1 | | 105 | 5-Castle Area 2 | | 106 | 5-Cannon | ### World 6 | Area ID | Area | |---------|------| | 107 | 6-1 Area 1 | | 108 | 6-1 Area 2 | | 109 | 6-2 Area 1 | | 110 | 6-2 Area 2 | | 111 | 6-3 Area 1 | | 112 | 6-3 Area 2 | | 113 | 6-4 | | 114 | 6-5 Area 1 | | 115 | 6-5 Area 2 | | 116 | 6-6 Area 1 | | 117 | 6-6 Area 2 | | 118 | 6-6 Area 3 | | 119 | 6-7 Area 1 | | 120 | 6-7 Area 2 | | 121 | 6-B | | 122 | 6-Tower Area 1 | | 123 | 6-Tower Area 2 | | 124 | 6-Tower 2 Area 1 | | 125 | 6-Tower 2 Area 2 | | 126 | 6-Castle Area 1 | | 127 | 6-Castle Area 2 | | 128? | 6-Cannon (Unused) | ### World 7 | Area ID | Area | |---------|------| | 129 | 7-1 | | 130 | 7-2 Area 1 | | 131 | 7-2 Area 2 | | 132 | 7-3 Area 1 | | 133 | 7-3 Area 2 | | 134 | 7-4 | | 135 | 7-5 Area 1 | | 136 | 7-5 Area 2 | | 137 | 7-5 Area 3 | | 138 | 7-6 Area 1 | | 139 | 7-6 Area 2 | | 140 | 7-6 Area 3 | | 141 | 7-Ghost House Area 1 | | 142 | 7-Ghost House Area 2 | | 143 | 7-Ghost House Area 3 | | 144 | 7-Tower Area 1 | | 145 | 7-Tower Area 2 | | 146 | 7-Castle Area 1 | | 147 | 7-Castle Area 2 | ### World 8 | Area ID | Area | |---------|------| | 151 | 8-1 Area 1 | | 152 | 8-1 Area 2 | | 153 | 8-2 Area 1 | | 154 | 8-2 Area 2 | | 155 | 8-2 Area 3 | | 156 | 8-3 Area 1 | | 157 | 8-3 Area 2 | | 158 | 8-4 Area 1 | | 159 | 8-4 Area 2 | | 160 | 8-5 Area 1 | | 161 | 8-5 Area 2 | | 162 | 8-6 Area 1 | | 163 | 8-6 Area 2 | | 164 | 8-7 | | 165 | 8-8 Area 1 | | 166 | 8-8 Area 2 | | 167 | 8-Tower Area 1 | | 168 | 8-Tower Area 2 | | 169 | 8-Tower 2 Area 1 | | 170 | 8-Tower 2 Area 2 | | 171 | 8-Castle Area 1 | | 172 | 8-Castle Area 2 | | 173 | 8-Final Castle Area 1 | | 174 | 8-Final Castle Area 2 | | 175 | 8-Final Castle Area 3 | ### Other | Area ID | Area | |---------|------| | 176 | 1-Up Toad House | | 177 | Item Toad House | | 178 | Mega Mushroom Toad House | | 179 | Blue Toad House | | 180 | MvsL: SMB 1-1 | | 181 | MvsL: Underground | | 182 | MvsL: Ice World | | 183 | MvsL: Pipe World | | 184 | MvsL: Castle |