In this tutorial, you'll learn how to:
- Install the necessary tools to start modding - Open your ROM in the editor - Open a level from your ROM - Create a bare-bones level to build from #### Section 1: Getting Ready To edit the game, you'll need a copy of your New Super Mario Bros. DS ROM and the New Super Mario Bros. Editor (NSMBe).We are not allowed to give a download to the ROM. If you have a 3DS, [here is a guide](https://3ds.hacks.guide/dumping-titles-and-game-cartridges.html) that lets you dump your game cartridge ROM using a modded 3DS.
For the best compatibility for more complex tasks, you will need a US region ROM.
Head over to [GitHub](https://github.com/MammaMiaTeam/NSMB-Editor/releases) to download the latest version of NSMBe from the Mamamia Team. When you click the link, you will be taken to a page that looks like this: [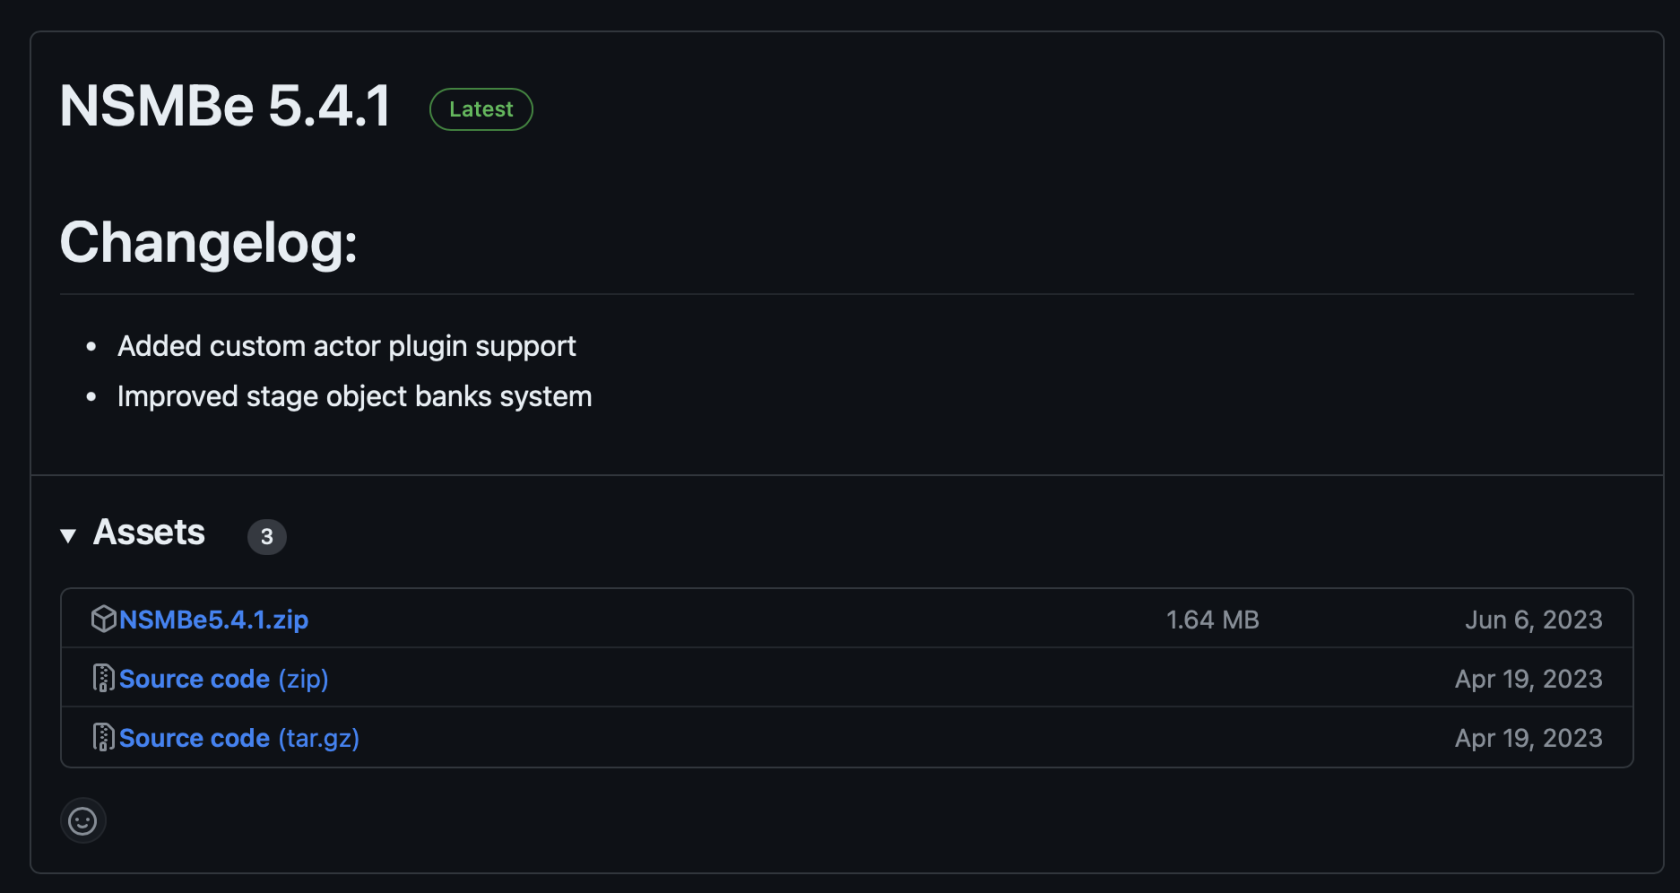](https://bookstack.nsmbcentral.net/uploads/images/gallery/2024-02/image.png) Just click on **NSMBeX.X.X.zip** to download the editor. (The X's will match with whatever version the editor is on. As of writing this version is 5.4.1, as seen in the screenshot) Now, in your downloads folder, you need to extract the zip file. On Windows, this is done by right-clicking the **.zip** and clicking **Extract All...** Just click extract on the window that appears. You should now have a folder in your Downloads folder named **NSMBeX.X.X**. The final folder will look something like this: [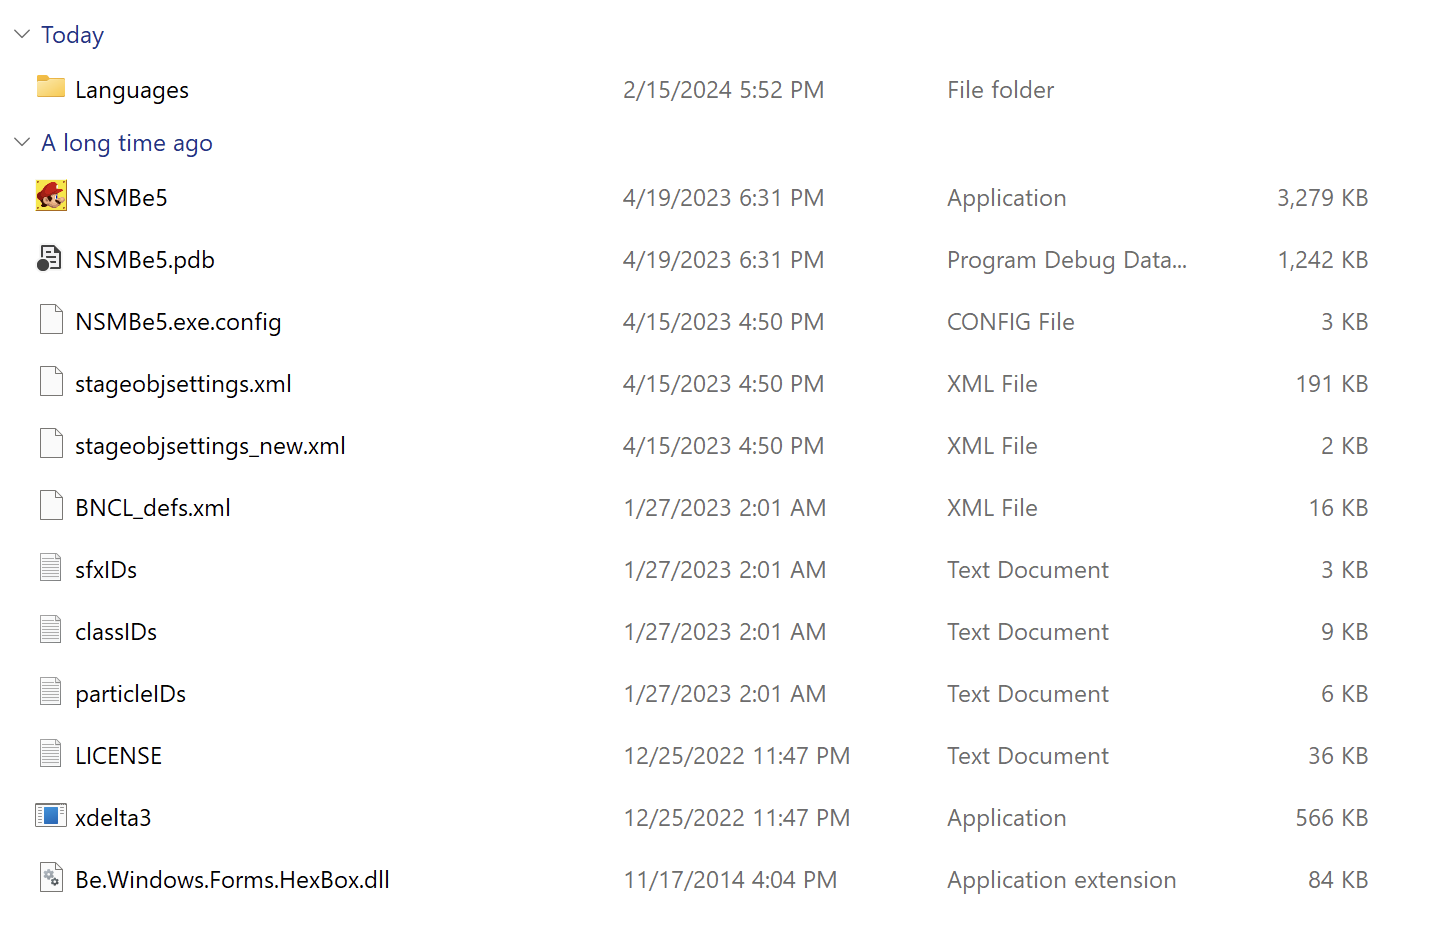](https://bookstack.nsmbcentral.net/uploads/images/gallery/2024-02/MqDimage.png)You have now installed the necessary tools to begin modding
#### Section 2: Opening Your ROM Now that you have the editor extracted, let's open up your ROM! Inside of the **NSMBeX.X.X** folder, open the app named **NSMBe5.exe**. You should see a window that looks something like this: [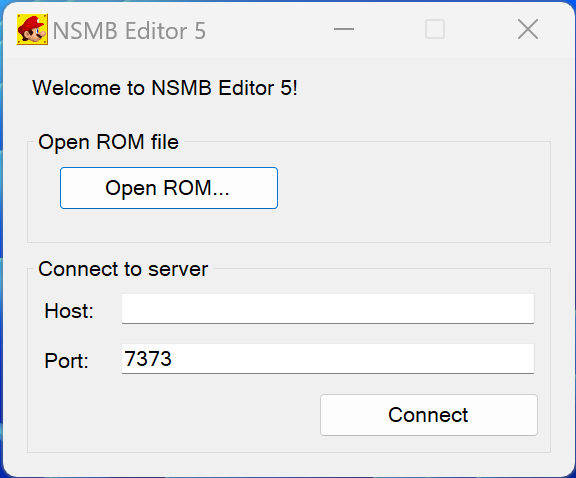](https://bookstack.nsmbcentral.net/uploads/images/gallery/2024-02/RBmimage.png) Now, click on **Open ROM...** and open your dumped ROM of New Super Mario Bros. DSThe ROM will have an extension of **.nds**
You should now see this: [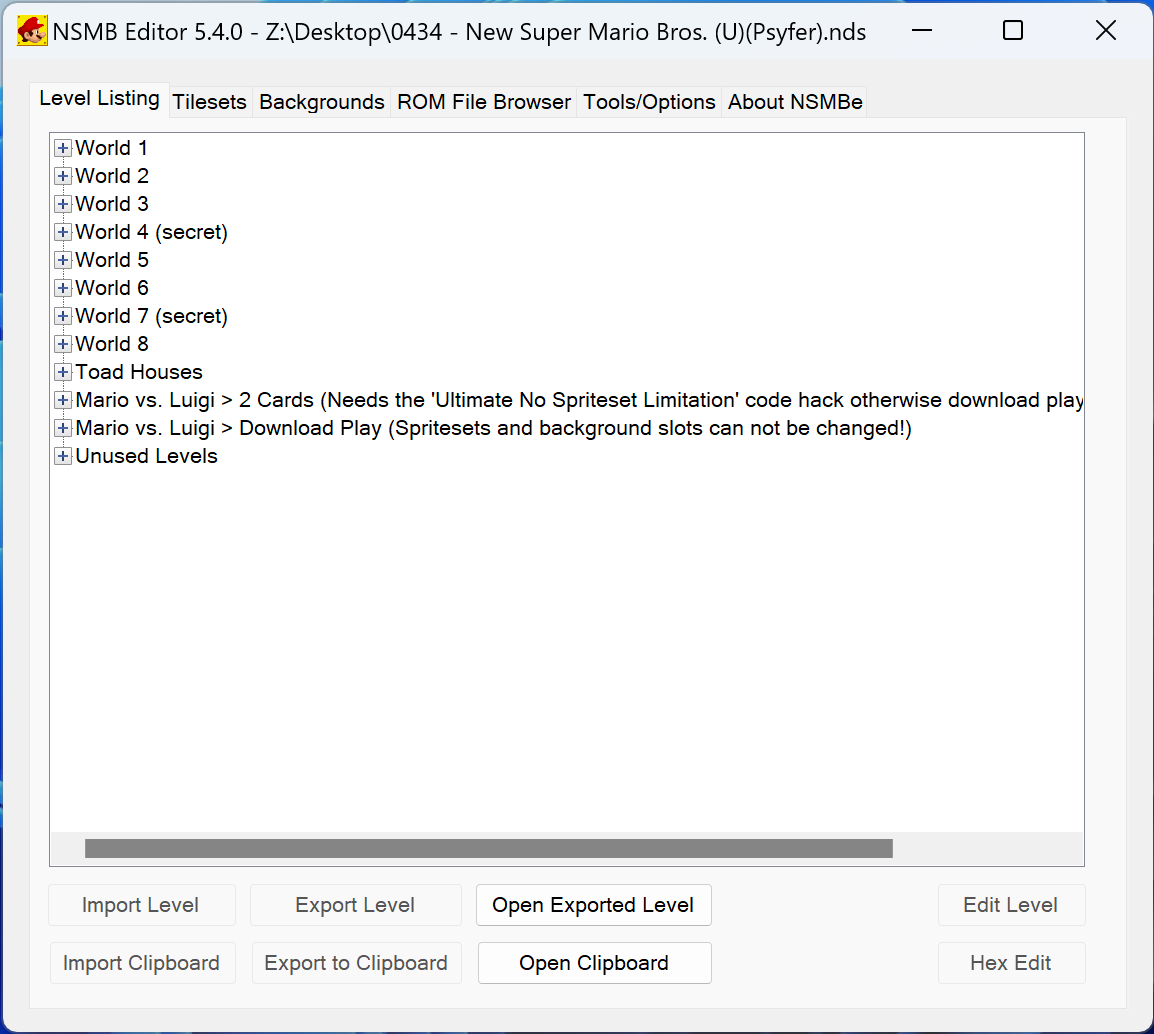](https://bookstack.nsmbcentral.net/uploads/images/gallery/2024-02/lrUimage.png)You have now opened your ROM in the editor
#### Section 3: Opening a Level Now for the fun part, editing a level! To start, we will open 1-1, Area 1. To do this, open the **World 1** drop down, open the **1-1** dropdown, and finally double click on **Area 1**.Each level in the game has a various number of **Areas**. Nintendo used these as a way to keep each sub-area separated. For example, **Area 1** of 1-1 is where you start the level, and **Area 2** is the bonus room found in **Area 1**.
[](https://bookstack.nsmbcentral.net/uploads/images/gallery/2024-02/YpKimage.png) You will now be presented with the level view: [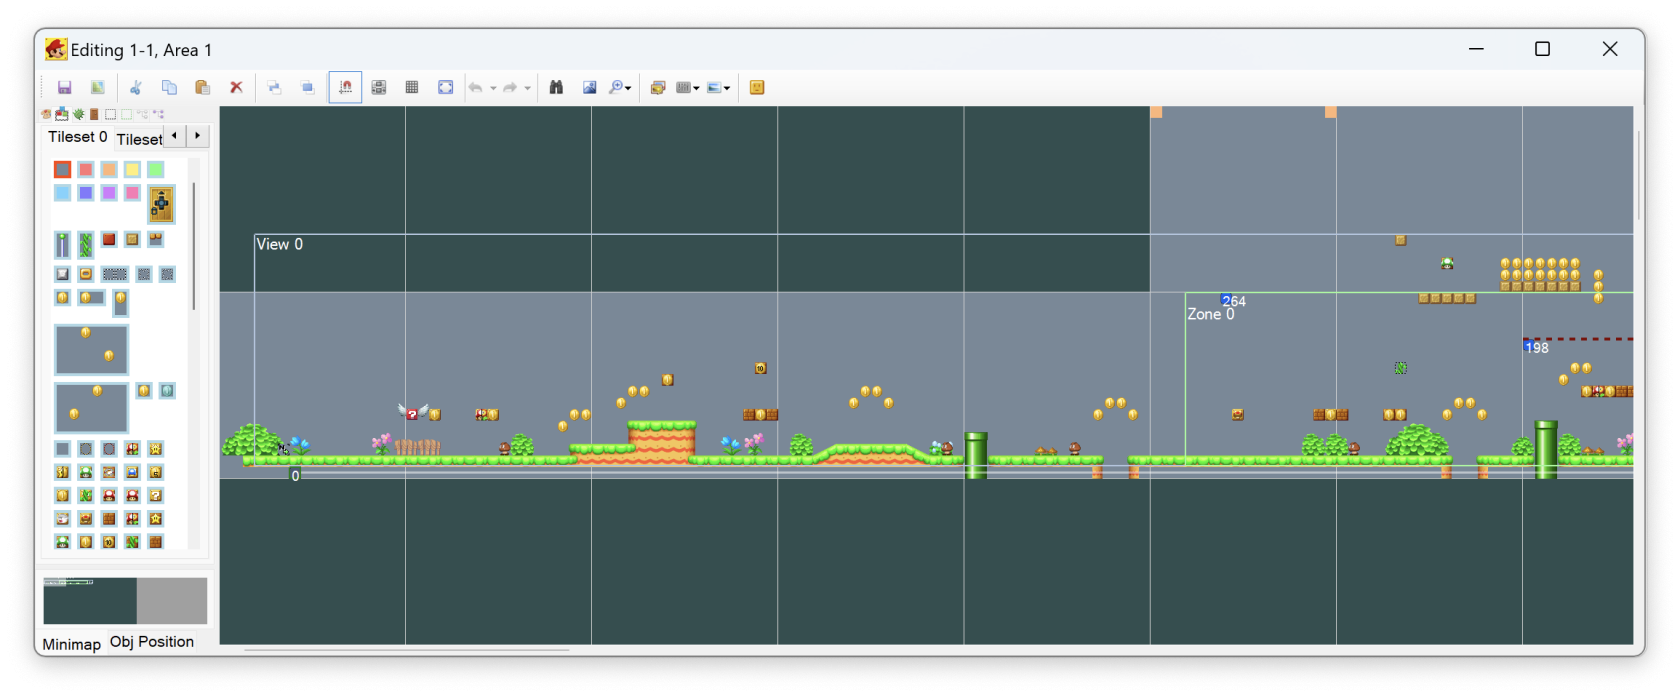](https://bookstack.nsmbcentral.net/uploads/images/gallery/2024-02/Vlbimage.png)If the level view appears too small, you may need to modify the config file. To do this: open the file named "NSMBe5.exe.config" using Notepad, delete the lines: **<System.Windows.Forms.ApplicationConfigurationSection> <add key="DpiAwareness" value="PerMonitorV2"/></System.Windows.Forms.ApplicationConfigurationSection>** After deleting the lines, save the file, restart the editor, and open **Area 1** again.
You have now opened a level from your ROM
#### Section 4: Creating a Bare-Bones Level It is best practice to start from a blank level, so let's clear out the existing level by pressing **Ctrl+A** to select everything in the level, followed by clicking the [](https://bookstack.nsmbcentral.net/uploads/images/gallery/2024-02/dktimage.png)at the top of the editor window. Your blank level will look like this: [](https://bookstack.nsmbcentral.net/uploads/images/gallery/2024-02/mVEimage.png) > ##### Now that we have a blank level, what do we need to add back? All levels in NSMB DS must at *minimum* have a **Start Entrance** and at least one main **View**. With that being said, let's add them back! To begin, we will add the main view. To do this, click on [](https://bookstack.nsmbcentral.net/uploads/images/gallery/2024-02/9sYimage.png) in the sub-menu bar. This will show a list of all the views in the level (or it would if we didn't just delete everything in the level). To create a view, all we need to do is click on **Add**. Your level will now have a transparent box: [](https://bookstack.nsmbcentral.net/uploads/images/gallery/2024-02/YQiimage.png) You'll notice a bunch of settings here. For now, the only thing you need to worry about is checking **Scroll vertically**. This allows the in-game camera to follow Mario up and down inside of your level.The **View** defines the bounds of your level. The camera is not allowed to go outside of the current view. Mario can go above the view, however the camera will not follow him. The sides of a view will stop Mario. Mario will die if he falls below the bottom of the view.
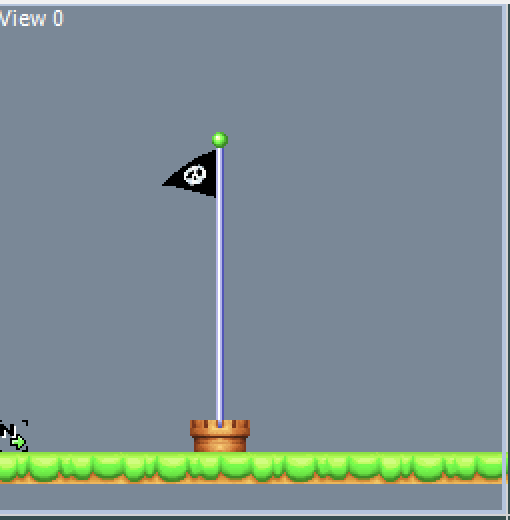
Click and drag the small box that says **View 0** and move the **View** to the top left of the level. While we're moving the view, go ahead and grab the bottom right box and extend the view to be one square big. You're level should look like this now: [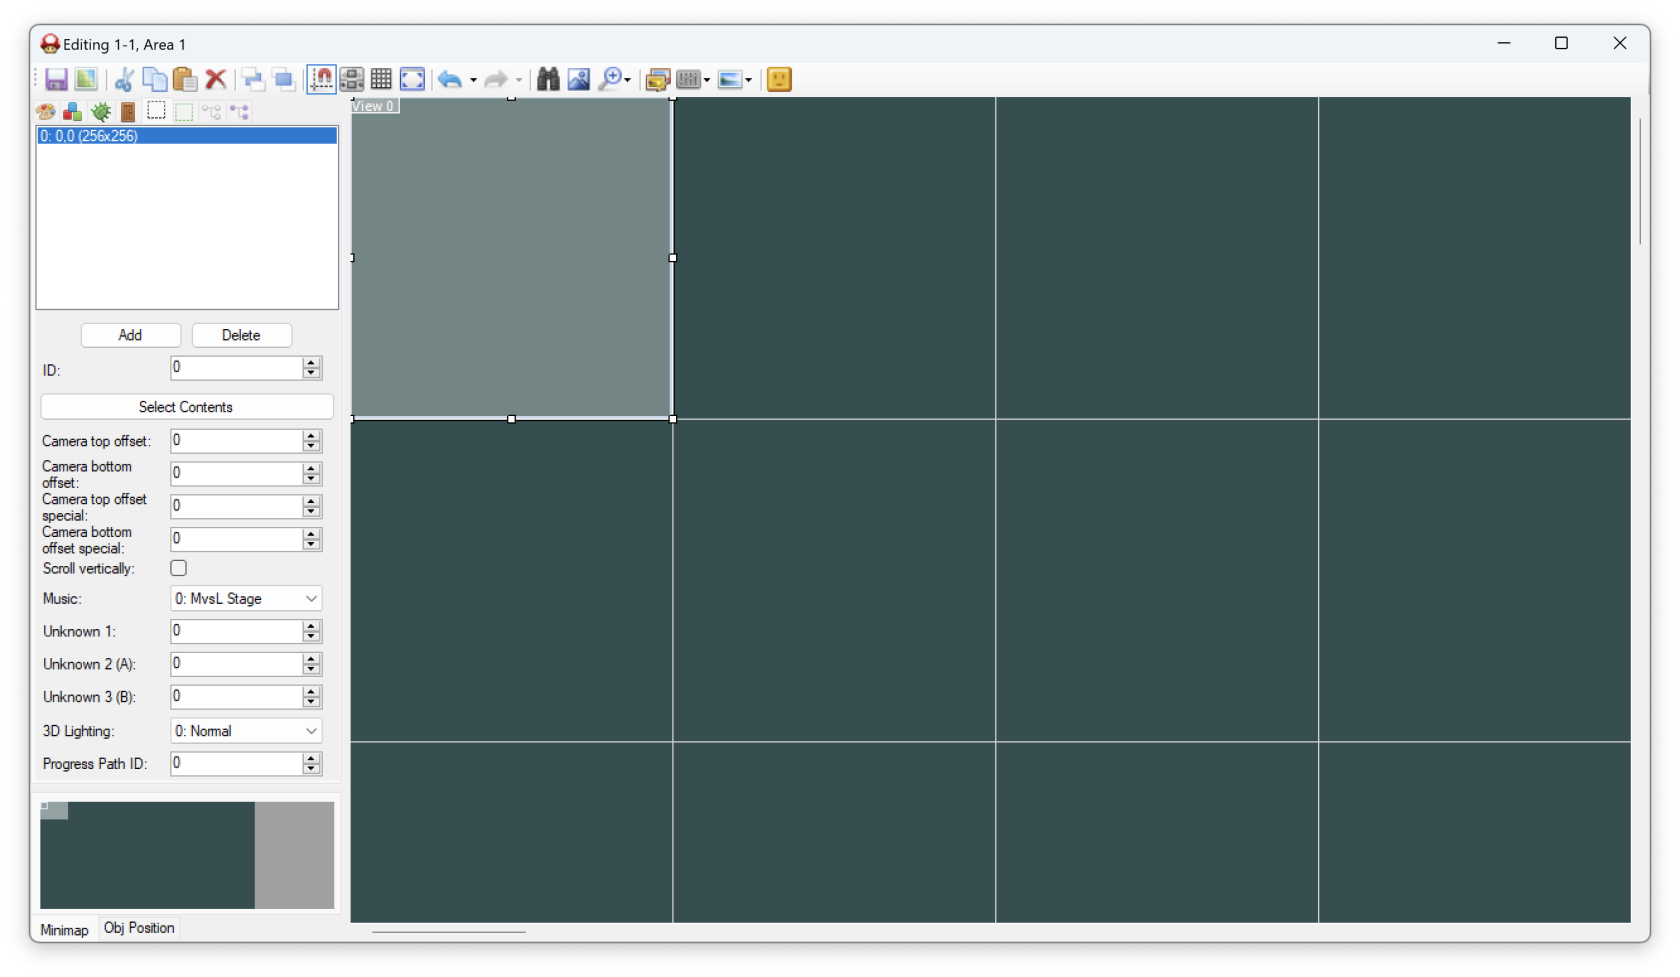](https://bookstack.nsmbcentral.net/uploads/images/gallery/2024-02/IG1image.png) Now, let's create the **Start Entrance**. Click on the [](https://bookstack.nsmbcentral.net/uploads/images/gallery/2024-02/Mehimage.png) button in the sub-menu. Similarly to the views button, this will give a list of every **Entrance** that is in this level. Go ahead and click on **Add** to create a new **Entrance**. [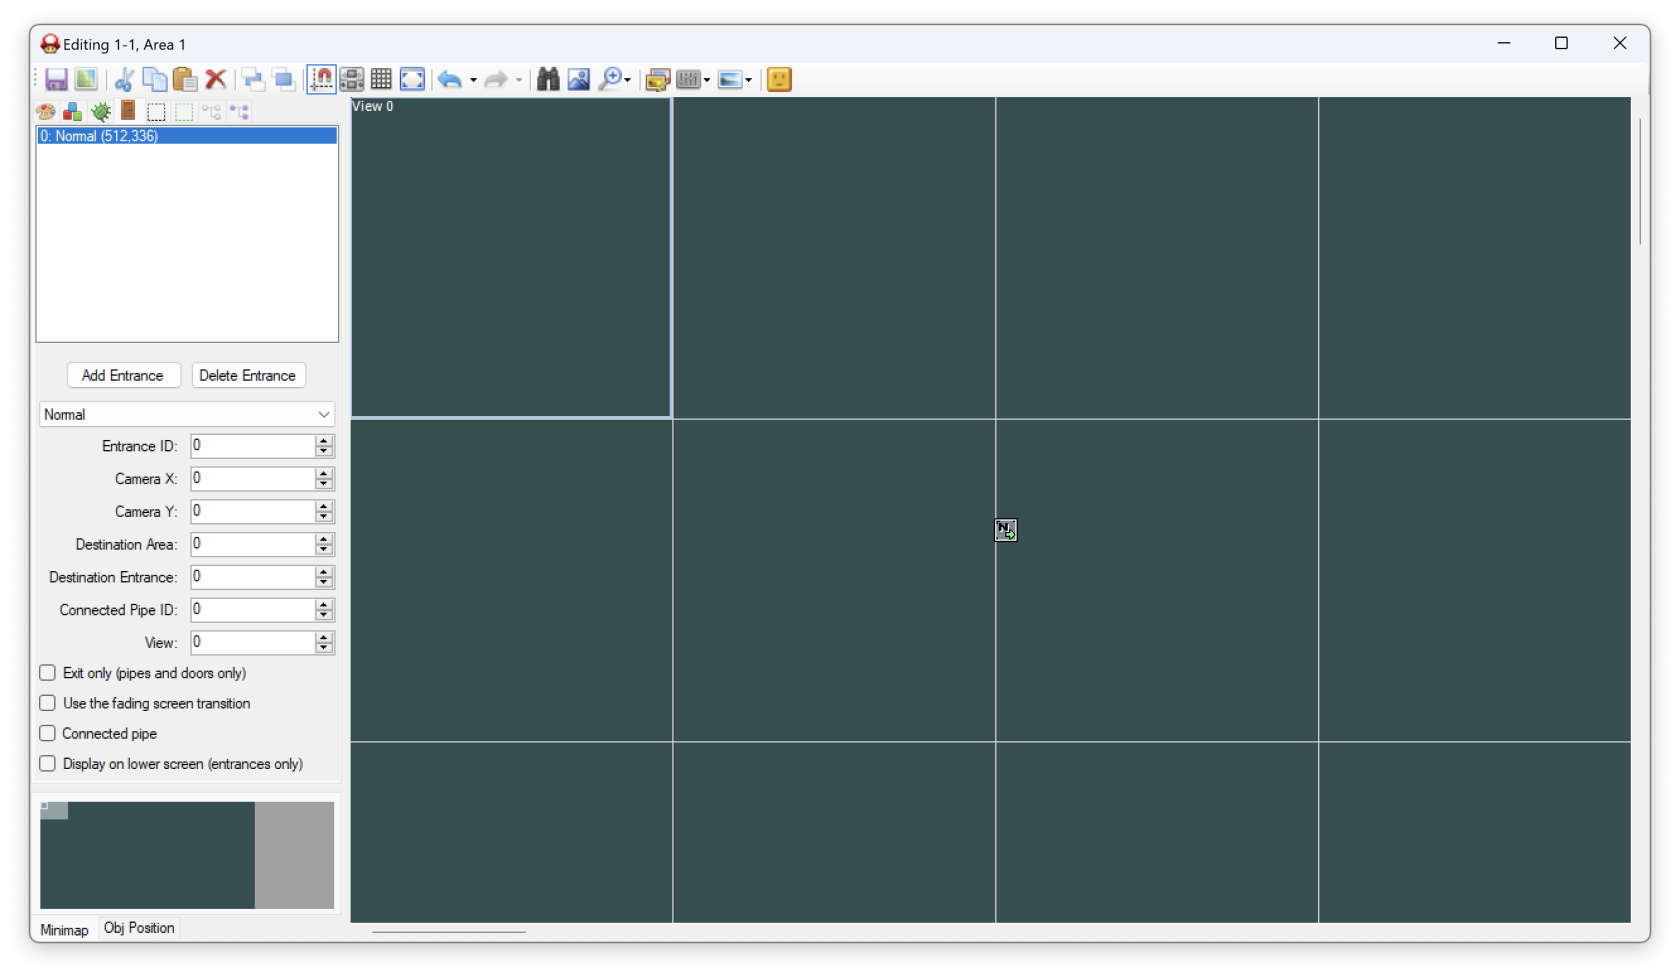](https://bookstack.nsmbcentral.net/uploads/images/gallery/2024-02/TZeimage.png) Once again, there are a few settings on the entrance that you can play with but for now let's just move the entrance inside of our **View**. [](https://bookstack.nsmbcentral.net/uploads/images/gallery/2024-02/TU5image.png) There we go! We have what's at *minimum* required. However...if we were to play this level now, Mario would just fall down and die. Let's add a floor and the **Goal Pole's Flag** to this level! To get to the **Tile** picker, click on the [](https://bookstack.nsmbcentral.net/uploads/images/gallery/2024-02/Q9wimage.png) button (and also click on **Tileset 1** if it is not already selected). Your side bar should now be filled with **Tiles**! [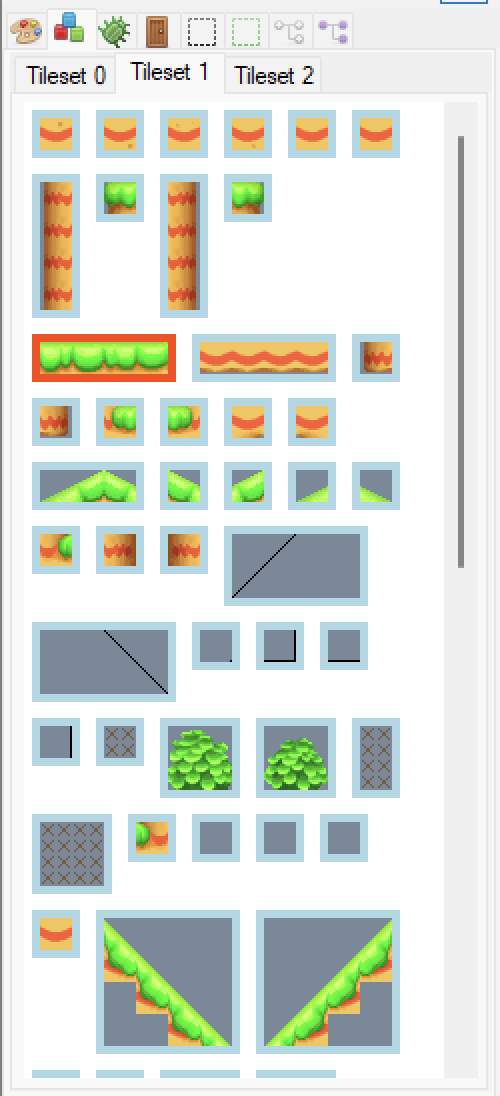](https://bookstack.nsmbcentral.net/uploads/images/gallery/2024-02/pxeimage.png) Go ahead and pick the tile I have selected (highlighted in red in the screenshot), then right-click to place the tile in our view. After this, you can grab the corner of the tile and stretch it out across the view. [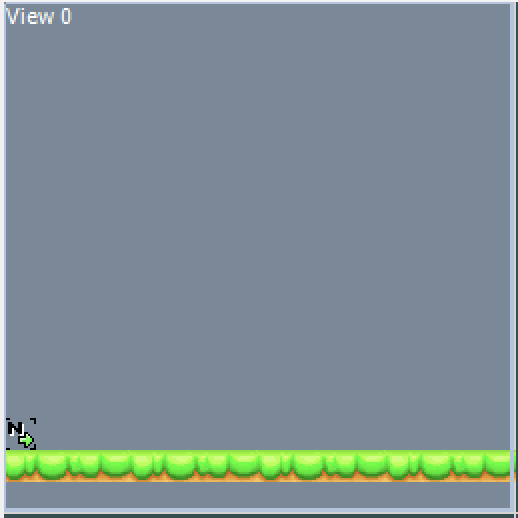](https://bookstack.nsmbcentral.net/uploads/images/gallery/2024-02/ceoimage.png) Not bad! Now, let's make a **Goal Pole** for Mario to clear the level with. First off, click on the [](https://bookstack.nsmbcentral.net/uploads/images/gallery/2024-02/Ob6image.png) button in the sub menu to bring up the **Actor List**. [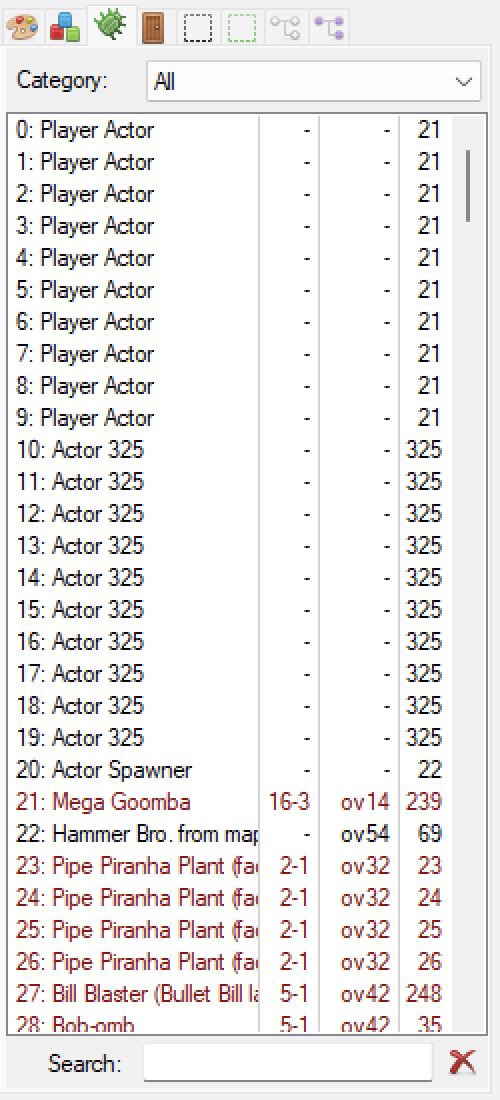](https://bookstack.nsmbcentral.net/uploads/images/gallery/2024-02/O9rimage.png) This is every **Actor** in the game. You'll become familiar with more **Actors** as you begin making levels. For now, enter "Goal Pole's Flag" into the search box. This will now filter out all other **Actors**. [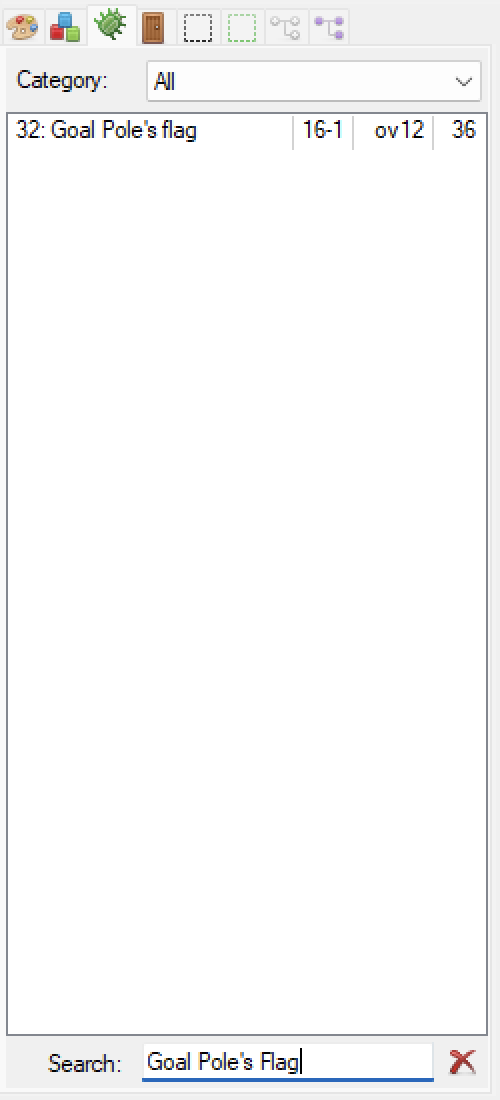](https://bookstack.nsmbcentral.net/uploads/images/gallery/2024-02/6Ubimage.png) Click on the **Actor** in the list, then right click in the level like you did for the tile. This will add the **Goal Pole's Flag** into the level. [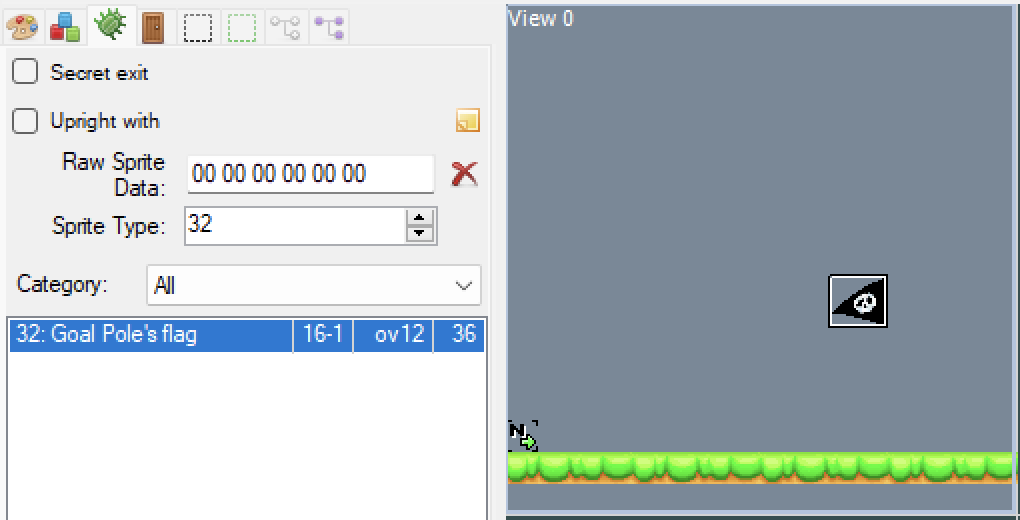](https://bookstack.nsmbcentral.net/uploads/images/gallery/2024-02/hnXimage.png) On the left, you'll notice that some options for the **Goal Pole's Flag** has appeared. All **Actors** will have an options menu appear for them when they are highlighted in the level. All that's left to do now is finish tiling the **Goal Pole**.Test your knowledge! The **Goal Pole** tiles are located in **Tileset 0**, try and build the flag like the next screenshot! Here's a tip, the **Goal Pole** is 9 tiles high and two tiles wide.
[](https://bookstack.nsmbcentral.net/uploads/images/gallery/2024-02/K3Oimage.png)With the flag created, we now need to build the castle. To begin, head over to **Tileset 2** and click on the castle. Now, right click to place the castle and drag it to create the castle. Your level will look like this now: [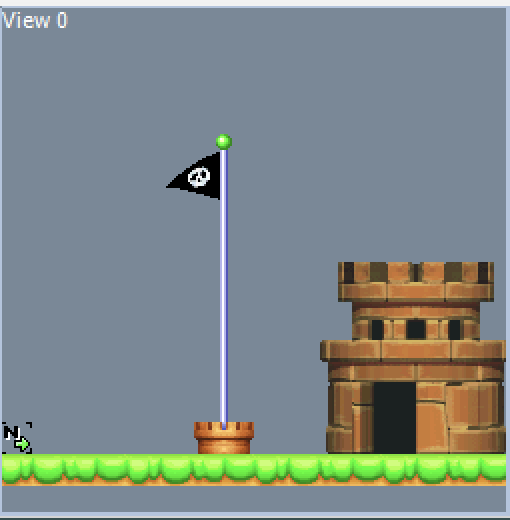](https://bookstack.nsmbcentral.net/uploads/images/gallery/2024-02/mciimage.png) We're almost done. The castle in this game is composed of three tiles: the castle we just created, the wall that will stop Mario, and the roof that allows the small flag to show up after you cleared the level. Select the wall from the tile picker: [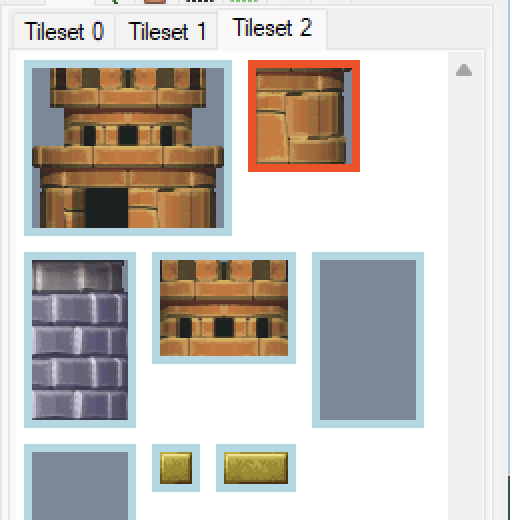](https://bookstack.nsmbcentral.net/uploads/images/gallery/2024-02/CPPimage.png)Drag this wall over the castle you created. [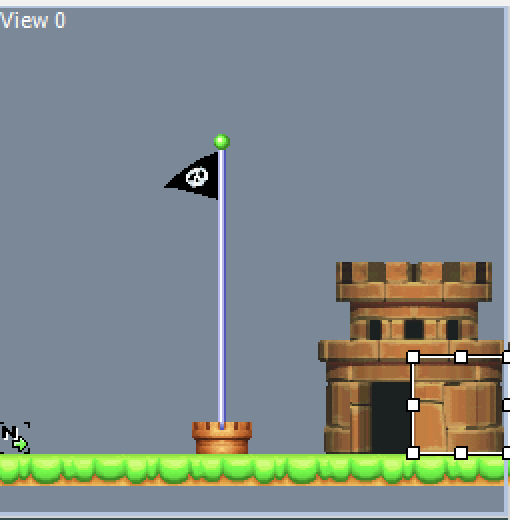](https://bookstack.nsmbcentral.net/uploads/images/gallery/2024-02/vSgimage.png)Lastly, drag the roof tile over the castle like you just did for the wall [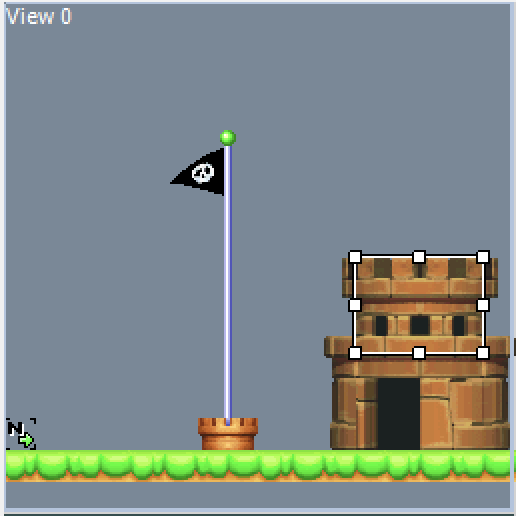](https://bookstack.nsmbcentral.net/uploads/images/gallery/2024-02/1fWimage.png)You have now created a bare-bones level
You can now save your level using the save icon or by pressing **Ctrl+S**.